dogie (OP)
Legendary

 Offline Offline
Activity: 1666
Merit: 1183
dogiecoin.com


|
 |
July 04, 2014, 08:27:15 PM
Last edit: December 12, 2015, 07:54:19 AM by dogie |
|
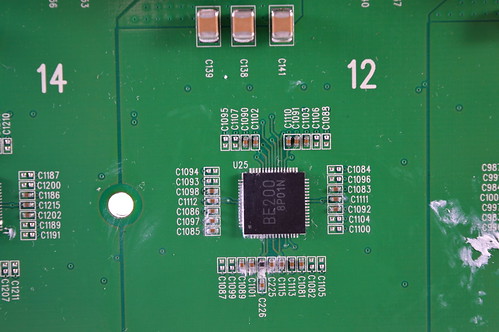
Dogie's Miner Setup Guides:Nicely formatted version available at dogiecoin.com!  Contents Contents: 0a) What to Expect0b) What You Need1) Powering2) Cooling3) Case4) Configuration5) Troubleshooting6) Where to buy0a) What to Expect (top)BTCGarden's AM V1 is their first ASICMiner generation 3 product. Chips are distributed across two mining boards, and an external controller is required. Units shipped direct from BTCGarden come with a Raspberry Pi and associated cables. | Chips | 32x ASICMiner Gen3 | | Hashrate | ~310GH | | Rated Voltage | 12V | | Rated Current | 25A | | Power.Consumption | 320W |
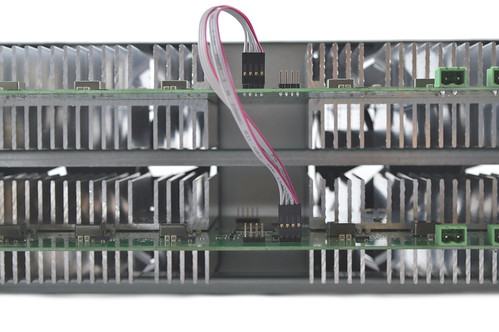
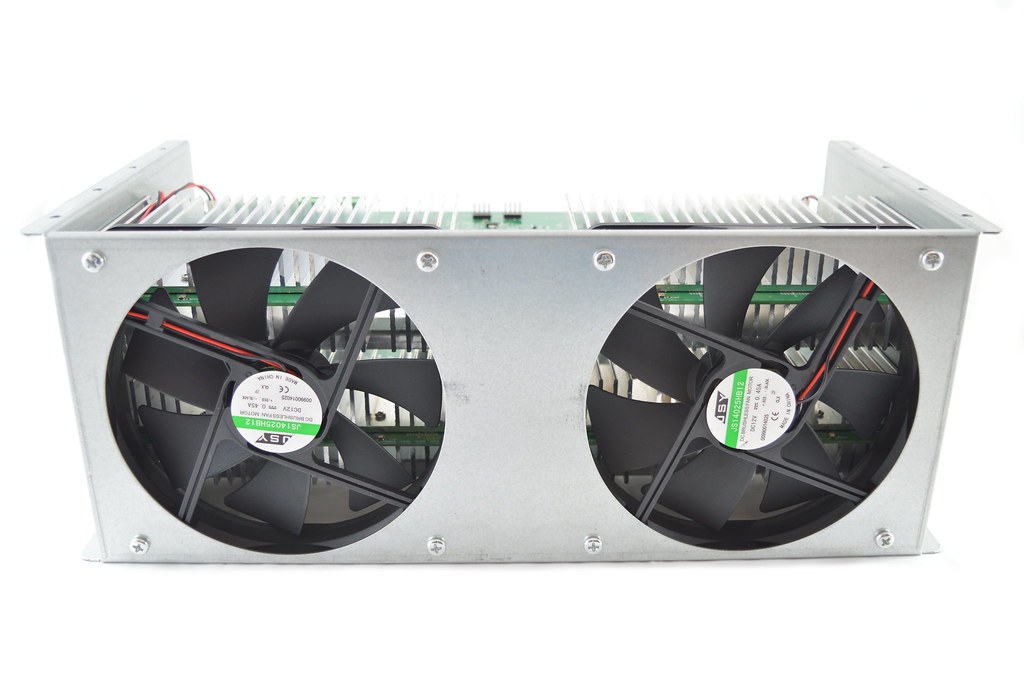 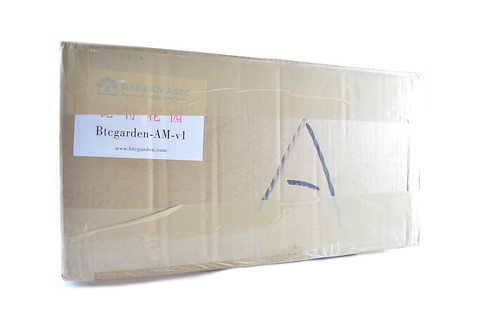 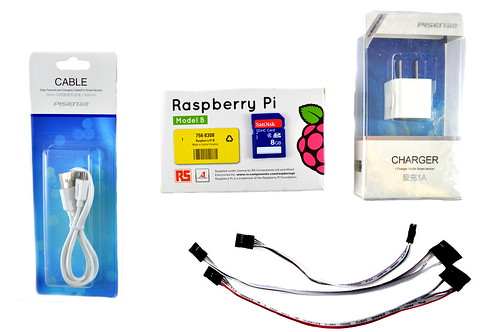   0b) What You Need (top) 0b) What You Need (top)You will need a few accessories and a power supply to get started. Click your flag to find everything you need to get started at Amazon!       1) Powering (top) 1) Powering (top)AM V1s do not come with a power supply, and you will need a typical computer PSU with 2xPCI-E 6 pin power connectors. We also need to tell the PSU to always be on, as there isn't a motherboard to do this. Cut a paper clip into a U and insert it into the green wire and either black wire to the side of the green wire. Tape it up for safety. The power supply will now be controlled by its switch on the rear socket.    2) Cooling (top) 2) Cooling (top)The AM V1 is self sufficient in cooling terms and utilises two 120mm JS14025HB12 fans to cool aluminum heatsinks on both the top and bottom of each board. Noise levels are very reasonable and comparable to the AntMiner S1. 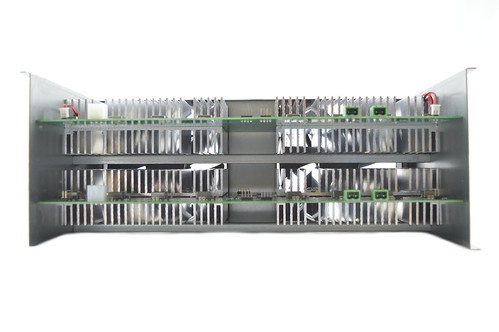 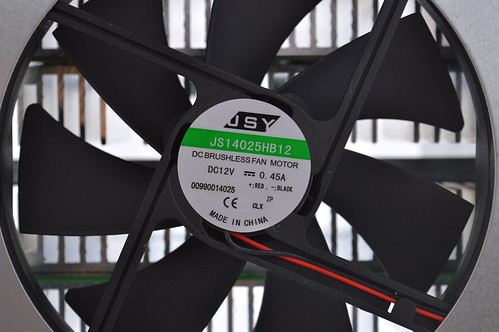 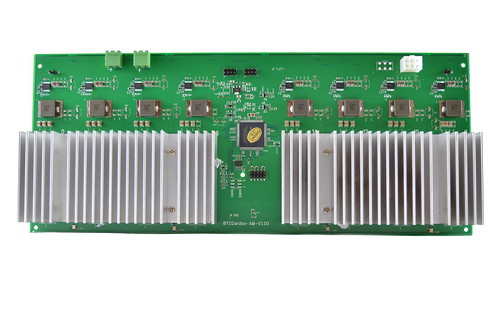 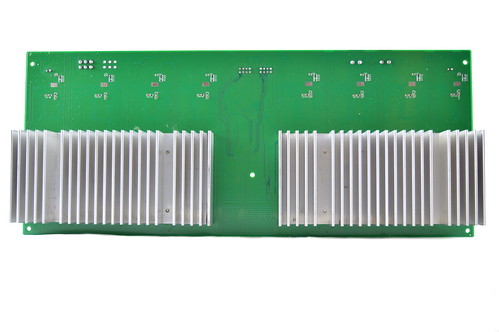 3) Case (top) 3) Case (top)An open steel case is used as the frame, adding significant strength to the miner. The units are easily stackable and measure 390 x 190 x 145mm, while weighing in at 4.2kg. The shipped weight is 5.2kg, and the dimensions of the box box are 425 x 255 x 220mm.  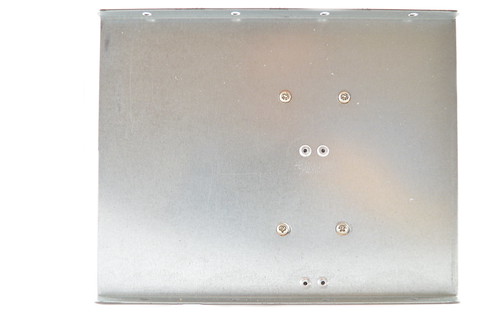 4) Configuration (top) 4) Configuration (top)AM V1s require a Raspberry Pi as the controller. Wiring: - Plug the SD card into the Raspberry Pi.
- Plug the 26 pin connector onto the Raspberry Pi with the red lines facing towards the centre of the board.
- Plug the other end of the cable onto the top, right hand 8 pin header when viewed from above with the fans facing away. The red lines should face right.
- Plug the included 8 to 8 pin wire from the top, left hand header to the bottom, right hand header. Make sure the red lines faces to the right.
- Plug in a network cable from the Pi to your router.
- Plug in the PCI-E cables to the miner and the power cable to the Pi.
Software: - Power both on.
- Using a browser, navigate to 192.168.1.123 - this goes to the AM V1's configuration page.
- Navigate to the page "Cgminer". Enter your pool information in the below format. Click Save.
- Navigate to the page "Network" and make sure both the gateway and dns are set to the IP of your router. If you are unsure of what this is, press your
windows key -> type "cmd" -> type "ipconfig" and look under "Default Gateway". - Navigate to the page "Cgminer Status" to check mining has started.
Antpool Register!Servers : stratum.antpool.com:3333
User : username.worker or username_worker - auto creates workers!
Password: anypassword
Servers : stratum.btcguild.com:3333
User    : username_worker
Password: anypassword
Servers : us1.ghash.io:3333
User    : username.worker  - auto creates workers!
Password: anypassword
  5) Troubleshooting (top) 5) Troubleshooting (top)| Problem | Solution | | How.can.I.upgrade.to.the.latest.firmware? | - Download the Windows Disk Imager and latest firmware file from here. Pull the SD card from your Raspbery Pi
and place it into your windows PC. Open Windows Disk Imager, select the firmware file and the SD card. Replace the
SD card into the Raspberry Pi. |
   Legal disclaimer: This information is for general guidance and does not constitute expert advice. We are not responsible if you, your property or a third party is injured or damaged as a result of any interaction with this information, and no warranty is provided. All text and images are covered by copyright. 6) Where to buy (top)
|
|
|
|
|
|
|
|
|
"Governments are good at cutting off the heads of a centrally
controlled
networks like Napster, but pure P2P networks like Gnutella and Tor seem
to be holding their own." -- Satoshi
|
|
|
Advertised sites are not endorsed by the Bitcoin Forum. They may be unsafe, untrustworthy, or illegal in your jurisdiction.
|
|
|
|
bbeesley
|
 |
July 06, 2014, 02:16:32 AM |
|
The R-Box is self succulent
mmmm....succulent and an R-Box no less Dogie...I think you are starting to phone these in ;-) also, you link to the parts list shows an rPi case but no rPI..this is presumptive that the V1 shipped with an rPi which is not true of all sellers and I don't see a link to how to download the image to the rPI and get it running..probably would stump anyone looking for a "comprehensive guide" |
1A3vU4r4typS1jNFfaJjvm77ZHMtqEvB4F
|
|
|
CrazyGuy
Legendary
Offline
Activity: 1973
Merit: 1007
|
|
July 06, 2014, 02:24:31 AM |
|
AM V1 can be purchased without a pi, but a pi is currently the only accepted controller. Each unit should come with the necessary ribbon cable to attach the pi to the V1. You can control up to 4 V1s on one pi with the latest firmware.
|
ASICPuppy.net ASIC Mining Hardware and Accessories - Compac F in stock!
|
|
|
|
bbeesley
|
|
July 06, 2014, 02:34:26 AM |
|
AM V1 can be purchased without a pi, but a pi is currently the only accepted controller.
yep...I read that...my V1 is ordered and in-route and I look forward to setting it up Sorry I didn't order from you but I found it for $40 less at another source |
1A3vU4r4typS1jNFfaJjvm77ZHMtqEvB4F
|
|
|
dogie (OP)
Legendary
Offline
Activity: 1666
Merit: 1183
dogiecoin.com
|
|
July 07, 2014, 08:21:15 PM |
|
The R-Box is self succulent
also, you link to the parts list shows an rPi case but no rPI..this is presumptive that the V1 shipped with an rPi which is not true of all sellers and I don't see a link to how to download the image to the rPI and get it running..probably would stump anyone looking for a "comprehensive guide" rPis are included as standard, only resellers take them out. An SD card with a preimaged SD card is also included. I could also include instructions for how to install firefox to login and buy an AM V1 but I don't for the same reason as above - if its not required by 95% of users, don't confuse the 95% for the 5%. |
|
|
|
|
drmadison
|
|
July 07, 2014, 09:58:41 PM |
|
Any information on how to chain multiple to a single RPi?
I have 2 that should be arriving today/tomorrow and I'd love to get them up and running ASAP!
|
|
|
|
|
dogie (OP)
Legendary
Offline
Activity: 1666
Merit: 1183
dogiecoin.com
|
|
July 07, 2014, 10:18:00 PM |
|
Any information on how to chain multiple to a single RPi?
I have 2 that should be arriving today/tomorrow and I'd love to get them up and running ASAP!
Repeat this down: Plug the other end of the cable onto the top, right hand 8 pin header when viewed from above with the fans facing away. The red lines should face right. Plug the included 8 to 8 pin wire from the top, left hand header to the bottom, right hand header. Make sure the red lines faces to the right. So Rpi into top level right cable one - top level left to 2nd level right cable two - 2nd level left to 3rd level right cable three - 3rd level left to 4th level right As per the intructions |
|
|
|
|
drmadison
|
|
July 07, 2014, 10:20:28 PM |
|
Any information on how to chain multiple to a single RPi?
I have 2 that should be arriving today/tomorrow and I'd love to get them up and running ASAP!
Repeat this down: Plug the other end of the cable onto the top, right hand 8 pin header when viewed from above with the fans facing away. The red lines should face right. Plug the included 8 to 8 pin wire from the top, left hand header to the bottom, right hand header. Make sure the red lines faces to the right. So Rpi into top level right cable one - top level left to 2nd level right cable two - 2nd level left to 3rd level right cable three - 3rd level left to 4th level right As per the intructions Excellent, thank you! |
|
|
|
|
live2snwboard
Member
 Offline
Activity: 62
Merit: 10
|
|
July 08, 2014, 04:25:06 PM |
|
What wattage power supply should i use for four of these? And would multiple supplies work if all four are connected to one rpi?
|
|
|
|
|
dogie (OP)
Legendary
Offline
Activity: 1666
Merit: 1183
dogiecoin.com
|
|
July 08, 2014, 04:42:03 PM |
|
What wattage power supply should i use for four of these? And would multiple supplies work if all four are connected to one rpi?
Corsair 1200 axi, and yes its fine. http://goo.gl/RA5lzM |
|
|
|
CrazyGuy
Legendary
Offline
Activity: 1973
Merit: 1007
|
|
July 08, 2014, 05:31:47 PM |
|
What wattage power supply should i use for four of these? And would multiple supplies work if all four are connected to one rpi?
Corsair 1200 axi, and yes its fine. http://goo.gl/RA5lzMI'm not sure about 4 with that PSU, that's around 1280 watts at the wall. I've got 3 running off of multiple power supplies and one pi, no problems. |
ASICPuppy.net ASIC Mining Hardware and Accessories - Compac F in stock!
|
|
|
dogie (OP)
Legendary
Offline
Activity: 1666
Merit: 1183
dogiecoin.com
|
|
July 08, 2014, 05:48:34 PM |
|
What wattage power supply should i use for four of these? And would multiple supplies work if all four are connected to one rpi?
Corsair 1200 axi, and yes its fine. http://goo.gl/RA5lzMI'm not sure about 4 with that PSU, that's around 1280 watts at the wall. I've got 3 running off of multiple power supplies and one pi, no problems. That will be no problem on the axi, which will do 1300 output and ~1450 at the wall. |
|
|
|
|
|
dogie (OP)
Legendary
Offline
Activity: 1666
Merit: 1183
dogiecoin.com
|
|
July 08, 2014, 08:57:16 PM |
|
Is your router definitely at 192.168.0.1? |
|
|
|
|
|
dogie (OP)
Legendary
Offline
Activity: 1666
Merit: 1183
dogiecoin.com
|
|
July 08, 2014, 10:58:06 PM |
|
Ok. Populate all 3 sets of server info, I'm not sure what happens if you don't fill all 3.
|
|
|
|
IanMac91
Newbie
Offline
Activity: 5
Merit: 0
|
|
July 08, 2014, 11:10:07 PM |
|
Ok. Populate all 3 sets of server info, I'm not sure what happens if you don't fill all 3.
I tried this with one being BitMinter, the other using Eligus and the other using D7.LT and all of them didn't work, yet did work on my block erupter cube. I tried to contact customer support of BTC Garden about a day ago, but haven't heard anything back yet. |
|
|
|
|
madsusies
Sr. Member
Offline
Activity: 428
Merit: 250
BitcoinEvo [$XBTE]
|
|
July 09, 2014, 06:10:59 AM |
|
I got same issues with technobit, I just switched to dynamic IP instead static, I wait for my btcg.miner, doesn't the Chinese adapter need just EU convertor ?
|
|
|
|
dogie (OP)
Legendary
Offline
Activity: 1666
Merit: 1183
dogiecoin.com
|
|
July 09, 2014, 11:10:35 AM |
|
I got same issues with technobit, I just switched to dynamic IP instead static, I wait for my btcg.miner, doesn't the Chinese adapter need just EU convertor ?
You can't swap to dynamic on these, the software is very cut down. See the links in section 1)b) for what you'll need depending on your country. They ship with US plugs as standard. |
|
|
|
|


