Audizine - An Automotive Enthusiast Community

Results 1 to 38 of 38
  1. #1
    Established Member Two Rings Hazziar's Avatar
    Join Date
    Oct 03 2010
    AZ Member #
    65197
    My Garage
    01 A4 Black
    Location
    Northeast

    Power Steering Rack Replacement — B6/B7 A4/S4

    Guest-only advertisement. Register or Log In now!
    I replaced the steering rack on my B6 S4 for the second time and made this DIY on how to go about it.

    TIME/DIFFICULTY
    6-10hrs depending on your prep and pace
    Medium difficulty range
    No special equipment needed

    PARTS
    ₪ ZF Steering Rack [new, rebuilt, or used]
    ₪ Synthetic Mineral Based PSF or M1 ATF – 2 Litres
    ₪ Rack Centering Bolt [M10-1.5 pitch]
    ₪ New Tie Rod Ends [optional]
    ₪ Banjo Bolt Crush Washers

    TOOLS
    [Key requirements]
    - 10mm 12point socket
    - 18mm Combination Wrench
    - 19mm Combination Wrench
    - 22mm or 7/8” Combination Wrench
    - 6mm Allen Key and Socket
    - 12mm Triple Square Socket
    - 2ft of 3/8" Extensions
    - Jack and Stands
    [Basic necessities]
    - a solid metric tool set
    - Allen and Torx Key or Socket sets
    - 3/8” Torque Wrench
    - Screwdrivers
    - Pick
    - Pliers
    - Hand Sledge
    - Punches
    [Misc.]
    - Penetrating Spray
    - Brake Cleaner
    - Anti-Seize
    - Petroleum Jelly
    - Dielectric Grease
    - RAGS!

    SETUP/REMOVAL

    — Apply E-brake, engage steering wheel lock at center position, loosen drivers side front wheel bolts, raise front of car on jack stands, and take off drivers side wheel.

    — Remove Belly Pan, if applies.

    — Siphon or drain any fluid left in reservoir.

    — Disconnect battery, unbolt clamp, and remove battery; a 6mm 1/8” drive Allen socket, long extension, and ratchet works best.


    — Remove driver side fuse access panel and lower dash panel. Dash panel is held on by 1 bolt behind the fuse panel and 2 bolts on the bottom. Disconnect OBDII port and light then place aside.


    — Detach steering column from rack pinion. Use a 6mm Allen key or socket wrench to remove bolt then slide the column off the pinion.
    ............yes the pinion seal let loose and blew PSF all over the footwell


    — Detach both tie rod ends from knuckles. Remove 13mm top bolt first then 16mm pinch bolt, use a punch or short extension and hand sledge to persuade tie rod ends out of the knuckle arms.


    — Detach upper control arms from knuckle. Support knuckle with jack, remove 16mm nut, remove pinch bolt using a punch and hand sledge. Pop arms out of knuckle through the access holes using a punch and hand sledge. Penetrating spray and heat will be needed on this step most likely………

    Alternative method if pinch bolt is seized: disconnect strut from lower control arm, pull strut aside, and jack knuckle up high into the wheel well. This will give you enough clearance to slide the rack out.


    — Disconnect Servotronic electrical connector. A pick or precision flat head screwdriver to raise the connector clip is recommended.

    — Remove access cover. Unscrew 10mm nut next to Servotronic connector and pull out the 2 plastic push pins located behind the strut then pull cover out. Don’t be afraid to contort it a little as it will catch on things coming out.


    Order of disassembly reference


    — Remove fluid lines. Lay rags under the lines and remove return line banjo bolt with a long 22mm or 7/8” combination wrench. Remove high pressure hard line completely; loosen hose fitting with 18mm and 19mm combination wrenches then remove banjo bolt with a long 19mm combination wrench, and place hard line aside.


    — Ensure steering rack is completely disconnected from all associated components then unbolt rack from body. The rack is held on by 3 x 10mm 12 point bolts as outlined below.

    Bolt 1: under battery


    Bolt 2: next to brake booster


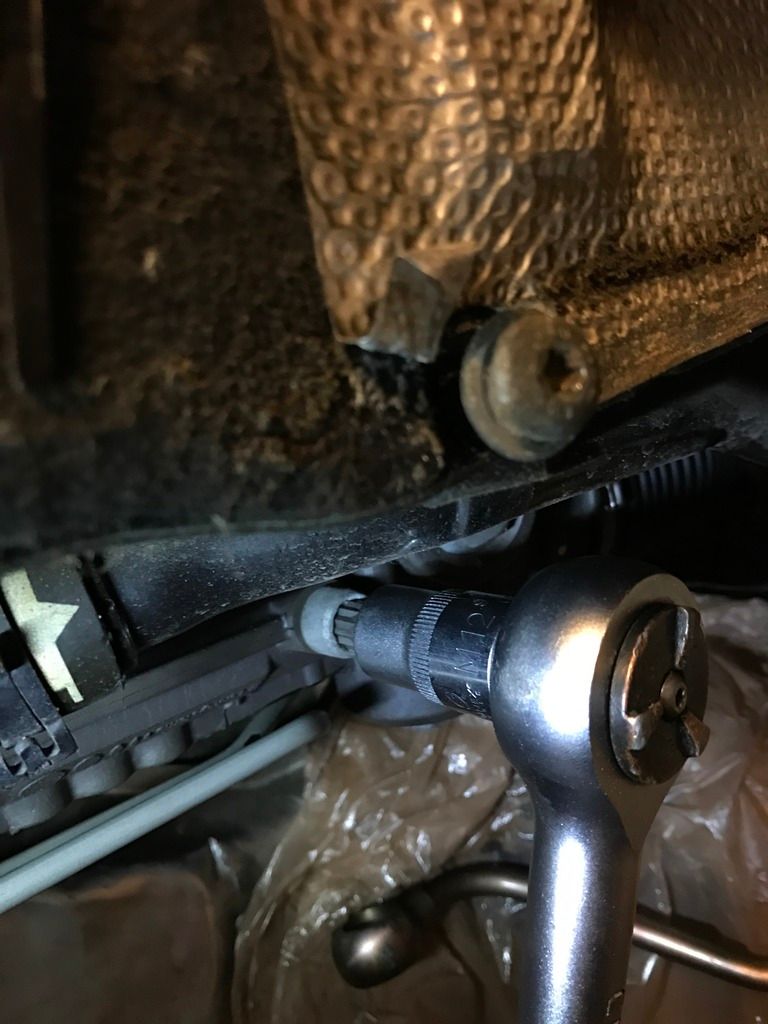
    Bolt 3: underneath car; look up between the drivers side DP and trans and you will see it hiding in the shadows. A long, approx. 2ft single or series of extensions will get you there; a universal joint might be needed also.


    — Remove rack. Lay some rags over the brake and ABS line and slide rack out through drivers side, you may need to get creative and conjure up some finesse…having a comrade assisting the rack out from the pass. side will make this step much easier. Disconnecting the strut from the lower control arm and pulling it aside will give added clearance if needed.


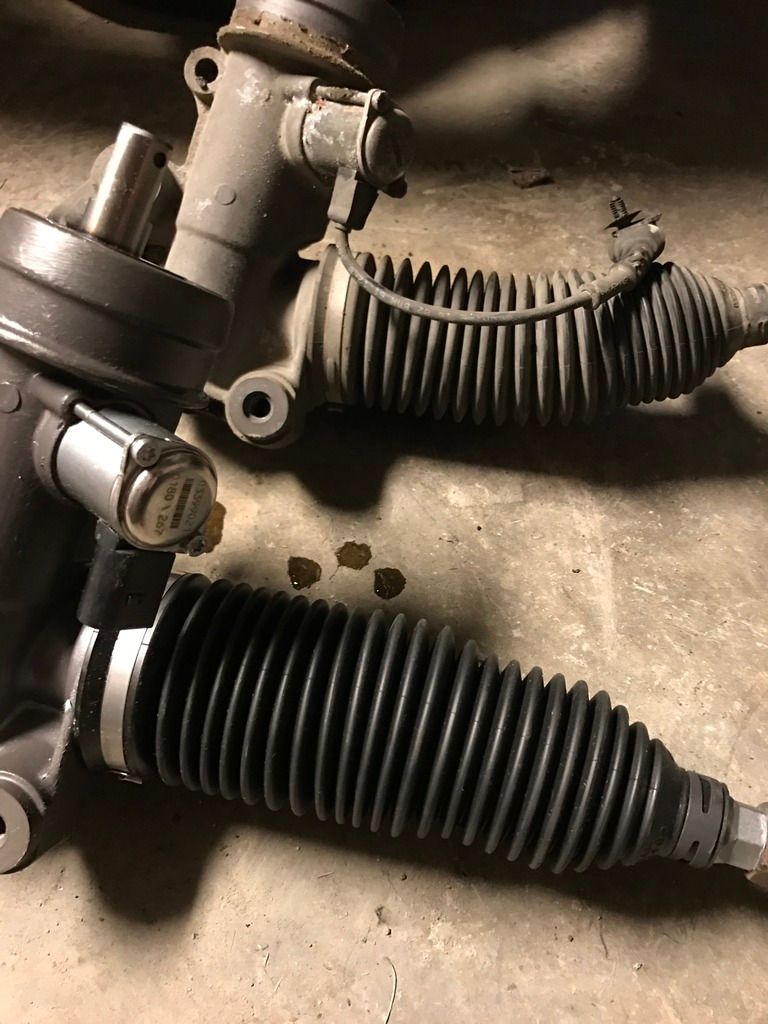
    — New rack prep. Transfer Servotronic valve and tie rod ends to new rack then center the rack.

    Swap or install new tie rod ends using 22mm and 18mm combination wrenches. Take note of the thread count on each side and match it when installing the tie rod ends on new rack. You'll avoid severe tire wearing issues if you can’t get an alignment right away. Anti-seize is your friend, so use it

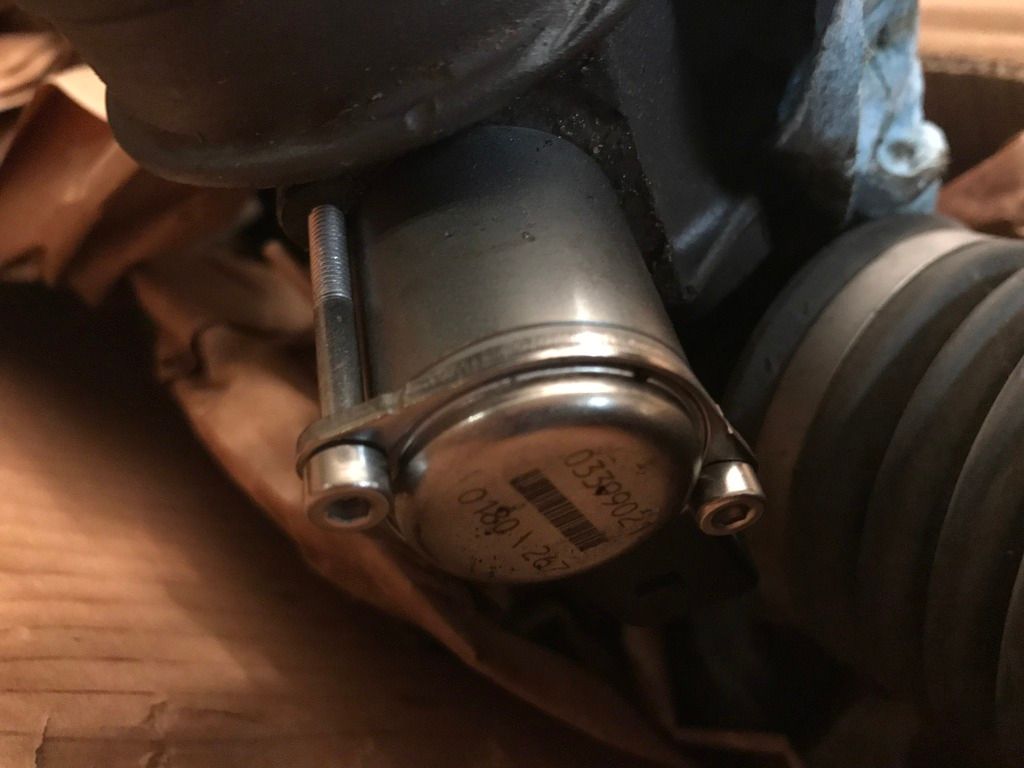
    Transfer Servotronic valve. Before installing, inspect the o-rings and replace if necessary. Regardless, apply petroleum jelly to the o-rings.

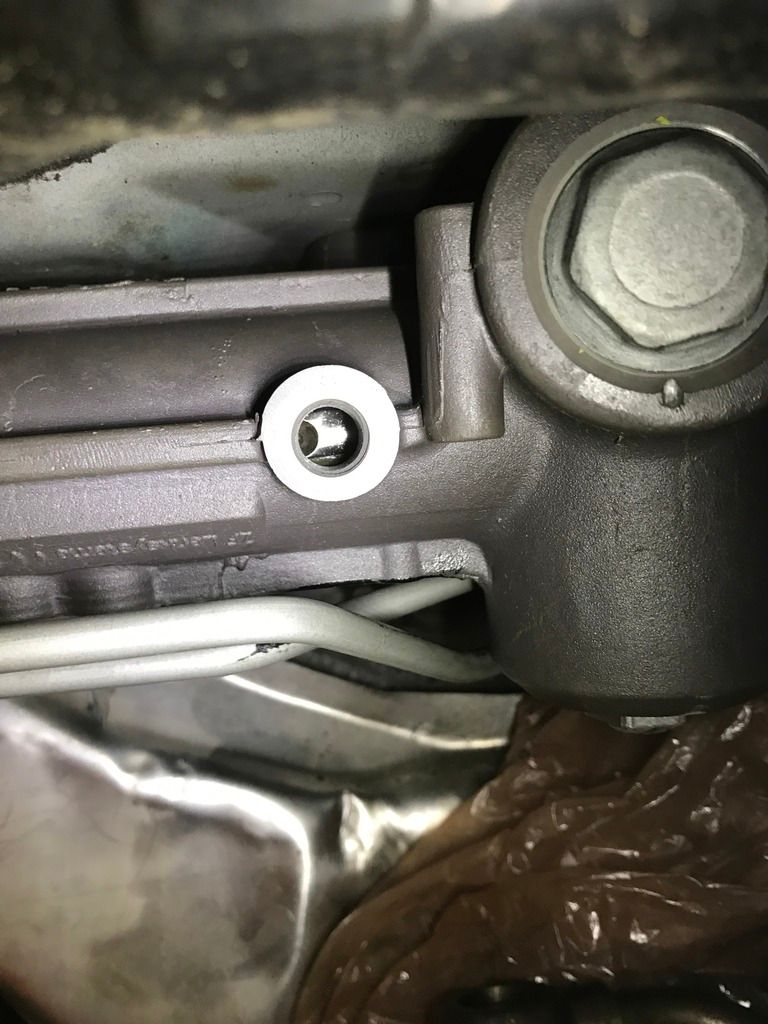
    Center the rack. Remove the access bolt using a 12mm triple square socket. Align centering notch on gear with access port by turning the pinion then use a M10 – 1.5 pitch bolt to secure gear in place.


    REASSEMBLY
    Point of advice; if it has a shank or threads, apply anti-seize and if it has electrical contacts, apply dielectric grease.

    — Install rack. Position steering rack back in the plenum chamber in reverse order of removal and loosely bolt rack in place then torque bolts, starting with the top then bottom, to approx. 50 ft-lbs…I say “approx.” because the use of long extensions makes it near impossible to achieve proper torque accuracy. You just want the rack to be evenly tightened.

    — Reattach steering column and reinstall dash panel.
    — Remove rack centering bolt and reinstall access bolt.
    — Reconnect fluid lines starting with return then high pressure line and tighten firmly, use new banjo crush washers.
    Applying petroleum jelly on the upper washers before placing them on the lines will help hold them in place while you battle getting the banjo bolts threaded in. Be patient on this…

    — Reinstall access cover
    — Reconnect Servotronic electrical connector
    — As necessary, reattach upper control arms to knuckle and strut to lower control arm. Before tightening strut, lift knuckle to curb weight position to avoid damaging the bushing.
    — Reattach tie rod ends to knuckle arms. Tighten pinch bolt first then top bolt.
    — Reinstall battery


    FLUSH/BLEED

    Flush the system free of any old fluid and leftover debris prior to bleeding.

    Koolade did an excellent write up on this which can be found HERE


    FINAL DETAILS

    — Start car, check system for leaks and abnormal noises.
    — Reinstall belly pan
    — Reinstall wheel
    — Lower off jack stands
    — Take a test drive
    — Schedule an alignment

    If you’ve made it this far, wipe the grin off your face

  2. #2
    Veteran Member Four Rings JRMSLINEA4's Avatar
    Join Date
    Dec 07 2008
    AZ Member #
    36091
    Location
    Harrisburg, PA

    Great write-up!
    2012 VW Golf R Rising Blue 2-DR | APR Carbonio Intake | APR Stage 1 ECU | Clear Sidemarkers | R Mats | Blind Spot Mirrors | H&R Sport Springs | 19x8 TSW Nurburgring Wheels | 235/35/19 Michelin Pilot Super Sports.(Gone)

    2012 Volvo S60 T-6 Electric Silver/Anthracite | Eibach Pro Kit Springs | Tint |

    2004 Audi S4 Moro Blue/Nogaro Alcantara 6-Speed. (Gone)

  3. #3
    Junior Member Two Rings
    Join Date
    Nov 04 2008
    AZ Member #
    34937
    Location
    SLC UT

    Hazziar, I just want to say thank you so much for posting such a detailed account of the rack replacement. I did mine yesterday and without this I wouldn't of had the confidence to do it. I really appreciate it.

  4. #4
    Veteran Member Three Rings
    Join Date
    Dec 26 2008
    AZ Member #
    36761
    Location
    STL

    that is awesome man, great job! I remember removing that 22m line to replace it, what a PITA!!:)

  5. #5
    Veteran Member Three Rings noznab's Avatar
    Join Date
    Jul 08 2007
    AZ Member #
    19384
    Location
    Tri-State

    Awesome write up!!
    A few mods here and there

  6. #6
    Established Member Two Rings Hazziar's Avatar
    Join Date
    Oct 03 2010
    AZ Member #
    65197
    My Garage
    01 A4 Black
    Location
    Northeast

    Thanks everyone! and Jakehobbs thats really great to hear!

    Update:
    While I had the dash panel off I did the 'Servotronic Mod' as outlined by member Eddie Man. It was extremely easy to do and cost me only $4, after a months worth of Sunday blasts on mountain roads I can say this is a must for spirited driving. The feedback is incredible and now my steering is spot on due to the added resistance. When city driving I can just flip the switch and have all the convenience of power assist back. Really simple yet effective mod.

    Last edited by Hazziar; 07-03-2017 at 06:00 PM.

  7. #7
    Established Member Two Rings FelizPrim3's Avatar
    Join Date
    Apr 24 2012
    AZ Member #
    92465
    Location
    North New Jersey

    awesome thanks!

  8. #8
    Senior Member Three Rings
    Join Date
    Dec 28 2011
    AZ Member #
    85832
    My Garage
    2007 RS4, 2008 Q7, 2005 4Runner V8, 2001 Impreza RS
    Location
    Upstate NY

    Great write-up, thanks! I'm about to tackle this job.
    '07 RS4 Avus w/ Silver Interior | RS4 Registry

  9. #9
    Established Member Two Rings AndreyMan's Avatar
    Join Date
    Nov 22 2011
    AZ Member #
    84269
    Location
    Montreal, QC, Canada

    Great write up!

    What were the symptoms that led you to replace it?

  10. #10
    Established Member Two Rings scamsel's Avatar
    Join Date
    Jan 22 2011
    AZ Member #
    69842
    My Garage
    '04 S4
    Location
    atlanta GA

    Quote Originally Posted by AndreyMan View Post
    Great write up!

    What were the symptoms that led you to replace it?
    i would like to know this as well!

  11. #11
    Established Member Two Rings Hazziar's Avatar
    Join Date
    Oct 03 2010
    AZ Member #
    65197
    My Garage
    01 A4 Black
    Location
    Northeast

    There was an internal failure inside the rack that caused the pinion seal to blow out which sprayed PSF all over the drivers side footwell and onto my shoes.

  12. #12
    Senior Member Three Rings Kodymfk's Avatar
    Join Date
    Jun 07 2012
    AZ Member #
    94819
    My Garage
    Black B6 A4 416whp e85 5 spd, Black AllRoad Static (tip)
    Location
    Lansing Michigan

    Quote Originally Posted by Hazziar View Post
    There was an internal failure inside the rack that caused the pinion seal to blow out which sprayed PSF all over the drivers side footwell and onto my shoes.
    just passing through looking at ways on how people take off there bottom half of the dash. Just wanted to say awesome DIY by the way.
    e85, meth, 30psi, 1.8T All the Way Check my build out! http://www.audizine.com/forum/showth...-build-on-methI'm also on the FB Kody K

  13. #13
    Established Member Two Rings Apraudi23's Avatar
    Join Date
    Apr 21 2008
    AZ Member #
    27937
    My Garage
    03 Audi A4 1.8TQ 5 spd
    Location
    Stonington, CT

    Does anyone know if you can swap the B6 or B7 S4 steering rack into a B6 A4 1.8T without having to modify the pressure lines etc.? I have done multiple searches without any luck. Appreciate any help in this matter.
    Goodwood Green >APR K04, Fluidamper Pulley, Carbonio, New South Gasket, Clutch Masters Stage 4 W/ Steel Flywheel, Decorsa Exhaust, TT Downpipe, VMR Test Pipe, ECS Boost Guage, 19'' Rotiform IND-T, ST Coilovers W/ 034 Strut Mounts, S4 Hotchkis Sway Bars, B7 S4 Brakes, Usp Front, Cupra lip, S4 Rear, S4 Blades<

  14. #14
    Senior Member Three Rings
    Join Date
    Dec 28 2011
    AZ Member #
    85832
    My Garage
    2007 RS4, 2008 Q7, 2005 4Runner V8, 2001 Impreza RS
    Location
    Upstate NY

    If it's quattro you're in with a pretty good chance, the part number 8E1422054CX is listed for:
    Code:
    Audi A4 	        2005, 2006, 2007, 2008
    Audi A4 Avant        	2005, 2006, 2007, 2008
    Audi A4 Cabriolet 	2003, 2004, 2005, 2006, 2007, 2008, 2009
    Audi A4 Quattro 	2003, 2004, 2005, 2006, 2007, 2008, 2009
    Audi A4 Quattro Avant 	2005, 2006, 2007, 2008
    Audi RS4 	        2006, 2007, 2008
    Audi RS4 Cabriolet 	2008, 2009
    Audi S4 	        2009
    Audi S4 4.2L 	        2003, 2004, 2005, 2006, 2007, 2008
    Audi S4 Avant 4.2L  	2005, 2006, 2007, 2008
    Audi S4 Cabriolet 	2009
    Audi S4 Cabriolet 4.2L 	2003, 2004, 2005, 2006, 2007, 2008
    '07 RS4 Avus w/ Silver Interior | RS4 Registry

  15. #15
    Veteran Member Four Rings
    Join Date
    Aug 19 2013
    AZ Member #
    121375
    Location
    minnesota

    which hose is the inlet and which is the outlet on the b6 1.8 power steering reservoir?

  16. #16
    Veteran Member Four Rings JEENYUS's Avatar
    Join Date
    Jul 28 2009
    AZ Member #
    45627
    My Garage
    2003 A4 3.0 V6
    Location
    SL,UT

    Quote Originally Posted by jacobsen View Post
    which hose is the inlet and which is the outlet on the b6 1.8 power steering reservoir?
    on the 3.0 the inlet in on top and the outlet is the one on bottom.
    Asses are where it's at. even fat chicks can have nice boobs. -MmmBoost

  17. #17
    Junior Member Two Rings
    Join Date
    Oct 16 2013
    AZ Member #
    125051
    Location
    United States

    Used this to replace the rack on my '06 b7 A4, SO helpful! Thank you!! This (in addition to the flush write up) really covered every little detail. Definitely very time consuming, but overall not horribly difficult.

    Cheers!

  18. #18
    Established Member Two Rings staypuft's Avatar
    Join Date
    Jan 27 2013
    AZ Member #
    108336
    My Garage
    Dirtbikes!
    Location
    Lehigh Valley, PA

    Thanks Hazziar!

  19. #19
    Veteran Member Four Rings Tone-Dogg's Avatar
    Join Date
    May 06 2007
    AZ Member #
    17803
    My Garage
    2020 Q3 P+
    Location
    Hartford, Connecticut

    Used this write up to replace mine, thank you SO Much, quick question. Anyone know what the torque spec is for the banjo bolts? Recently as in 3 months later my 3, 10mm bolts came loose and the 19 mm banjo bolt started leaking, I retightened the 3 10mm, and was able to get about an 1/8 to 1/4 more on the 19mm, before I felt I might strip it. Thoughts? TIA Also, do you think I am in the clear with that banjo bolt?

    Sent from my Samsung Note 4
    2016 Q5 3.0T Quattro P+ Sline Black Optic

    2020 Q3 2.0T Quattro Premium +

  20. #20
    Active Member Two Rings DS84's Avatar
    Join Date
    Apr 06 2014
    AZ Member #
    176767
    Location
    Oregon

    amazing straight forward write up, can't even thank you enough. Dad and I were able to knock out in roughly 4 hours, ontop of doin breaks resurfacing rotors and ajusting coils up 1/2 inch.

    Thanks agian OP

  21. #21
    Active Member Two Rings dmbuchholz's Avatar
    Join Date
    Nov 23 2013
    AZ Member #
    131548
    Location
    Fort Wayne, IN

    I will need to do this in the future but dont have the place to work on my car just yet. This is an early thank you for the write up as I don't think I would be able to do something like this without pictures.

  22. #22
    Veteran Member Three Rings
    Join Date
    Jan 30 2007
    AZ Member #
    15283
    My Garage
    2014 Lexus IS350, 1988 Porsche 944, 2008 Porsche Boxster, 2001 Audi TT Quattro
    Location
    Greenville, SC

    Great write-up on replacing a steering rack on a B7 S4. Looks doable. However when i read my bentley manual, it says that the heat shield has to be removed and to remove the heat shield one has to remove the front exhaust pipe. The procedure for that looks very difficult. Were you able to accomplish this without removing the heat shield?
    Tom
    2014 Lexus IS350 (present), 1988 Porsche 944 (present), 2008 Porsche Boxster (present), 2001 Audi TT Quattro (present), 2006 Audi S4 (past), 1998 Audi A4 (past), 1975 Audi Fox (past)

  23. #23
    Established Member Two Rings B5man17's Avatar
    Join Date
    Jun 24 2013
    AZ Member #
    117734
    Location
    MN

    I didn't remove the heat shield when I did this job last year.

  24. #24
    Established Member Two Rings Lexxielex's Avatar
    Join Date
    Jul 08 2012
    AZ Member #
    96472
    My Garage
    A Great White Buffalo
    Location
    City, MN

    Will this work diy work for an 02 1.8 Quattro Auto A4? I believe it will, I just would like some clarification because where Aussiedan listed the part numbers I see it starts from 03. I'm trying to do this in a couple weeks and save money, since my local shop quoted me a about $1500 to do it. Thanks in advance for the responses!!
    Lex!

    "I made a lot of mistakes and realized I had to let them go. Don't think about your errors or failures, otherwise you'll never do a thing." -Bill Murray

  25. #25
    Established Member Two Rings duk3's Avatar
    Join Date
    Mar 28 2014
    AZ Member #
    167141
    Location
    NJ, United States

    <-- ***

    edit:
    My 19 mm banjo bolt for hardline at rack was loose. No longer need help there but would still like cobfirnation in where the crush washers are meant to go.

    *** -->

    Thanks very much OP!

    I've had a bunch of issues with this repair. Working on trying to rectify now. Please give me some feedback if u have a minute and know any answers. Meanwhile I'll be troubleshooting here.

    1. I replaced rack completely but did not yet remove centering bolt, adjst, nor replace with new bolt. My steering wheel is perfectly aligned to straight wheel as-is. Do I still need to do those steps?

    2. i started car and flyid dumped out from somewhere near the hardlines. My rack had come with 2 of each sized crush washer. Upon reattaching hardlines , I put one washer on each side of the hardline's "end fitting." (Banjo bolt?) Can't Google now as this phone I'm typing on us on my last nerve. Was that right or do both washers go between hardline end fitting and rack? Hopefully I will find that the leak is only due to one of these bolts being loose. Couldn't crank to spec because my damn torque wrench is seized or something.

    3. On passenger side, I reattached tie rod end by first doing top bolt, then pinch bolt. Then I re-read these instructions which specify the opposite. So I loosened pinch bolt and began to tighten top bolt more when the head snapped off it. Then I attempted to remove pinch bolt so I could hopefully extract broken top bolt and found that the pinch bolt and but are twisting indefinitely. Neither tightening or loosening as I twist but and bolt stays still. Was unable to hammer tie rod end out and no surprise since the bolt is still in. I'm kind of baffled. Do you agree with this: I ordered new top and pinch bolts to replace. Must drill out punch bolt, hammer it out, try to extract broken top bolt from tie rod end using multispline extraction bits, reassemble. Finally, I don't think the specified order of reassemble here by OP seems correct. Is it? Pinch bolt, then top bolt? I think that would strip the top bolt as it went it.

    Thanks again OP and all AZers. Gotta go take it all apart again now. Will be back to check for replies.
    Last edited by duk3; 11-27-2015 at 11:23 AM.
    2003 A4 1.8T Quattro: fixing 1 thing at a time. Thanks Audizine!

  26. #26
    Veteran Member Four Rings Tone-Dogg's Avatar
    Join Date
    May 06 2007
    AZ Member #
    17803
    My Garage
    2020 Q3 P+
    Location
    Hartford, Connecticut

    Quote Originally Posted by duk3 View Post
    <-- ***

    edit:
    My 19 mm banjo bolt for hardline at rack was loose. No longer need help there but would still like cobfirnation in where the crush washers are meant to go.

    *** -->

    Thanks very much OP!

    I've had a bunch of issues with this repair. Working on trying to rectify now. Please give me some feedback if u have a minute and know any answers. Meanwhile I'll be troubleshooting here.

    1. I replaced rack completely but did not yet remove centering bolt, adjst, nor replace with new bolt. My steering wheel is perfectly aligned to straight wheel as-is. Do I still need to do those steps?

    2. i started car and flyid dumped out from somewhere near the hardlines. My rack had come with 2 of each sized crush washer. Upon reattaching hardlines , I put one washer on each side of the hardline's "end fitting." (Banjo bolt?) Can't Google now as this phone I'm typing on us on my last nerve. Was that right or do both washers go between hardline end fitting and rack? Hopefully I will find that the leak is only due to one of these bolts being loose. Couldn't crank to spec because my damn torque wrench is seized or something.

    3. On passenger side, I reattached tie rod end by first doing top bolt, then pinch bolt. Then I re-read these instructions which specify the opposite. So I loosened pinch bolt and began to tighten top bolt more when the head snapped off it. Then I attempted to remove pinch bolt so I could hopefully extract broken top bolt and found that the pinch bolt and but are twisting indefinitely. Neither tightening or loosening as I twist but and bolt stays still. Was unable to hammer tie rod end out and no surprise since the bolt is still in. I'm kind of baffled. Do you agree with this: I ordered new top and pinch bolts to replace. Must drill out punch bolt, hammer it out, try to extract broken top bolt from tie rod end using multispline extraction bits, reassemble. Finally, I don't think the specified order of reassemble here by OP seems correct. Is it? Pinch bolt, then top bolt? I think that would strip the top bolt as it went it.

    Thanks again OP and all AZers. Gotta go take it all apart again now. Will be back to check for replies.
    I just did this job for the second time last week, fortunately everything went super smooth and was able to remove the old rack in an hour and install the new one in an hour and a half with no helper. Yes the stars aligned for me.

    I am going to try and help you out duk3.

    1. My suggestion is grab some vice grips and turn the rack either right to left and count the turns or left to right, do your best to find the middle. Remember the rack should have a key and really can only line up one way.

    2. I am sure you are using new crush washers either copper or aluminum is fine. To keep it simple, bolt, then one crush washer, then feed thru line then crush washer then screw into rack. Basically crank the crap out of these, you don't want them to leak on you. (Most of the time they leak because they were not tight enough or there was movement in the rack and it wasn't tight enough, special note here to use Blue Loctight on the 3 bolts to hold the rack in and crank these to. Use your judgement here)

    3. Dude good luck with getting that top bolt out, never see one snap. I always just tighten the top one snug then tighten the pinch bolt. You are probably going to have to remove the pinch bolt and take the tie rod end off the drill that bolt out or buy another.

    Just some great tips to share that will save you some time and headaches, in no specific order....

    -use Loctight on the 3 bolts holding the rack in.
    -tighten the crush washers really tight, I started from the wheel well, then went in from the bay, a box set wrench works really well here, start with the 19 mm first, then the 22mm. I also has the rack in and bolted before I connected the banjo bolts, done it both ways and easier to bolt the rack first then banjo bolts.
    -jack the knuckle up to easily have room to slide the rack in, you might have to adjust the height by 1" to get it to twist and finally get in there, it will go, don't force it.
    -be careful feeding the rack in not to knock off the shifter linkage.
    -when everything is in and wheels on, put the tires on a piece of cardboard, this way you can easily turn the wheel and get most of the bubbles out. I turned mine back and forth 10 times. Normal driving will take care of the rest.
    -probably pretty obvious but never hold the wheel at full turn, the amount of pressure built in the lines is huge.
    -carry an extra bottle of fluid in your trunk just in case a banjo bolt works it's way out, you don't want to starve your pump.

    Hope this helps... good luck.


    Sent from my SM-N910V using Tapatalk
    2016 Q5 3.0T Quattro P+ Sline Black Optic

    2020 Q3 2.0T Quattro Premium +

  27. #27
    Established Member Two Rings duk3's Avatar
    Join Date
    Mar 28 2014
    AZ Member #
    167141
    Location
    NJ, United States

    Thank you!

    Yes this advice is all helpstop

    You sorted out my washers question. I did not use blue threadlock on the 3 mounting bolts so thanks for that as well. I'll go back to add that when I get my new bolts to replace broken and stripped & broken 13mm and 16mm ones.

    I do now know not to hold wheel at full stop. I'm sure no knowing this is what went wrong with my rack in the first place. I used to love turning the wheel full stop and ripping a u-turn. I'd think "Audi's really are the best. Look at thus turning radius!" And this is my 3rd Audi. DERP.

  28. #28
    Established Member Two Rings
    Join Date
    Mar 15 2015
    AZ Member #
    320546
    Location
    Toronto/Ontario

    Sorry bring back a bit of an old thread but it was a great help in the replacement of my steerig rack. So thanks to the OP for the post, it was a huge help. But I just had one question about the centering bolt on the rack. I think I might have missed it but I was wondering what the purpose of it is? And if I forgot, what can happen?

  29. #29
    Veteran Member Four Rings Tone-Dogg's Avatar
    Join Date
    May 06 2007
    AZ Member #
    17803
    My Garage
    2020 Q3 P+
    Location
    Hartford, Connecticut

    Quote Originally Posted by TurboBrickTom View Post
    Sorry bring back a bit of an old thread but it was a great help in the replacement of my steerig rack. So thanks to the OP for the post, it was a huge help. But I just had one question about the centering bolt on the rack. I think I might have missed it but I was wondering what the purpose of it is? And if I forgot, what can happen?
    IMO, I didn't see a purpose to the centering bolt, or even see one on my rack. If there was one I overlooked it. Try referring to 1. in my prior post. That is how I centered the rack. You truly can't mess it up. Good luck.
    2016 Q5 3.0T Quattro P+ Sline Black Optic

    2020 Q3 2.0T Quattro Premium +

  30. #30
    Established Member Two Rings
    Join Date
    Mar 15 2015
    AZ Member #
    320546
    Location
    Toronto/Ontario

    Ya I think I overlooked it as well, I'm just not sure what the bolt is for. The alignment is fine, the rack is in fine, I'm just confused as to what it does?

  31. #31
    Active Member One Ring
    Join Date
    Aug 13 2013
    AZ Member #
    120956
    My Garage
    2004 Audi A4 / 2008 Jeep Rubicon
    Location
    Denver

    Thanks for the write-up! In case anyone is reading this and can't get the rack out, I fought it for a long time, but eventually just REMOVED the strut. Slides right out. It's a bit more work, makes the job a lot easier. Thanks again for the article.

  32. #32
    Veteran Member Three Rings
    Join Date
    May 29 2010
    AZ Member #
    59652
    My Garage
    2004 Audi S4, 2008 Audi RS4 Ti
    Location
    Phildelphia / Auckland

    My new unit did not have a centering bolt installed and it was not on-center. I had to poach it from the old rack.


  33. #33
    Veteran Member Three Rings
    Join Date
    May 29 2010
    AZ Member #
    59652
    My Garage
    2004 Audi S4, 2008 Audi RS4 Ti
    Location
    Phildelphia / Auckland

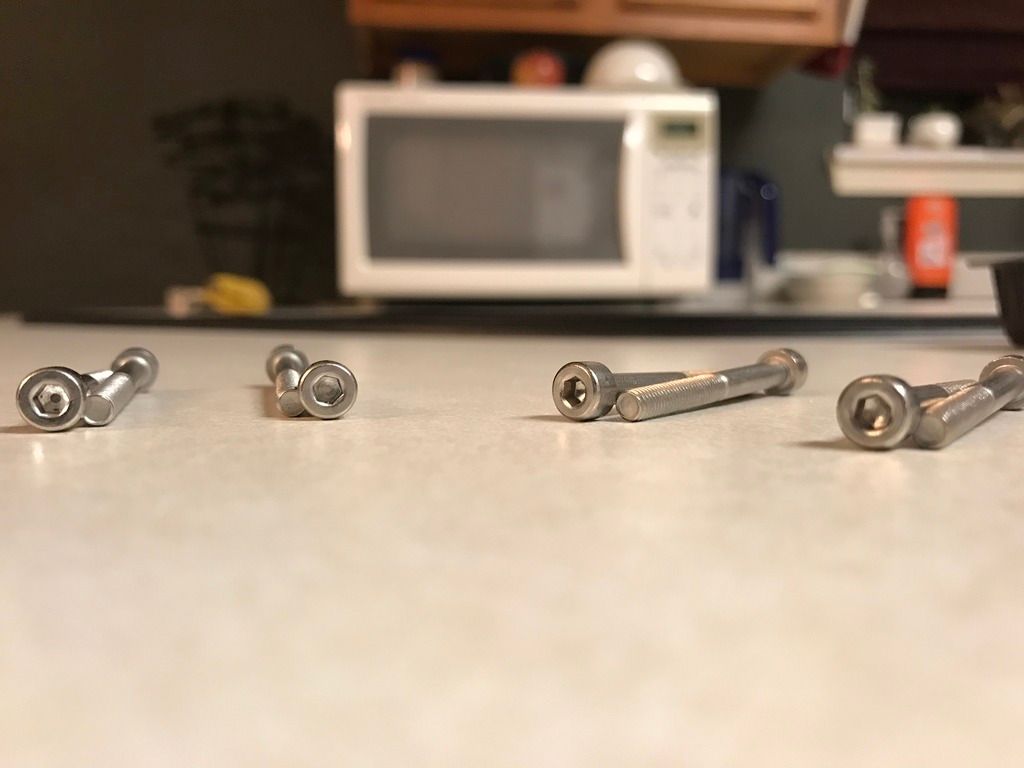
    If you need to replace the servotronic fasteners, the dimensions are M4x0.7x40mm.

    I bought some stainless 316L bolts. They happily get rid of the torx interface for a less strip-risky internal hex (1/8") and are more corrosion resistant than the coated fastnerss. I had to buy in bulk qty (of 10) and only used 4. If anybody wants the remainder, I'd be happy to donate where there is need.


    Last edited by S4Bennett; 12-10-2016 at 03:35 PM.

  34. #34
    Active Member Two Rings 8Kami6's Avatar
    Join Date
    May 04 2016
    AZ Member #
    372817
    Location
    Maryland


    Thanks for the write up! My boys and I got the job done on my car.

    -Hachi Bee

  35. #35
    Established Member Two Rings staypuft's Avatar
    Join Date
    Jan 27 2013
    AZ Member #
    108336
    My Garage
    Dirtbikes!
    Location
    Lehigh Valley, PA

    Where are you guys buying your racks from? I am replacing mine this winter and I really refuse to drop $800 on a new/refurbished rack.

  36. #36
    Veteran Member Four Rings Tone-Dogg's Avatar
    Join Date
    May 06 2007
    AZ Member #
    17803
    My Garage
    2020 Q3 P+
    Location
    Hartford, Connecticut

    http://rackdoctor.net/

    Sent from my VS995 using Audizine mobile app
    2016 Q5 3.0T Quattro P+ Sline Black Optic

    2020 Q3 2.0T Quattro Premium +

  37. #37
    Junior Member Two Rings
    Join Date
    Sep 11 2011
    AZ Member #
    81109
    Location
    Chantilly VA

    B6 3.0 experience

    I have replaced several racks on Audi's including a D2 S8 which I thought was one of the most difficult jobs I have ever done, but I was surprised just how difficult this one was too.
    On the 3.0 B6 the third rack mounting bolt simply cannot be seen from below. There is only a small crack of access and it doesn't line up with the bolt.
    I eventually could see it from the side access if I crouched down at a very specific angle. Using a deep socket, I removed it from the side. If you have a mini air ratchet you might be lucky and get it in there. I forced my big ratchet in there to do it up but the height from the ratchet to the bolt is very critical. Also the 22mm banjo bolt can be turned about 10 degrees with a wrench and if you want to use a socket you'll need a very, very shallow one. I used an open style one where the ratchet grips around the outside of the socket. There was no way I could get a socket on the 19mm bolt. What a stupid design! Another 1" of space would have made all the difference. Even trying to pull the rack out finds it hitting the hard line hose. On my car that hose cannot be disconnected easily like what is show in the photos above. Mine was all one piece disappearing behind the engine. If you bend the hard spiral line to get it out of the way, you will have a hard time lining it back up on re-assembly because it will now be in the wrong resting position to line up the banjo bolts. And starting those bolts reaching in just by feel and keeping the washers in place is horrendous especially if they don't grab straight away.
    My pinch bolt and track rod ends were the easy part. All in all I think I'd be willing to pay someone to do this job, and I never ever say that!!

  38. #38
    Veteran Member Four Rings Gunnarrrrr's Avatar
    Join Date
    Mar 25 2015
    AZ Member #
    322635
    My Garage
    cars, wheels, cars with wheels
    Location
    San Jose 🤮

    Just did this yesterday, and idk why you psychos are doing it with the strut and spring in the way. I removed my strut and first of all, you’re looking at only the 3 top bolts, knuckle pinch bolt, and lower strut bolt and it all comes out.

    secondly, you have an insaaaaane amount of room to work with. enough to where I was able to pull the rack out a little and access the fluid line banjos from the wheel well, and then properly torque them from under the car with how much room you have to move the rack around.

    IMG_9450.jpg


    Sent from my iPhone using Audizine Forum
    B9 SQ5 Mythos X Magma - 034 stg2
    2005 B6 GT2871
    2005 B6 S4 4.2L 6MT

Bookmarks

Posting Permissions

  • You may not post new threads
  • You may not post replies
  • You may not post attachments
  • You may not edit your posts
  •  


    © 2001-2024 Audizine, Audizine.com, and Driverzines.com
    Audizine is an independently owned and operated automotive enthusiast community and news website.
    Audi and the Audi logo(s) are copyright/trademark Audi AG. Audizine is not endorsed by or affiliated with Audi AG.