CS6A Complete AWD swap | FWD OZ Rally converted to AWD via Outlander/EVO 9
 Apr 8, 2015, 05:44 AM
#46

Wow! a huge congrats on the next phase. how can you go to sleep knowing this gem of parts are right there with you...lol. Got a question if you are doing a custom driveshaft, where are the measures taking from point a to b to insure accuracy of it?
 Apr 8, 2015, 11:16 AM
#47
We might find upon doing the measurements (basically based off of of these) that an EVO driveshaft will work. There's a relatively strong probability that this will be the case being that the CT9A is just an upgraded CS6A. In either case given that I don't have a stock driveshaft to use from any vehicle, rather than buy a used stock 3-piece, I'll just have an aluminum/chromeoly one made; whether it's designed for the EVO 8/9, or custom. I'd love to do carbon fiber as it takes a lot of stress away from other components, but I'm scared about it cracking.
Last edited by doncarbone; Apr 8, 2015 at 11:28 AM.
Apr 26, 2015, 05:53 PM
#48
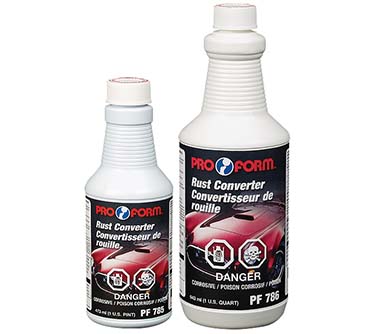
Not much to report this weekend, just been painting misc items that were purchased used. Killed some rust, primed, painted w/ brake caliper paint (knuckles) and standard engine enamel. The next step is the shell is going in for a roll bar, seam welding and bracing in a few key areas. Until then (1-2 weeks) I'm just reorganizing the inventory of parts and cleaning some things up while everything is off the car...
Attachment 328464
EVO front knuckles, front engine cross-member, timing cover plates/brackets, P/S pump bracket, side cyl-head mount bracket, rear tranny mount bracket, starter shield
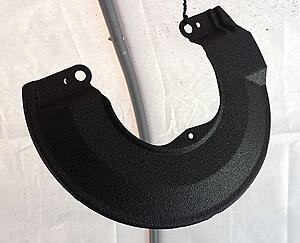
brake dust shields I painted in the same rubberized coating I did the rear Outlander subframe in (a bit like a truck bed liner compound):
discovered today the cylinder head passenger mount brackets between the 4G69 and 4G63 are identical with the exception of the mount bolts. For anyone doing a DOHC swap, that's one less thing to worry about:
Attachment 328466
Attachment 328464
EVO front knuckles, front engine cross-member, timing cover plates/brackets, P/S pump bracket, side cyl-head mount bracket, rear tranny mount bracket, starter shield
brake dust shields I painted in the same rubberized coating I did the rear Outlander subframe in (a bit like a truck bed liner compound):

discovered today the cylinder head passenger mount brackets between the 4G69 and 4G63 are identical with the exception of the mount bolts. For anyone doing a DOHC swap, that's one less thing to worry about:
Attachment 328466
Last edited by doncarbone; Apr 26, 2015 at 06:20 PM.
 May 9, 2015, 04:47 PM
#52

OK, read through the whole thing. Amazing project and an excellent job of documentation!
I daily drive my sportback, so I don't have any ideas of an AWD swap, but I'm dying to see where this goes from here.
Any further updates?
I daily drive my sportback, so I don't have any ideas of an AWD swap, but I'm dying to see where this goes from here.
Any further updates?
May 11, 2015, 02:56 PM
#53
No major updates at the moment. The car is a few weeks away from having the cage fabricated along with seam welding in the engine bay, the seat mounts and fender bracing.
I was researching and doing some measurements regarding the CT9A's multi-link setup on the back to determine how compatible the EVO components would be (as eventually I'd like to run some nice coilovers like Ohlins). For what it's worth, I ultimately decided to just stick to what I have and deal with possibly relocating the shock towers on the back if I really wanted to run an EVO setup. The Lancer TEINs I have now should still do a good job.
This type of setup (large trailing arm holding the hub + a lower control arm) was what the majority of pre-CT9A evos ran, so it's not weaker, just heavier.
Jul 30, 2015, 05:09 PM
#55
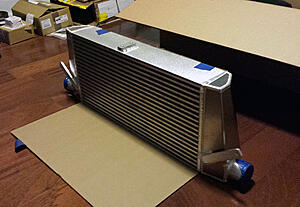
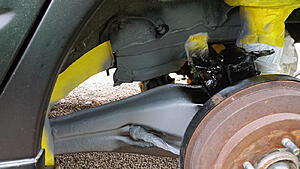
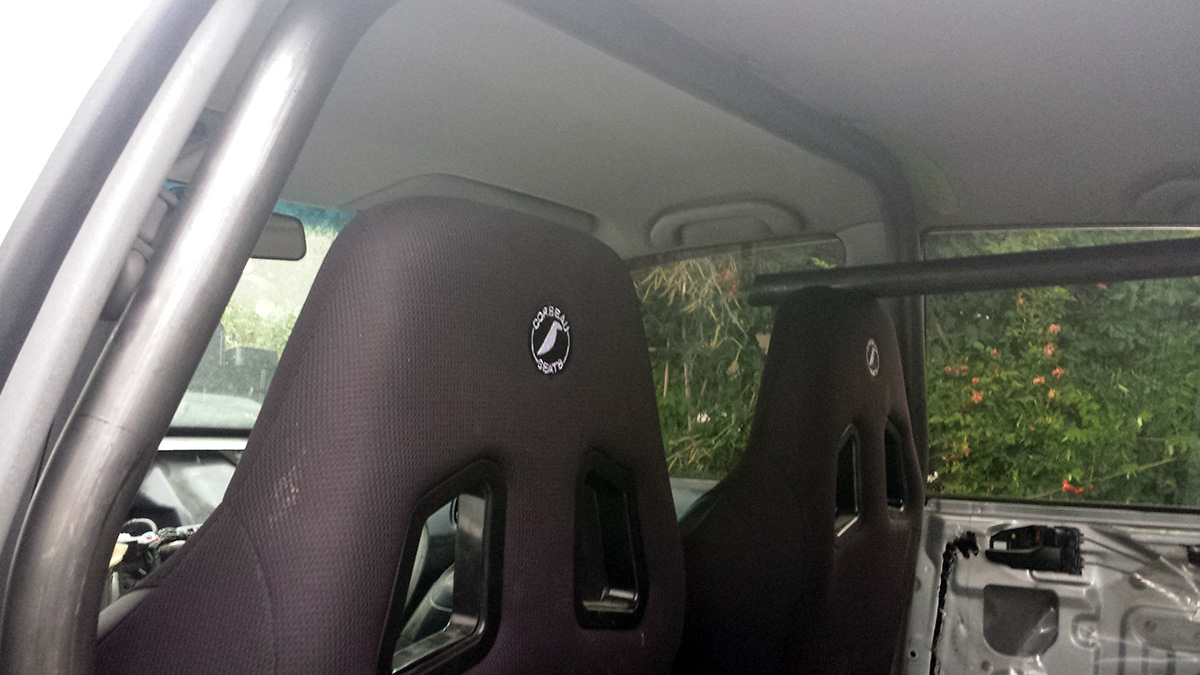
Roll bar being fabricated few pics of that below. Will tie in direct through trunk floor to the top of the Outlander subframe. Fender braces are also being thrown on, as well as the FMIC (ETS 4.0").
Other than that engine is going in next week (Aug 6) for assembly and machine work (more on that to come, but preview also pictured below):

Attachment 327934
did some more paint work to the control and trailing arms:
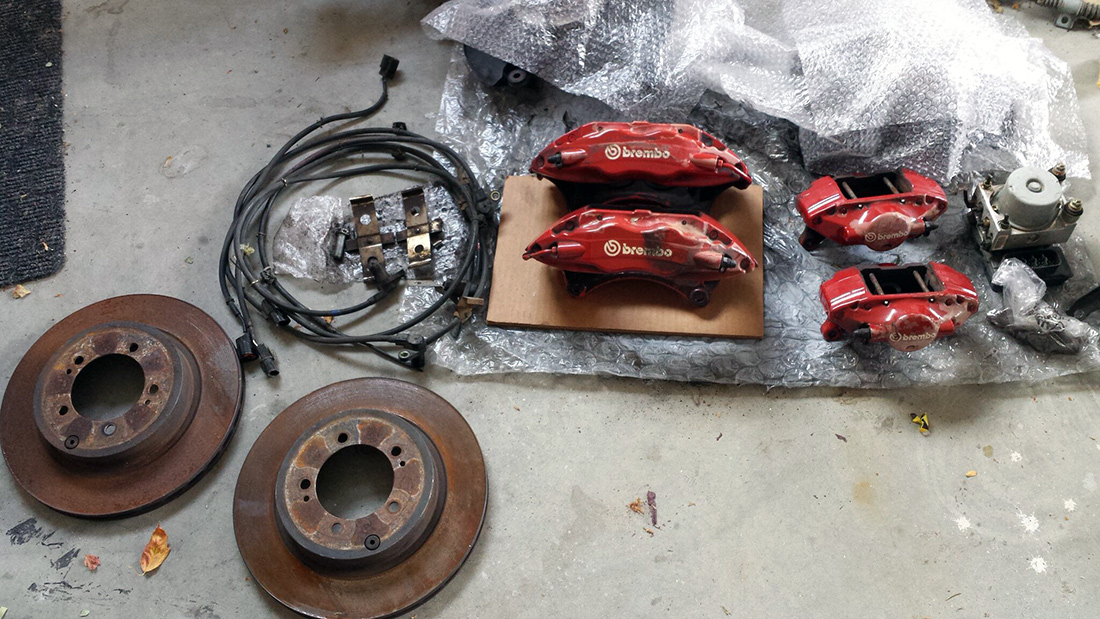
purchased some brembos that need a good clean and a repaint (clear coat fading go figure):

the rear rotors pictured are for test fitment, as the Outlander came with drums, but will try to make these fit.
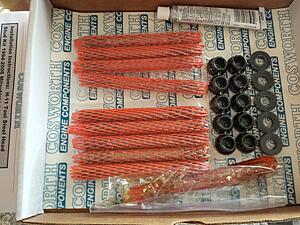
engine parts all ready to go for next Thursday:
Attachment 327937
Other than that engine is going in next week (Aug 6) for assembly and machine work (more on that to come, but preview also pictured below):

Attachment 327934
did some more paint work to the control and trailing arms:

purchased some brembos that need a good clean and a repaint (clear coat fading go figure):
the rear rotors pictured are for test fitment, as the Outlander came with drums, but will try to make these fit.
engine parts all ready to go for next Thursday:
Attachment 327937
Last edited by doncarbone; Jul 30, 2015 at 06:16 PM.
Sep 5, 2015, 04:57 PM
#56
few more updates:
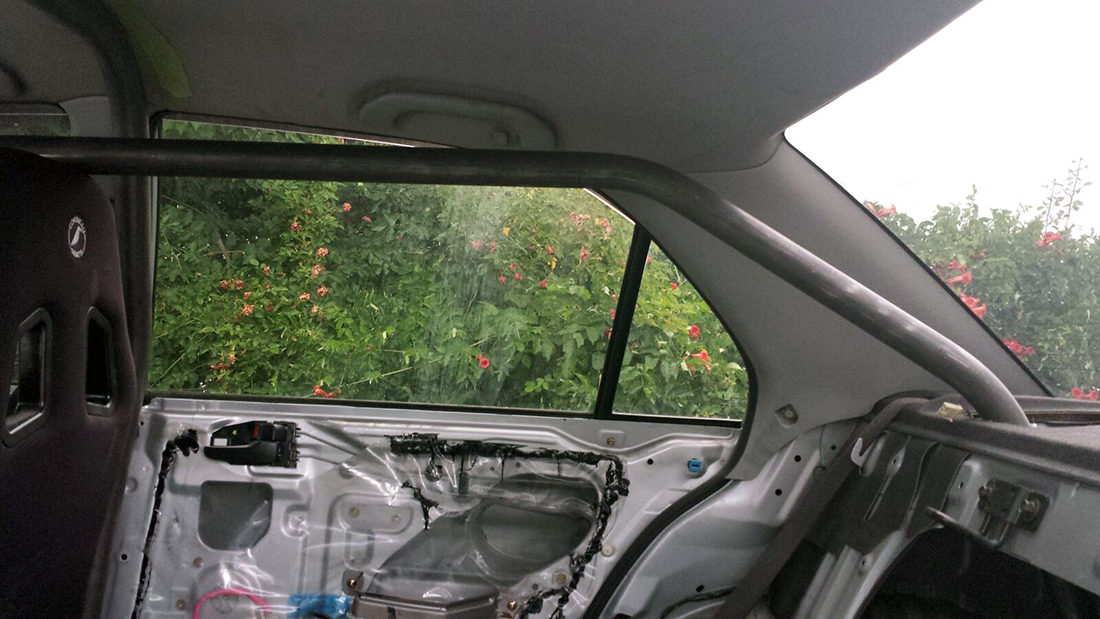
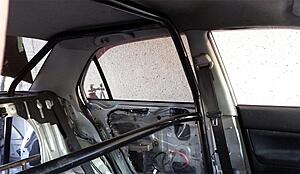
1) roll bar is nearly complete. in addition to this, a few areas of the unibody will be stitch welded, fender braces (ultra-racing) are to be bolted up, and the front crash bar will be modified slightly to fit the 4.0" intercooler.
Attachment 327792
Attachment 327793
Attachment 327795
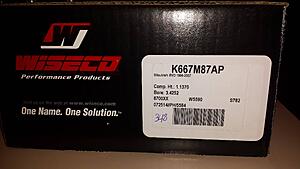
2) All engine parts have been taken to a local shop. This is a 4G69 DOHC 2.4L EVO 9 build. The block has been measured and given the current wear is about 0.0035 over the stock 87mm, we feel safe cleaning it up thou to 0.0045. Pistons are Wiseco asymmetrical K667M87AP with upgraded pins. Going for 9.5:1. These are technically 4G63 pistons. The 4G69 and 4G63 share the same deck height, so an 87mm 4G63 piston is a convenient choice.
Again I'm running into an issue of having to decide if this next phase of the build should be shared in a different thread, but for now I'll post some information here:
Wiseco 4G63 asymm 87mm 9.5:1 pistons K667M87AP
Manley turbo tuff rods 14403-4
K1 billet l/w 100mm crankshaft 100mm
ARP 12pt main studs
Cosworth main bearings, thrust bearings, rod bearings
Cosworth H11 ultra high performance head studs
Cosworth 87mm head gasket, 1.5mm
GSC BSEK
TOMEI oil baffle plate
Mishimoto oil cooler MMOC-EVO-01
Fluidampr harmonic balancer
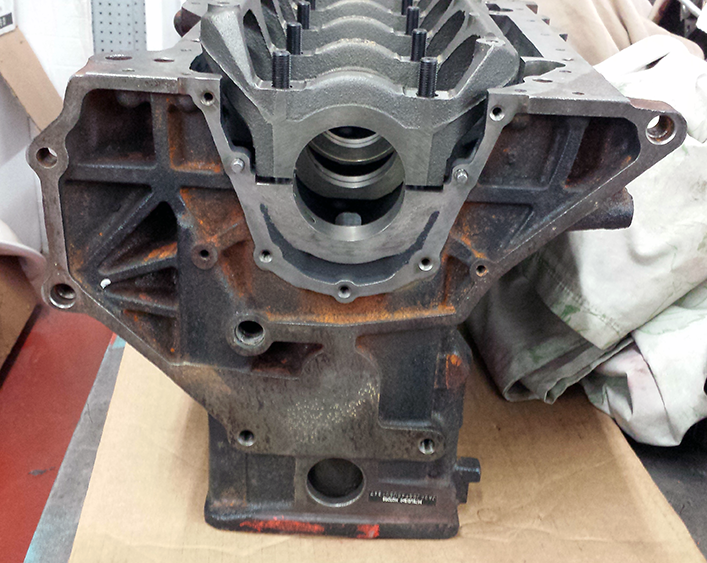
The full tear down of the 4G69 engine I did this past spring. This first pic always makes me laugh because at the moment i took the picture i swear my dog wasn't in frame but he came in to see what was going in the moment the flash went off:
Attachment 327796
Attachment 327797
Attachment 327798
Attachment 327799
The block was actually in great shape considering it has close to 90,000km now. We're just doing a very light hone 0.0010" over. At 0.0045" I'm told there shouldn't be any piston slap, but even if there is, it should go away once the engine is warm.
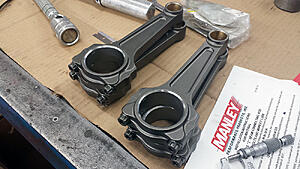
Comparison of stock 4G69 rods vs. Manley I-beam:
Attachment 327800
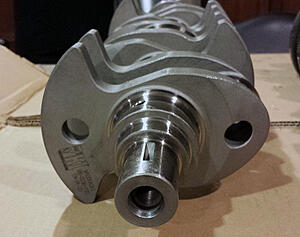
Crankshaft comparison stock 100mm 4G69 (likely a spare crank unless I sell it...):
Attachment 327801
Attachment 327802
Attachment 327803
Attachment 327804
Will post more once the engine build progresses further:
1) roll bar is nearly complete. in addition to this, a few areas of the unibody will be stitch welded, fender braces (ultra-racing) are to be bolted up, and the front crash bar will be modified slightly to fit the 4.0" intercooler.
Attachment 327792
Attachment 327793

Attachment 327795
2) All engine parts have been taken to a local shop. This is a 4G69 DOHC 2.4L EVO 9 build. The block has been measured and given the current wear is about 0.0035 over the stock 87mm, we feel safe cleaning it up thou to 0.0045. Pistons are Wiseco asymmetrical K667M87AP with upgraded pins. Going for 9.5:1. These are technically 4G63 pistons. The 4G69 and 4G63 share the same deck height, so an 87mm 4G63 piston is a convenient choice.
Again I'm running into an issue of having to decide if this next phase of the build should be shared in a different thread, but for now I'll post some information here:
Wiseco 4G63 asymm 87mm 9.5:1 pistons K667M87AP
Manley turbo tuff rods 14403-4
K1 billet l/w 100mm crankshaft 100mm
ARP 12pt main studs
Cosworth main bearings, thrust bearings, rod bearings
Cosworth H11 ultra high performance head studs
Cosworth 87mm head gasket, 1.5mm
GSC BSEK
TOMEI oil baffle plate
Mishimoto oil cooler MMOC-EVO-01
Fluidampr harmonic balancer
The full tear down of the 4G69 engine I did this past spring. This first pic always makes me laugh because at the moment i took the picture i swear my dog wasn't in frame but he came in to see what was going in the moment the flash went off:
Attachment 327796
Attachment 327797
Attachment 327798
Attachment 327799
The block was actually in great shape considering it has close to 90,000km now. We're just doing a very light hone 0.0010" over. At 0.0045" I'm told there shouldn't be any piston slap, but even if there is, it should go away once the engine is warm.
Comparison of stock 4G69 rods vs. Manley I-beam:
Attachment 327800
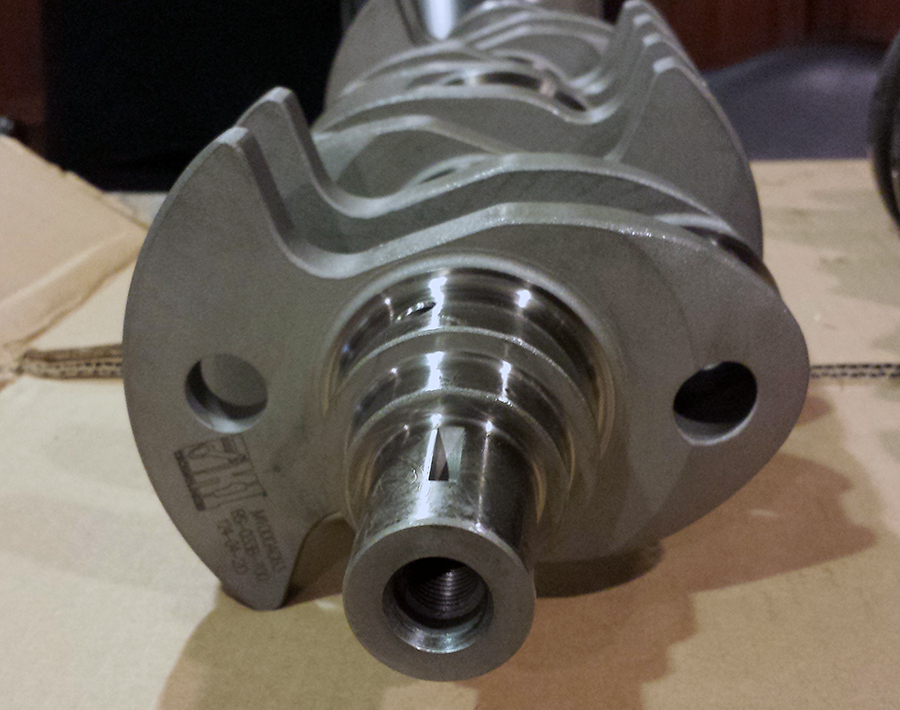
Crankshaft comparison stock 100mm 4G69 (likely a spare crank unless I sell it...):
Attachment 327801
Attachment 327802
Attachment 327803
Attachment 327804
Will post more once the engine build progresses further:


Last edited by doncarbone; Sep 5, 2015 at 05:01 PM.
Sep 5, 2015, 10:37 PM
#57
I've updated the first post of this thread with more details about the engine build:
https://www.evolutionm.net/forums/pr...l#post11319379
https://www.evolutionm.net/forums/pr...l#post11319379
Sep 16, 2015, 09:32 AM
#58
roll bar updates:
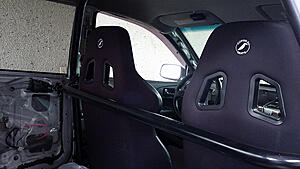
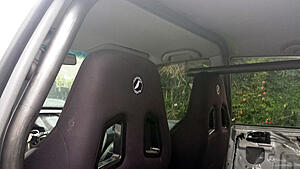
door braces, fit about a spider's *** hair from the door panels, as close as they can be without touching. they're a bit steep (but about where most sanctioning bodies recommend), but i'll probably do a door bar hinge on these if it's a pain getting in and out:
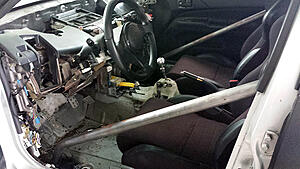
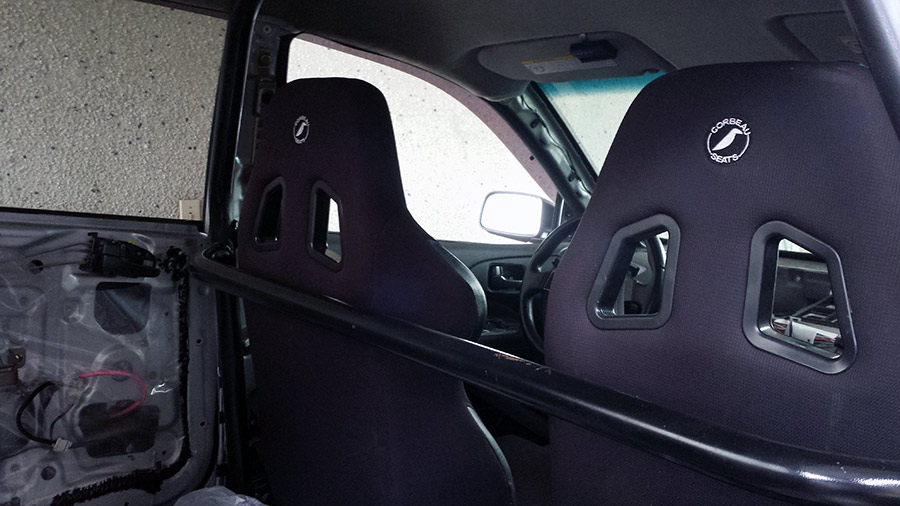
door braces, fit about a spider's *** hair from the door panels, as close as they can be without touching. they're a bit steep (but about where most sanctioning bodies recommend), but i'll probably do a door bar hinge on these if it's a pain getting in and out:

Last edited by doncarbone; Sep 16, 2015 at 09:35 AM.
Oct 1, 2015, 02:26 PM
#59
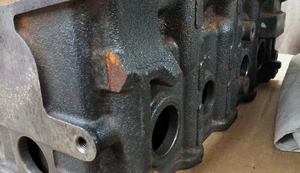
Small update on the engine...
Block cleaned up and painted, old rusted freeze plugs replaced... GSC balance shaft eliminator bushings in, crankshaft balanced (K1 built a nice crank it was 1 gram out per outside counterweights). Next will be testing rod fitment as the cylinder walls may have to be ground down to accommodate the large Manley rods.
Attachment 327698
Attachment 327699

Attachment 327701

Attachment 327704
More to come soon
Block cleaned up and painted, old rusted freeze plugs replaced... GSC balance shaft eliminator bushings in, crankshaft balanced (K1 built a nice crank it was 1 gram out per outside counterweights). Next will be testing rod fitment as the cylinder walls may have to be ground down to accommodate the large Manley rods.

Attachment 327698
Attachment 327699
Attachment 327701

Attachment 327704

More to come soon
Last edited by doncarbone; Oct 9, 2015 at 12:31 PM.
Oct 7, 2015, 09:12 PM
#60
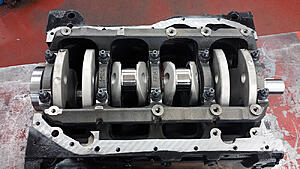
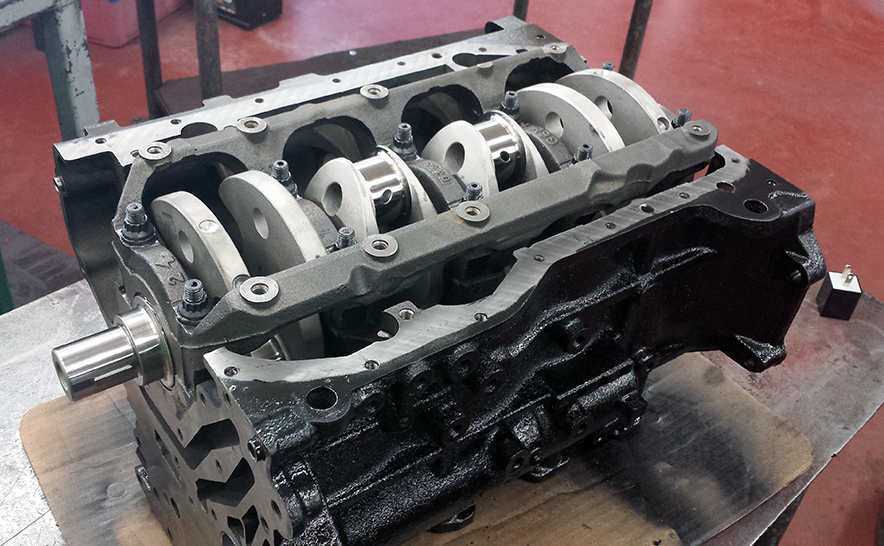
few more engine updates...rotating assembly complete:
Attachment 327667
Attachment 327668
Attachment 327669
Attachment 327670
Just as mitsuorder reported in his 4G69 build thread, the very bottoms of the cylinders had to be notched slightly to allow for the large Manley rods to clear safely:
Attachment 327671
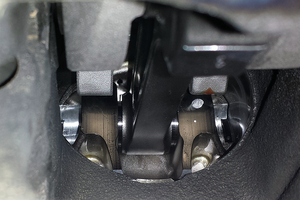
In addition, due to the design of the asymmetrical Wiseco pistons used, there was no adequate room under the piston for the small end of the rods to slide up enough to allow for the pin to go through (an oversight on my part as the measurements were available, I just assumed they'd be decently compatible with popular rods and no different than any other 4G63 Wiseco piston...).
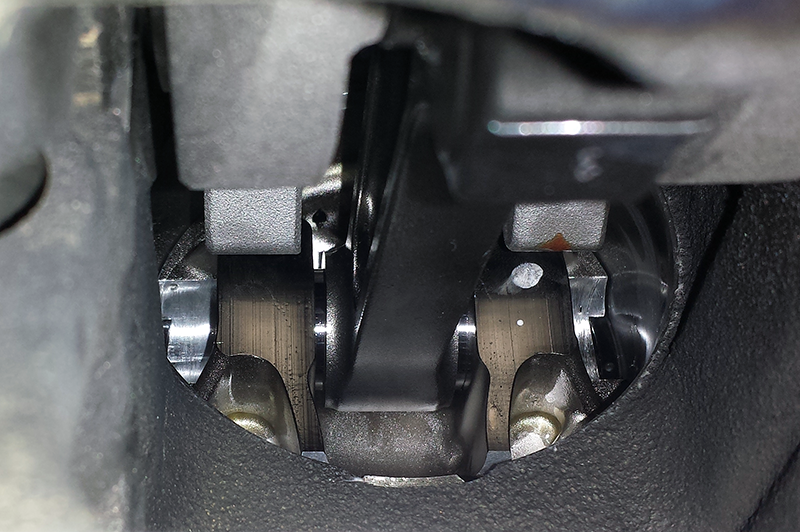
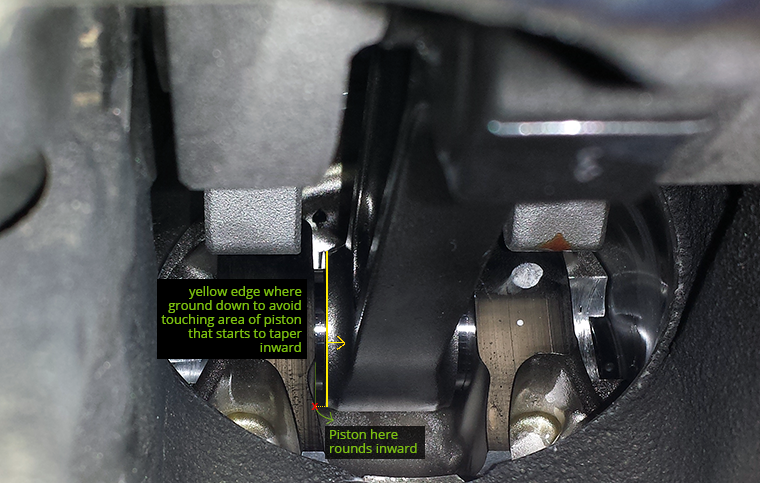
It's a bit hard to see from the picture below, but the inside of these pistons rounds inward just after the pin which was touching the outside edge of the rod on either side. About 1.2-1.5mm of material was ground off the rod per side to allow for the pin to fit as well as give the piston a adequate room to breath. I spoke to Manley and they claimed this was not a problem.
Outlined/labelled if the explanation is confusing (i'm no professional so i'm probably lacking a simple technical term that in one word defines what I'm explaining lol):

the x is where they were directly hitting in all 4 corners.
Attachment 327667
Attachment 327668
Attachment 327669
Attachment 327670
Just as mitsuorder reported in his 4G69 build thread, the very bottoms of the cylinders had to be notched slightly to allow for the large Manley rods to clear safely:
Attachment 327671
In addition, due to the design of the asymmetrical Wiseco pistons used, there was no adequate room under the piston for the small end of the rods to slide up enough to allow for the pin to go through (an oversight on my part as the measurements were available, I just assumed they'd be decently compatible with popular rods and no different than any other 4G63 Wiseco piston...).
It's a bit hard to see from the picture below, but the inside of these pistons rounds inward just after the pin which was touching the outside edge of the rod on either side. About 1.2-1.5mm of material was ground off the rod per side to allow for the pin to fit as well as give the piston a adequate room to breath. I spoke to Manley and they claimed this was not a problem.
Outlined/labelled if the explanation is confusing (i'm no professional so i'm probably lacking a simple technical term that in one word defines what I'm explaining lol):
the x is where they were directly hitting in all 4 corners.
Last edited by doncarbone; Oct 7, 2015 at 09:16 PM.