GetMyMacReady - Configure your Mac
What is GetMyMacReady?
GMMR is a Mac specific subset of GetMeReady (with the purpose of simplifying the process of setting up a new computer). It doesn’t matter if you just want to set up yet another computer or if you need to replace your old one with brand new shiny hardware.
Real time savers
Regardless if you are interested in the GMMR script or not, the combination of the Ctrl+Tab window switch-fix, Alfred, XtraFinder and HyperDock is a real time saver for me. It really enhances my productivity and effectiveness on a daily basis. And combined with some real great tools this really makes my days a lot easier - especially Sublime Text, Dropbox and LastPass.
So even if you are not interested in the GMMR script itself, maybe you could find some real gems here that enhances your productivity. If so, skip down to the Manual/other Tweaks-section or browse through the What’s included in GMMR-section.
How does the script work (read this before you use GMMR)
GMMR is a simple Bash script that will install most of the applications you typically need. A computer bootstrapper if you will. The script will also do some basic tweaking of the OS. The applications are grouped into three main categories: Core, Productivity and Developer.
There is some applications that is not possible to script that must be manually installed. And we also need to semi-manually install all applications from App Store. It is also advised to exclude all applications from GMMR that is already installed via App Store.
And the rest of the Mac OS X tweaks that isn’t included in the script will you find I you scroll down this document.
What if I’m not interested in one of the applications or a whole package?
Should you lack interest of a whole package it’s easy to exclude (comment out) the whole group. The same goes for single applications. Just use the hash (#) comment on each line you want to exclude.
For example should you want to exclude the whole Development package, simply comment out that row in GetMyMacReady.sh like this:
#source "$DIR/Development.sh"
Or if you want to exclude only Atom application from the Development package:
#brew cask install --appdir="/Applications" atom
What’s included in GMMR
General tools and system utilities
Homebrew (w/ Cask)
XtraFinder
iTerm2
Alfred (w/ tweak for Homebrew)
HyperDock
WhiteClock2
f.lux
SmcFanControl
Caffeine
Java
FlashPlayer
General applications
Google Chrome
FireFox
TeamViewer
VLC Player
Spotify
FileZilla
LastPass
Productivity tools
Dropbox
Slack
Evernote
Skitch
Google Hangouts
Skype
OmniGraffle
Google Drive
Developer tools
Sublime Text 3
Atom
GitHub
SourceTree
Mono SDK
Xamarin Studio
Vagrant
VirtualBox
Sublime Text Fix
This script will take care of the configuration of Sublime Text 3. For further details see separate “SublimeFix” section.
Hacks and tweaks
And finally we have a special hack fixing the upper left corner of your screen as a shortcut to lock your screen. Really handy time saver. Although you have the “lock” command in Alfred that is pretty convenient as well.
Run GMMR
- Download the GMMR package to your local drive (e.g. ~/Download/)
- Open a terminal in the folder where GMMR is located (e.g. ~/Download/Get Me Started/Mac)
- Run the following command:
chmod +x GetMyMacReady.sh && ./GetMyMacReady.sh - Sit back and relax, this will take some time (and yet save you time!). Check in now and then in case you have to respond to any prompts
- Note: For some reason the XCode command line tools seems to take extremely long time, so please be patient.
Manual/other tweaks
In this section you will find my favourite settings. Maybe you like some or you might like them all. Either way, these are my favourite settings and you choose freely from them as you like and ignore the rest. There is no right or wrong here, just different tastes.
Table of contents:
- SublimeFix
- Enable “put screen to sleep” hot corner
- Enable Ctrl + Tab to switch active window in an application
- Enable Tab key navigation for all form fields
- Configure Alfred
- Configure XtraFinder
- Configure HyperDock
SublimeFix
This script will take care of most of the configuration of Sublime Text. Basically this is what the script does:
- Make sure all needed folders are in place
- Install Package Control
- Enable Package Sync (if path is provided, see below)
- Install a couple of themes and colour schemes (see below for details)
- Configure basic preferences
- Menlo font, size 14
- Tab size 4 (and make sure not converted to spaces)
- Enable Brogrammer theme and colour scheme
- Set default settings for Soda theme
- Add a bunch of ignore file/folder patterns (such as .git, .svn, .vagrant etc)
SublimeFix should be run automatically when you run GetMyMacReady, but you could as well run it manually if needed. It is also possible to run it even if you have already configured your Sublime text as it will only add files that are missing (and not overwrite your current settings).
What’s included:
- Package Control
- ApplySyntax
- Backbone.js
- BBCode Syntax
- EJS
- Markdown Preview
- MarkdownEditing
- PlainTasks
- SublimeLinter
- SublimeLinter-gjslint
- SublimeLinter-json
- Package Syncing (really convenient way to keep you settings backuped)
- Brogrammer Theme
- Soda Theme
- Incl additional colour schemes for Soda
- Atom Dark colour scheme
- Custom adaptation of Atom Dark
Important notes
Package Control
When you start Sublime Text for the first time after the settings file for Package Control has been updated, all packages in the settings file will be automatically downloaded and installed.
If you already have your own favorite collection of packages, you should replace the Get me Started/Common/Package Control.sublime-settings with your own file (if you have a backup copy). Should you not have a backup, you could easily add additional packages to the JSON array. By adding additional items to the package control array those will be downloaded and installed automatically. No need to search for one package at a time to install, very convenient and time saving.
Package Sync
To automatically enable Package Sync you need to rename the file _Package Syncing.sublime-settings to Package Syncing.sublime-settings and update the following line with your actual path where all settings files are currently stored (or should be stored if this is the first time you use Package Sync).
"sync_folder": "YOUR_PATH_HERE"
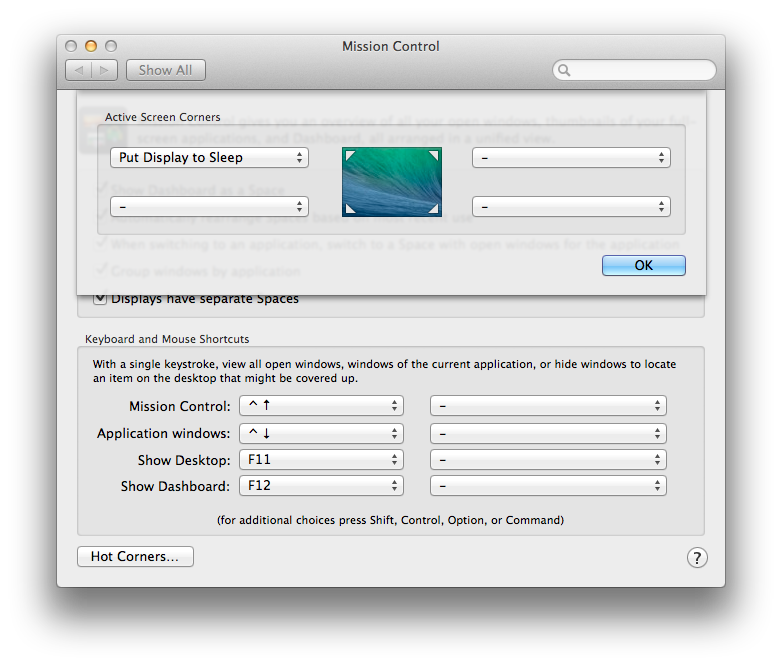
Enable “put screen to sleep” hot corner
If the HotCorners tweak was not run automatically or if you for some reason need to configure this once more you could do this manually by following the guide below, or you just run the HotCorners.sh script.
- Open Apple menu -> System Preferences -> Mission Control
- Click Hot Corners and configure as below
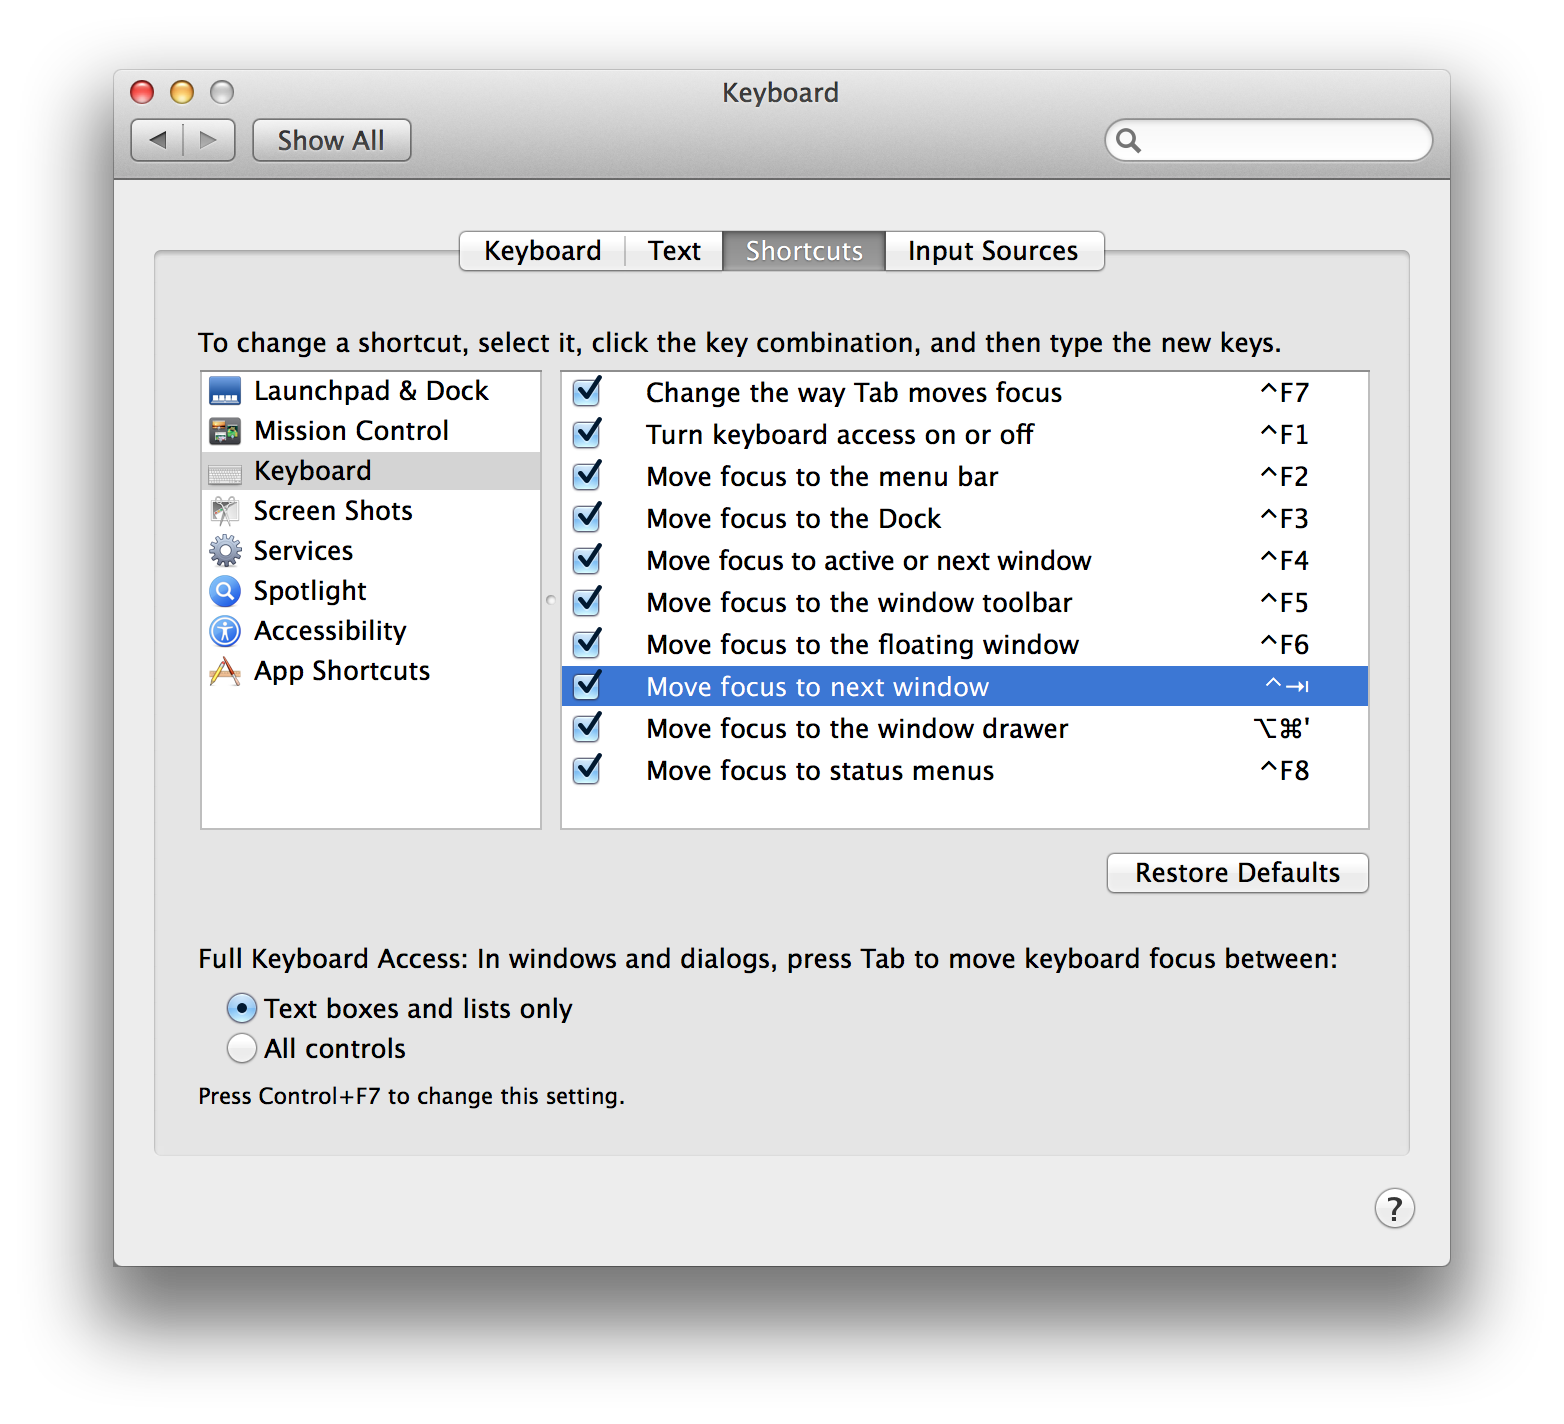
Enable Ctrl + Tab window switching with Swedish keyboard
- Open Apple menu -> System Preferences -> Keyboard
- Switch to Shortcuts “tab”
- Select “Keyboard” in the left sidebar
- Doubleclick on keyboard shortcut text next to “Move focus to next window” and press “Ctrl + Tab”
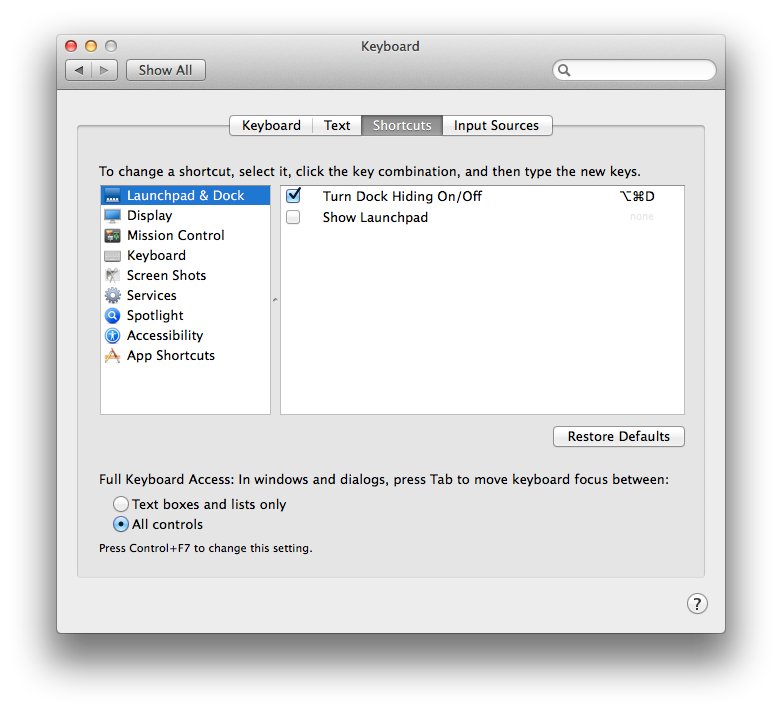
Enable Tab key navigation for all form fields
If you want to be able to tab between all controls on a form, and not just text boxes and lists, you can easily enable this:
- Open Apple menu -> System Preferences -> Keyboard
- Switch to Shortcuts “tab”
- Select “Keyboard” in the left sidebar
- Make sure “All controls” is selected beneath Full Keyboard Access
Search in current folder
TBD
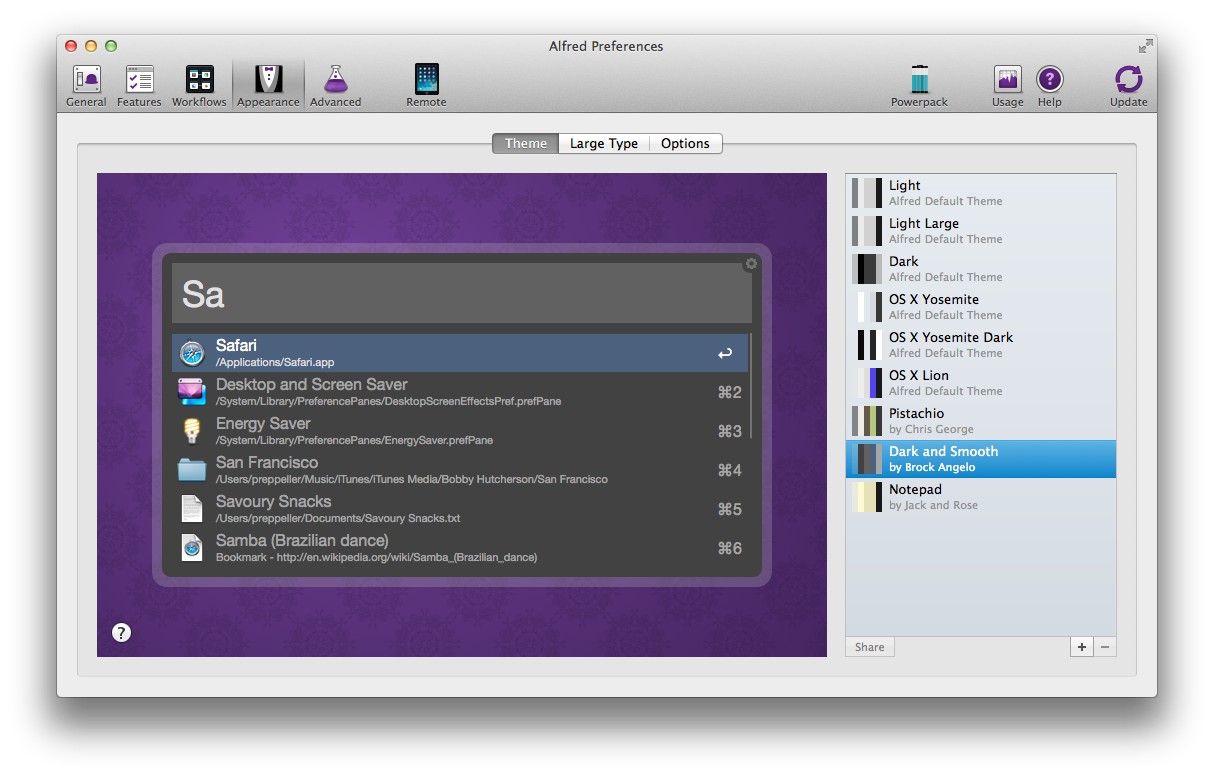
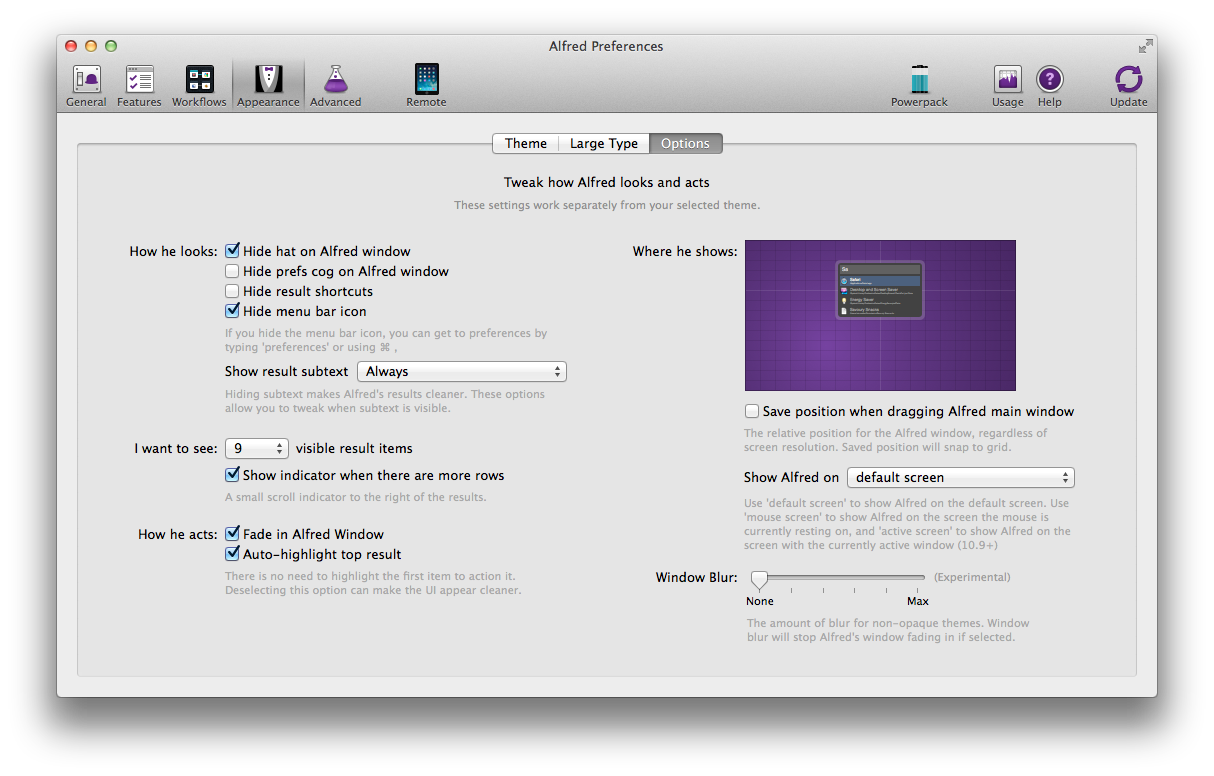
Configure Alfred
- Use Dark and Smooth theme
- Hide Hat and icon in menubar
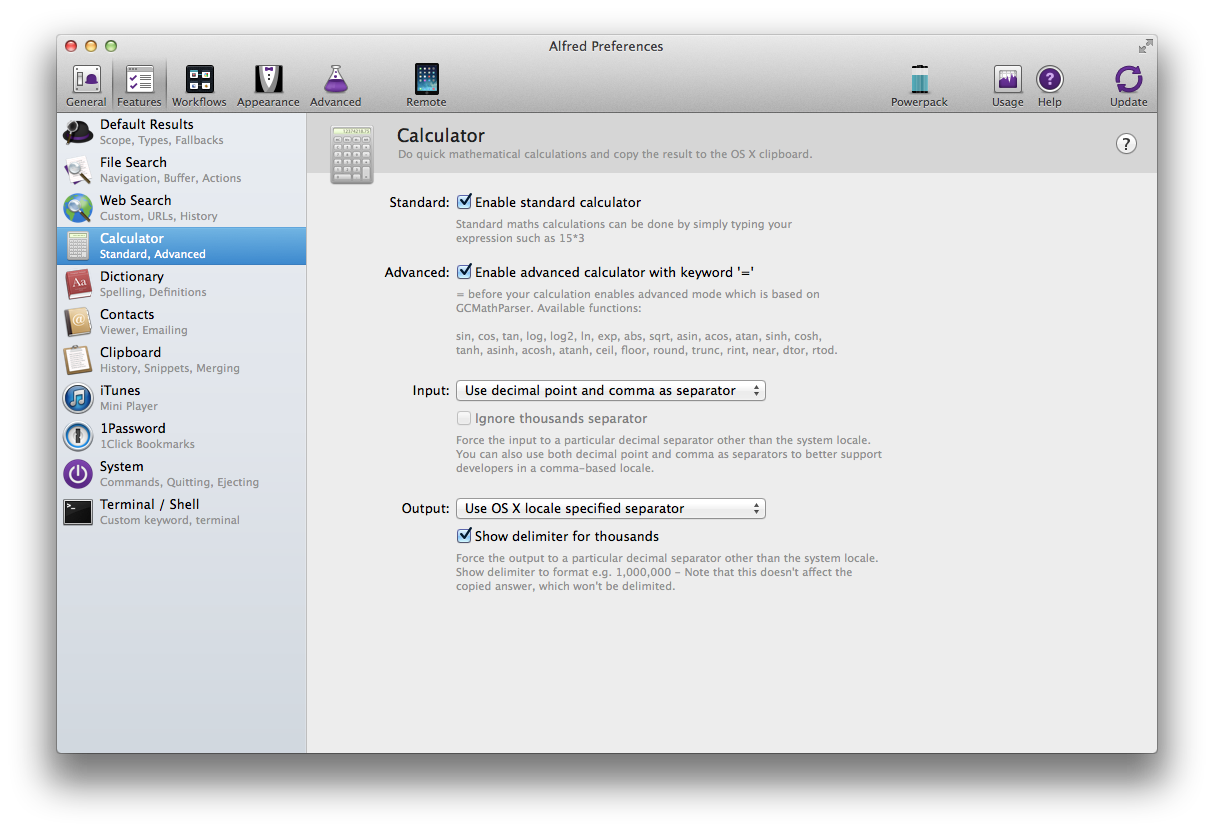
- Enable both “,” (comma) and “.” (dot) as decimal separator in calculator
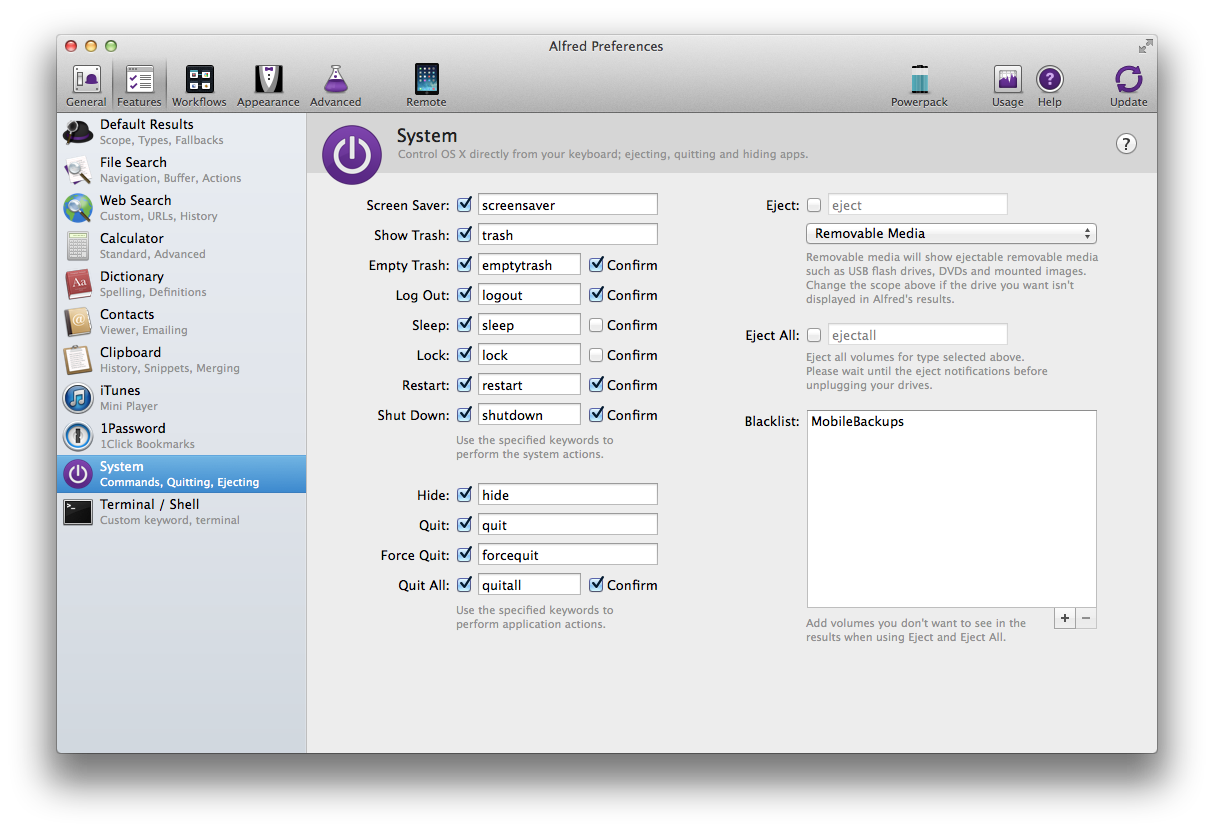
- Confirm shutdown etc
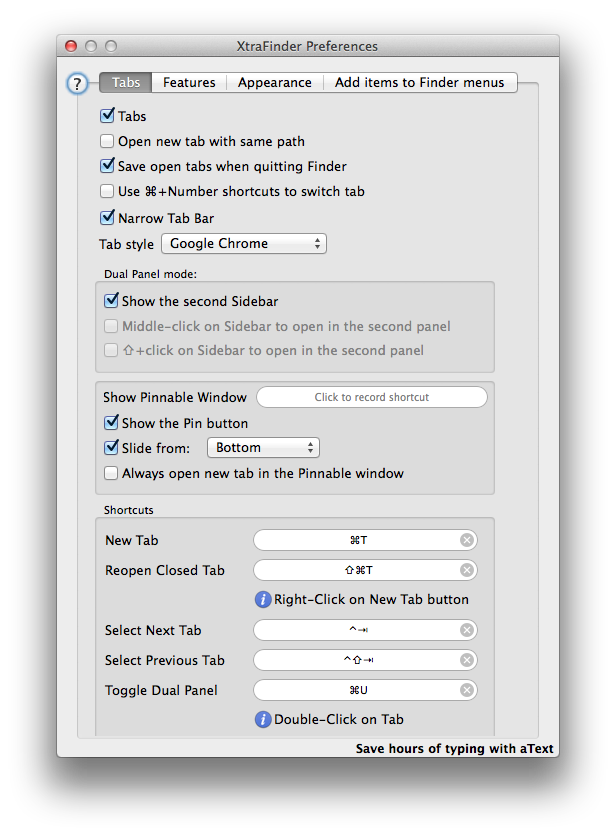
Configure XtraFinder
This is my favorite settings. It contains a couple of real nice gems. If you like them all, the easiest way to set things up is to simply import my XtraFinder_Settings.plist (found in the Mac subfolder). Should you prefer to set each setting manually you will find them all below.
Settings spotlight
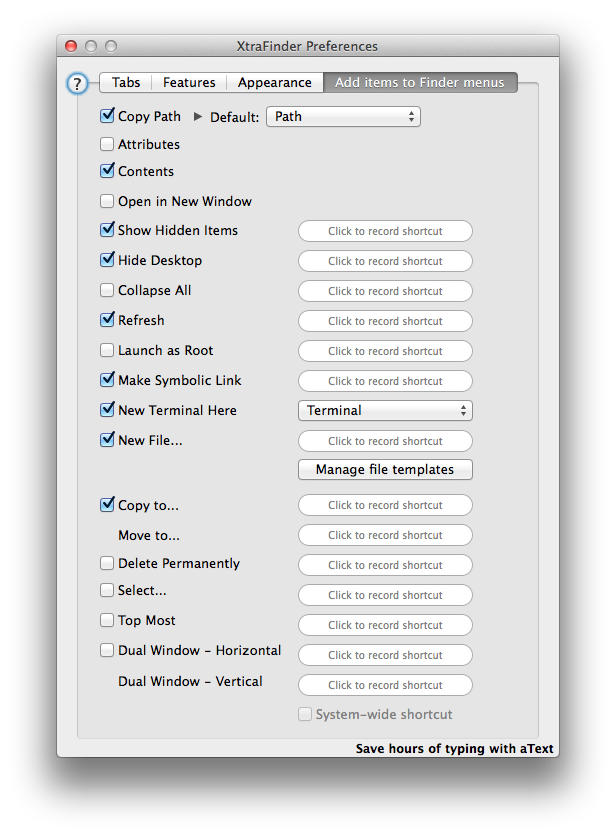
- Add a “New file” menu (like in Windows.. I knooow )
- Copy path (a real time saver)
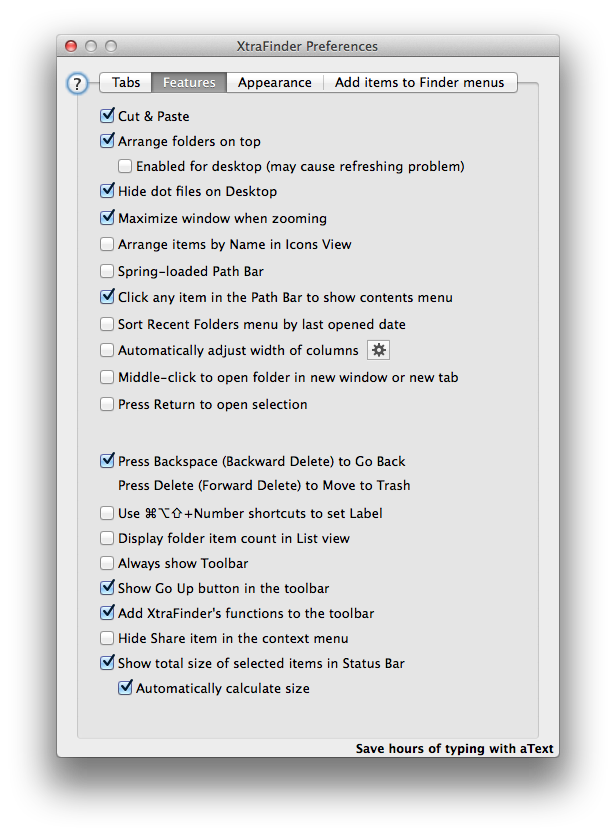
- Arrange folders on top (easier to find folders vs files)
- Use [Backspace] as “navigate backwards” (open previous location in history, as in some web browsers and in Windows)
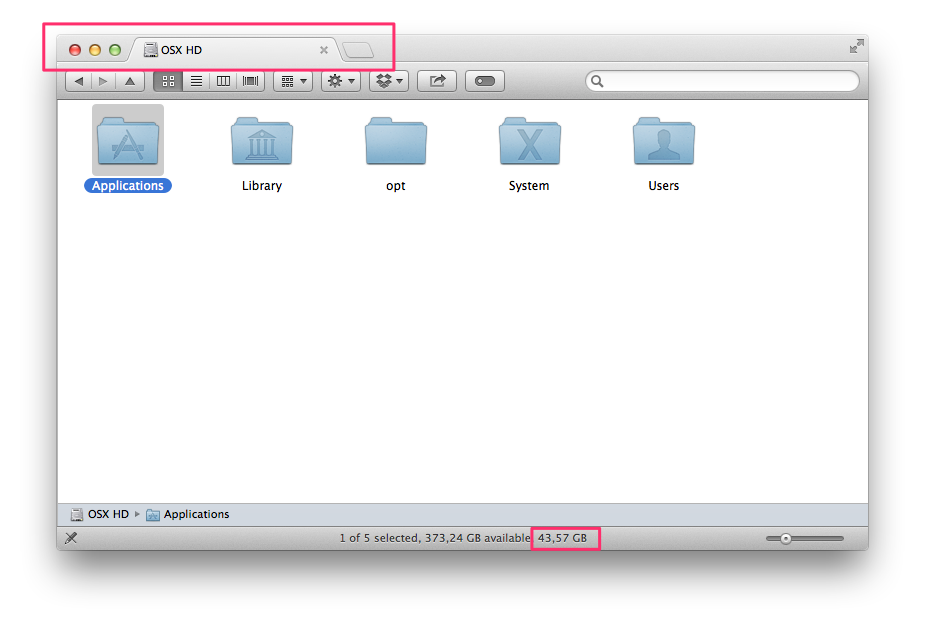
- Nice tabs (Chrome style), with possibility to show two folder side-by-side using ⌘+U (really handy! Norton Commander sort-of)
- Cut & Paste (as you used to from… like everywhere basically, but for some reason not the vanilla Mac OS X Finder for some reason… if you can Copy, you should be able to Cut as well)
- New terminal here, opens a terminal using the folder as current directory (handy if you’r using the terminal now and then)
- Copy/Move to.. (another time saver if you often copies or moves files to different locations)
- And some other useful settings not listed here, some of the default in XtraFinder
Nice tabs (Chrome style) and Folder size
New File-menu and New Terminal Here

Configuration
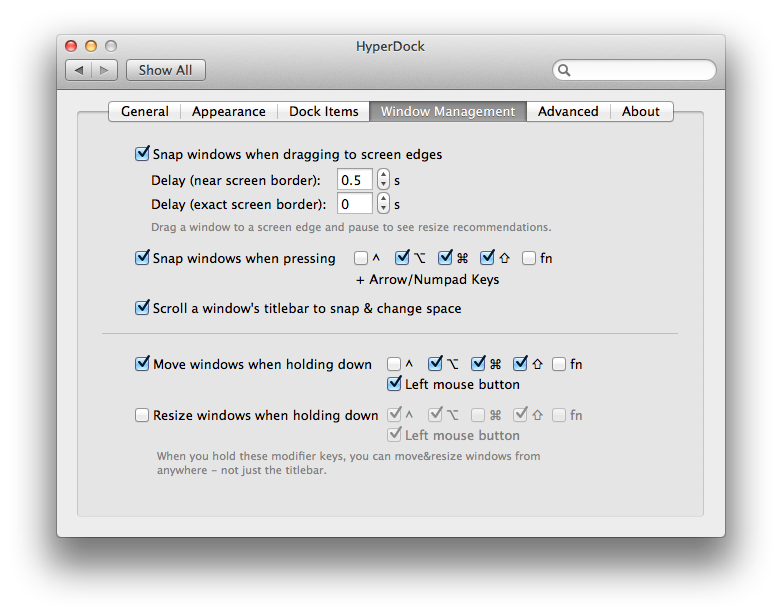
Configure HyperDock
Because of my keyboard layout the default settings doesn’t work optimally for me so I prefer the ⌘+Alt+Shift + Arrow Key combination.
Note: If you experience problems with HyperDock unexpectedly stops working after running for some time, try checking the “Upgrade to unstable versions”. That solved this issue for me.

Written by Mikael Levén