USING NANOKONTROL WITH OCTACTRACK via Arduino and MIDI USB Host Shield
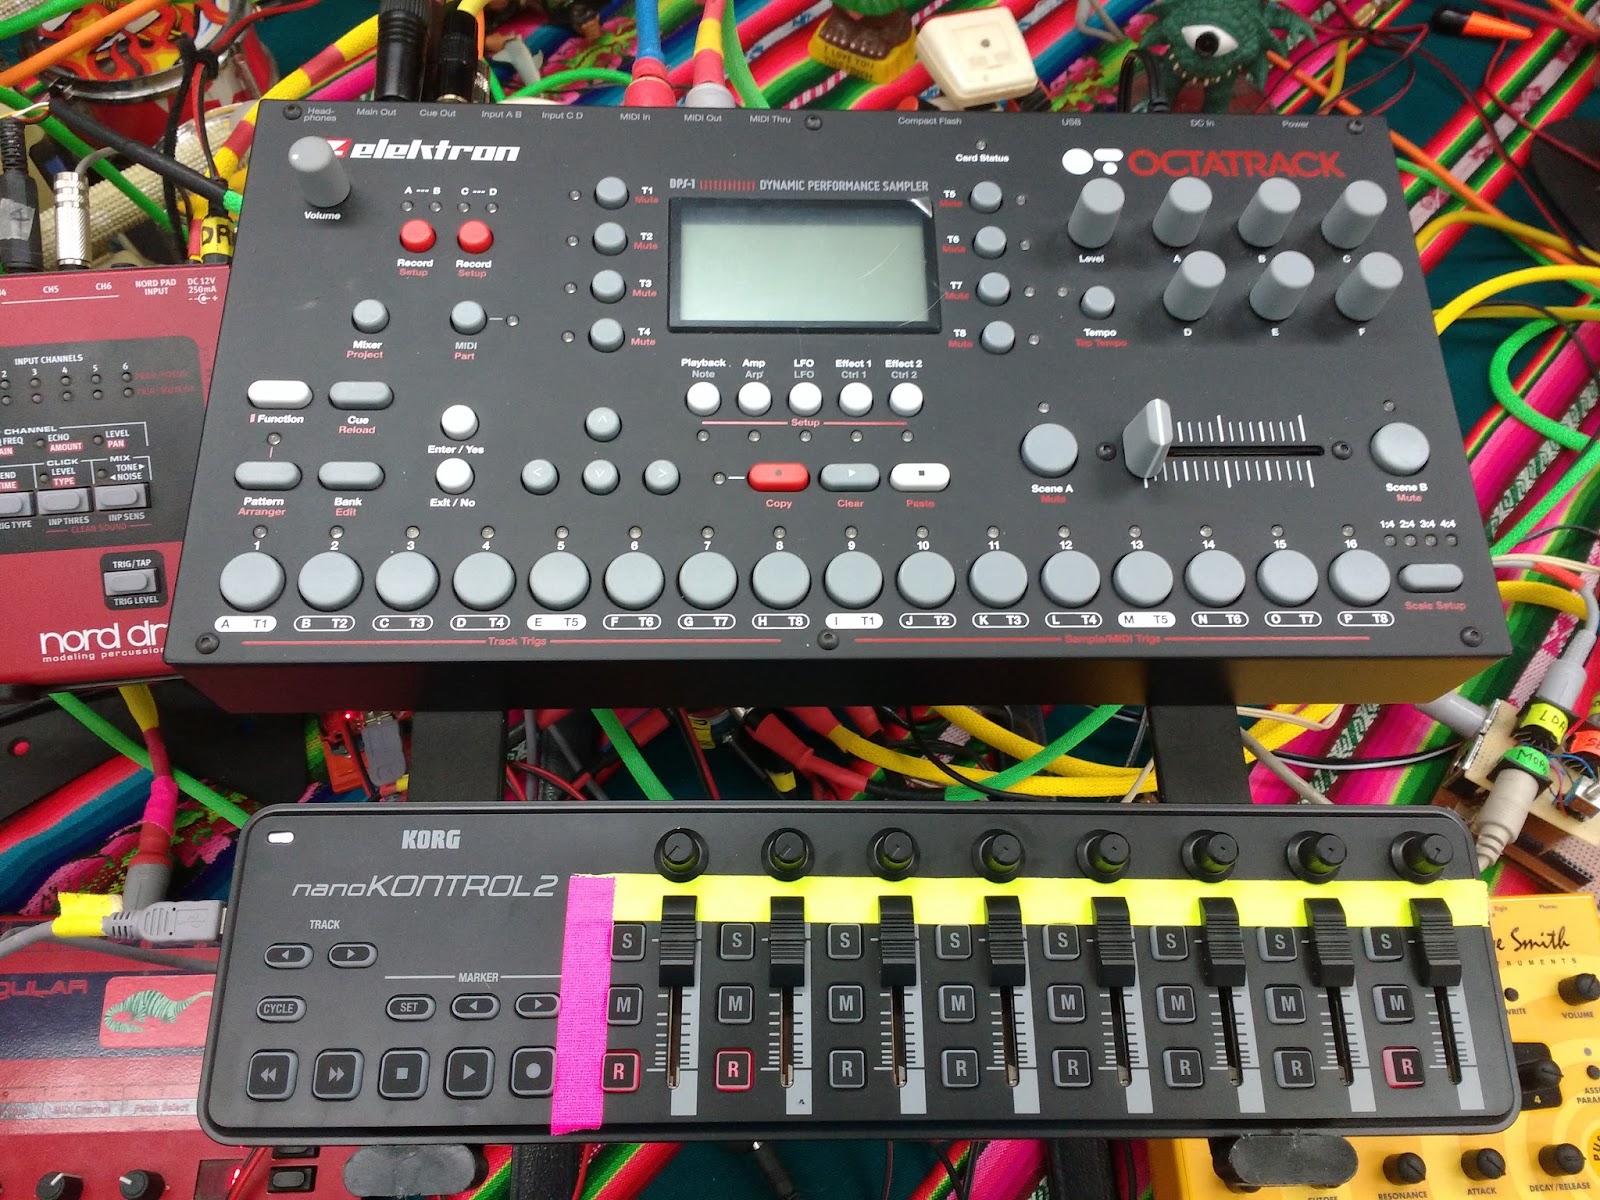
This tutorial will guide you to the process of connecting the Korg nanoKontrol to Octatrack without the need of a computer, thanks to arduino uno plus a USB host Shield.
This is possible thanks to Yuuichi Akagawa's USB MIDI class driver for Arduino USB Host Shield and this Collin's lab article for MAKE magazine
You will need:
- Of course, an Octatrack
- NanoKontrol V1 or V2 (both tested working)
- Arduino Uno (original, clon, counterfeit, whatever you can afford) and USB type B cable. It also works in older versions like Diecimila or Duemilanove.
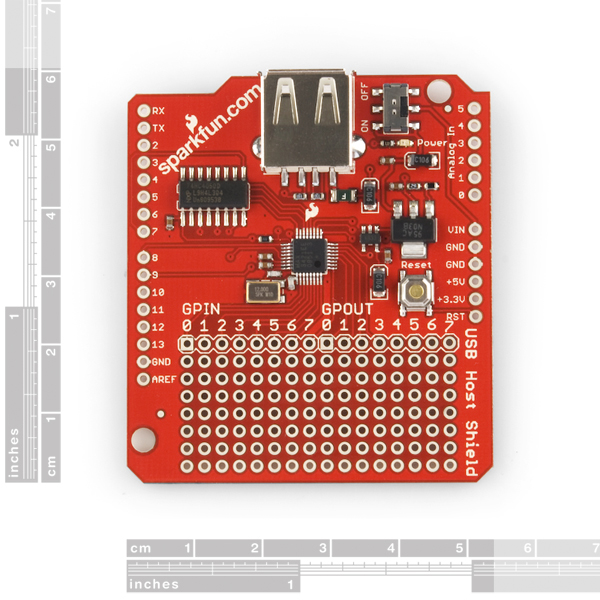
- Sparkfun USB Host shield (looks like other USB host shields work as well but this is the one I've tried) with its male headers already soldered.
- Midi Cable (Din 5)
- Mini (not micro) USB cable (for connecting nanoKontrol to USB host shield)
- 9 to 12V power supply (at least 800mA) for the Arduino.
- 220ohm resistor (¼ or ⅛ Watt) x 2
- Din 5 Female connector for PCB
- Soldering Iron, solder and pliers
Two things to consider:
- I've been using this setup with a nanoKey and a mopho desktop synth for 3 or 4 years. Recently I borrowed a nanoKontrol to try the same setup with my octatrack and worked as well with no hardware or software changes. Since I started using the arduino and USB host shield, everything was updated (Akagawa's library and Arduino IDE). But I haven't tried the last releases yet. So, I will show you the way I can assure that works. In the meantime, if anyone tries the last versions and succeed, please let me now.
- This is not an intensive tutorial. It assumes you know (for example) how to read schematics, install an arduino library, upload code to the board or even solder. If you don't, feel free to search for specific tutorials on the Internet.
- First of all, download and install Arduino 1.0.5
- Download and unzip the libraries we need into the Libraries folder (inside Arduino Folder). Here's a tutorial in case you need it
- Open the Arduino IDE
- Open the USB_MIDI_converter file, following this path:
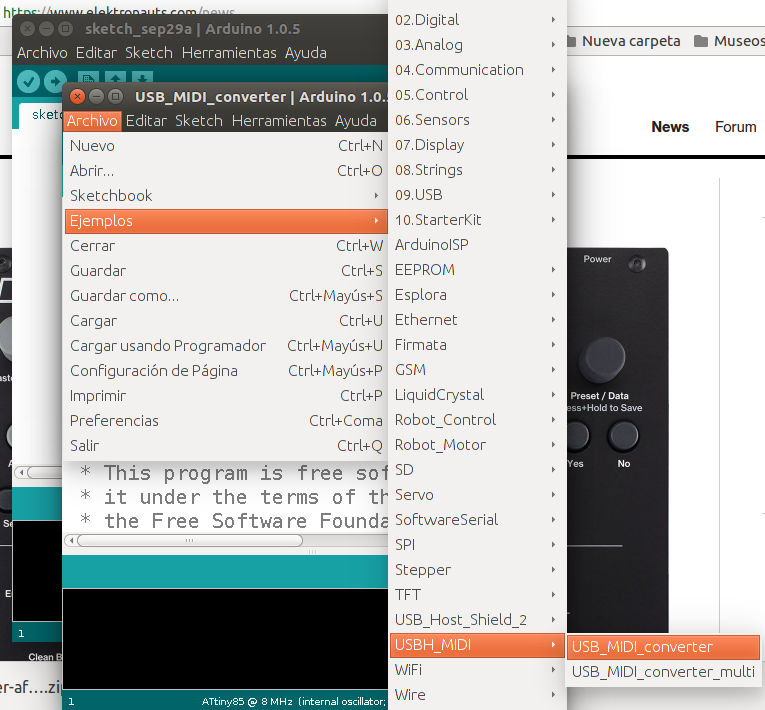
If you can't find the file, it's because you didn't install the libraries correctly. Go a step back and try again!
5) Connect the Arduino Uno to a USB port, select the right port and board in the “Tools” section and upload the sketch to the board (using the button with the arrow). If you need help doing this, you can read Adafruit's Lesson 0 and 1 on Arduino:
https://learn.adafruit.com/lesson-0-getting-started
https://learn.adafruit.com/adafruit-arduino-lesson-1-blink
f you get an error message, you can look for possible solutions in here:
https://www.arduino.cc/en/Guide/Troubleshooting
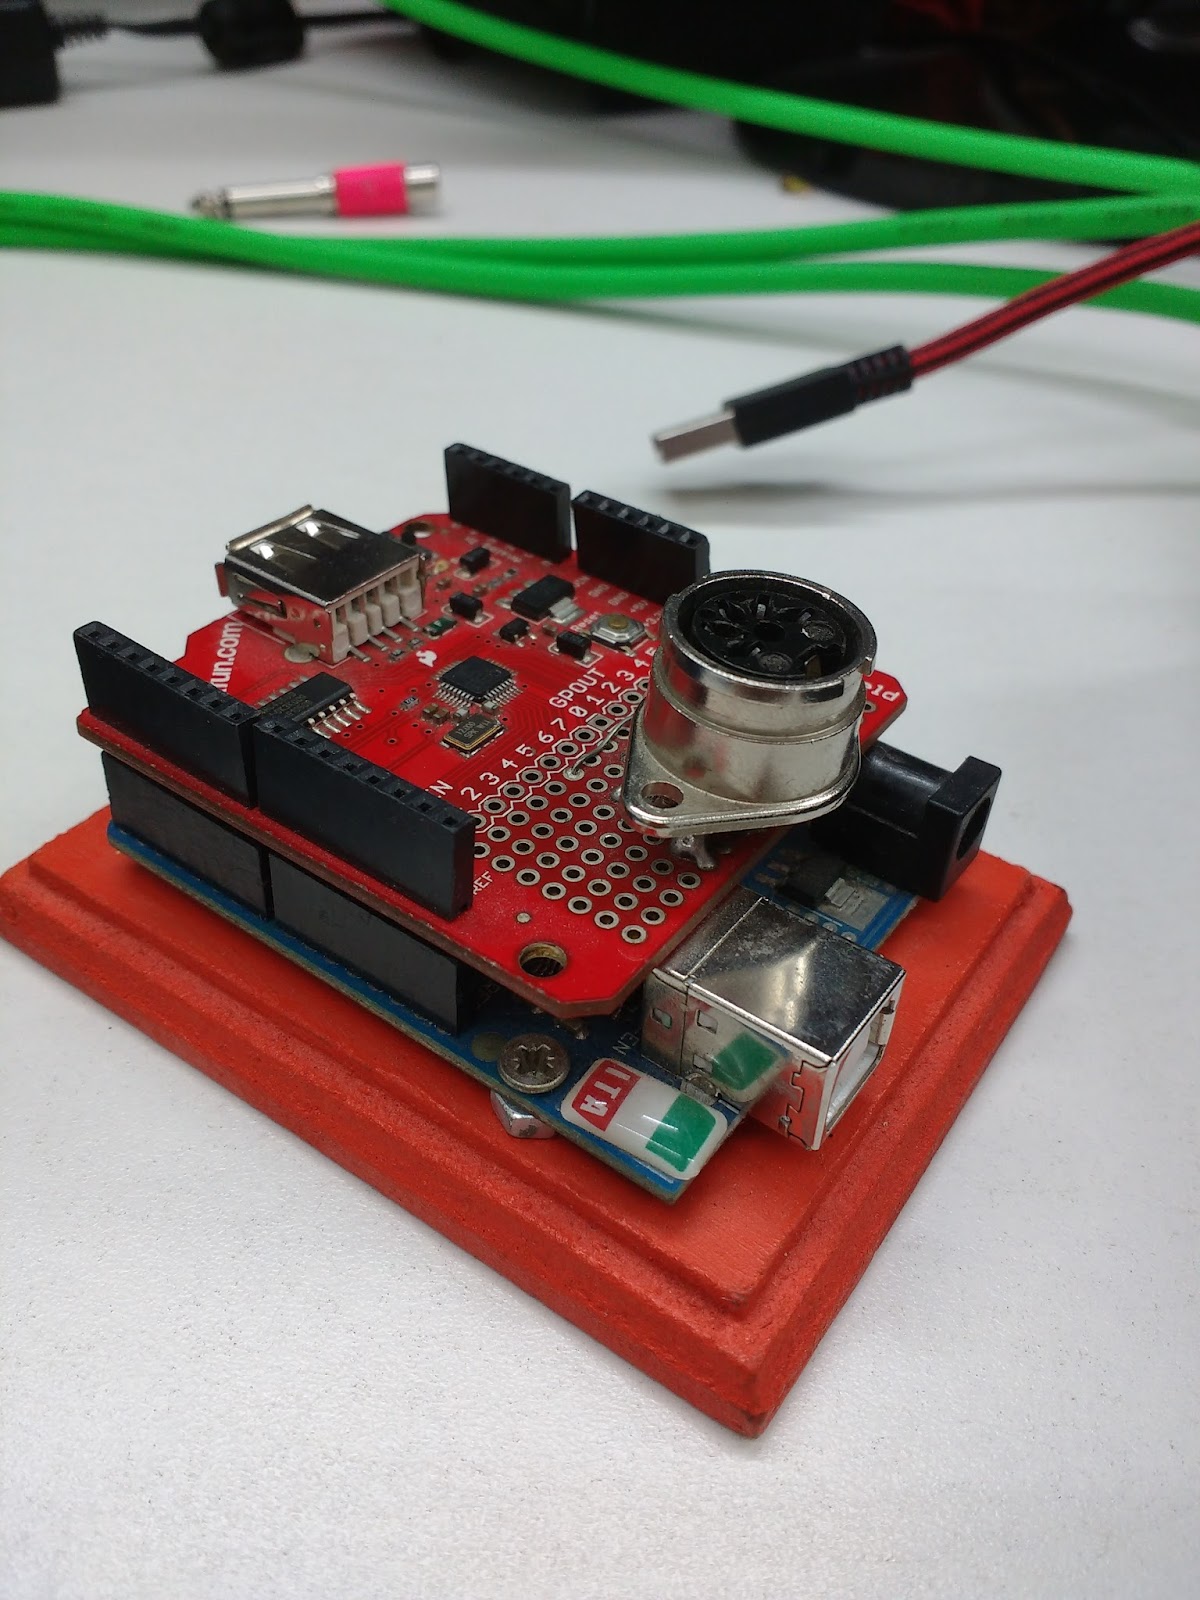
6) In the next step, you should prepare the MIDI Out port. There's plenty of space to solder it in the USB host shield. Here, you'll need the two 200ohm resistors, the MIDI Female connector, soldering iron, solder and pliers. If you never soldered before, here's a tutorial
The pin use to write serial data (MIDI is a type of serial data) in Arduino is labeled TX. It is very simple to assemble:
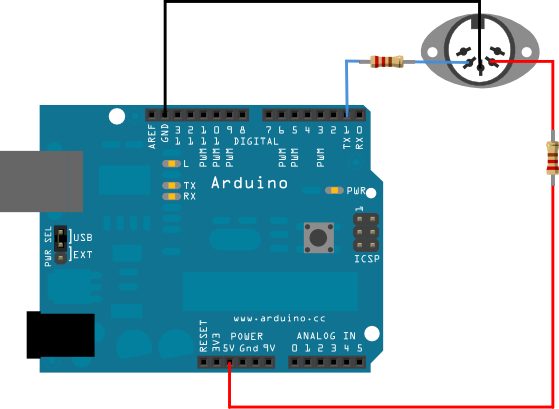
In the graphic, you see the midi jack attached directly to the arduino board. Just remember to do it in the USB Host shield. Mine looks like this:
7) We're almost done. Now you should use the Korg Kontrol software to assign the different CC messages to nanoKontrol. My template looks like this:
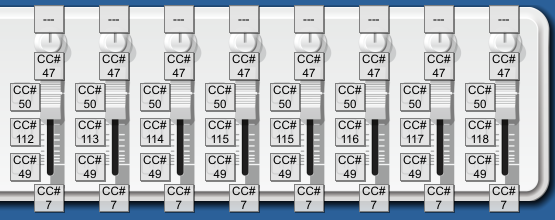
Each of the 8 columns is assigned to a MIDI channel from 1 to 8. Silders control level (main volume of each track), potentiometers control CUE level (I´m using it as an FX send). Buttons labeled R mute and unmute each audio track. Buttons labeled M activate or deactivate each MIDI track and buttons labeled S are used to SOLO audio tracks 1 to 8. You can use whatever combination you want but if you want to try this one right away, download the template here and upload it to your nanoKontrol2 using the Kontrol software.
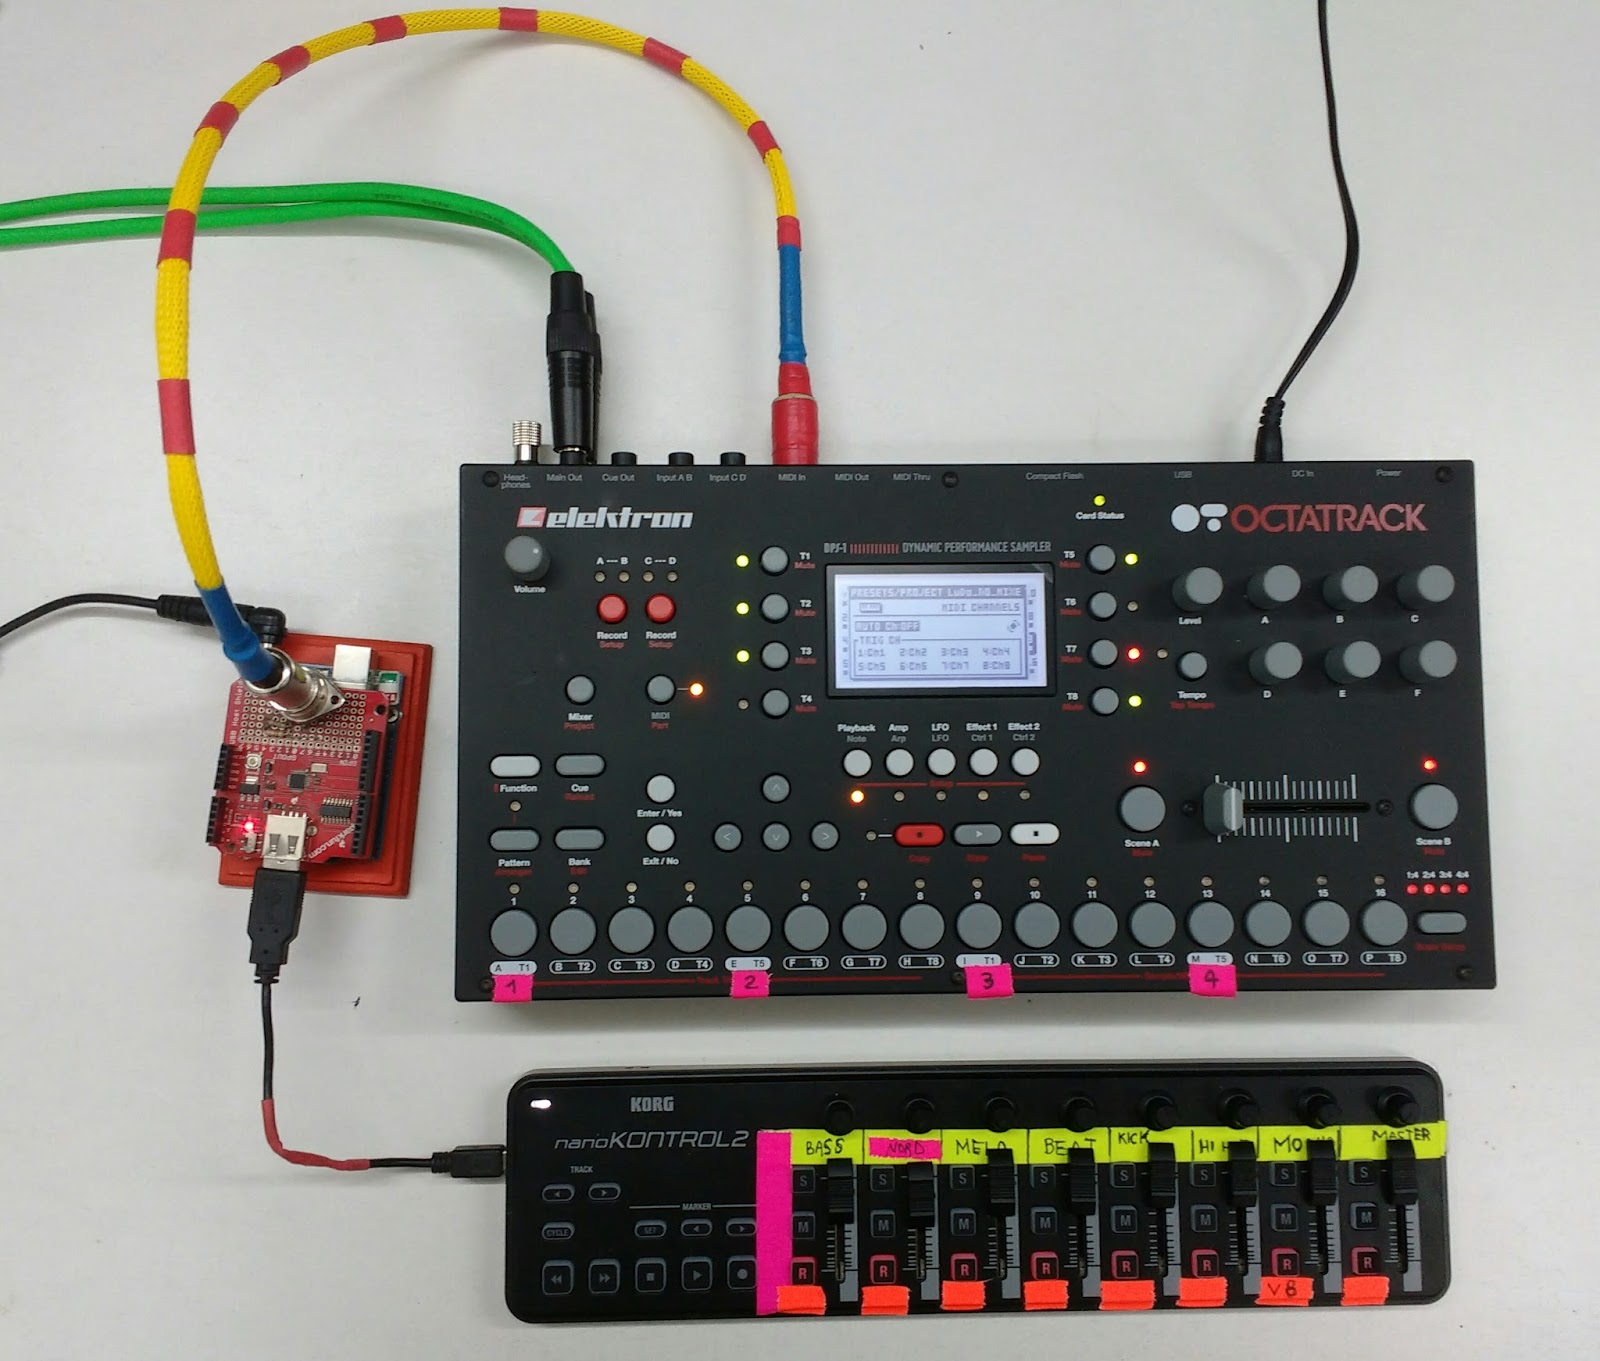
8) Connect everything!:
- nanoKontrol to USB host shield using miniUSB cable
- USB Host shield MIDI Out to Octatrack MIDI In
- 9/12 Volt and 800mA (or more) power supply to Arduino
- Of courser, Octatrack Power Supply and Audio out.
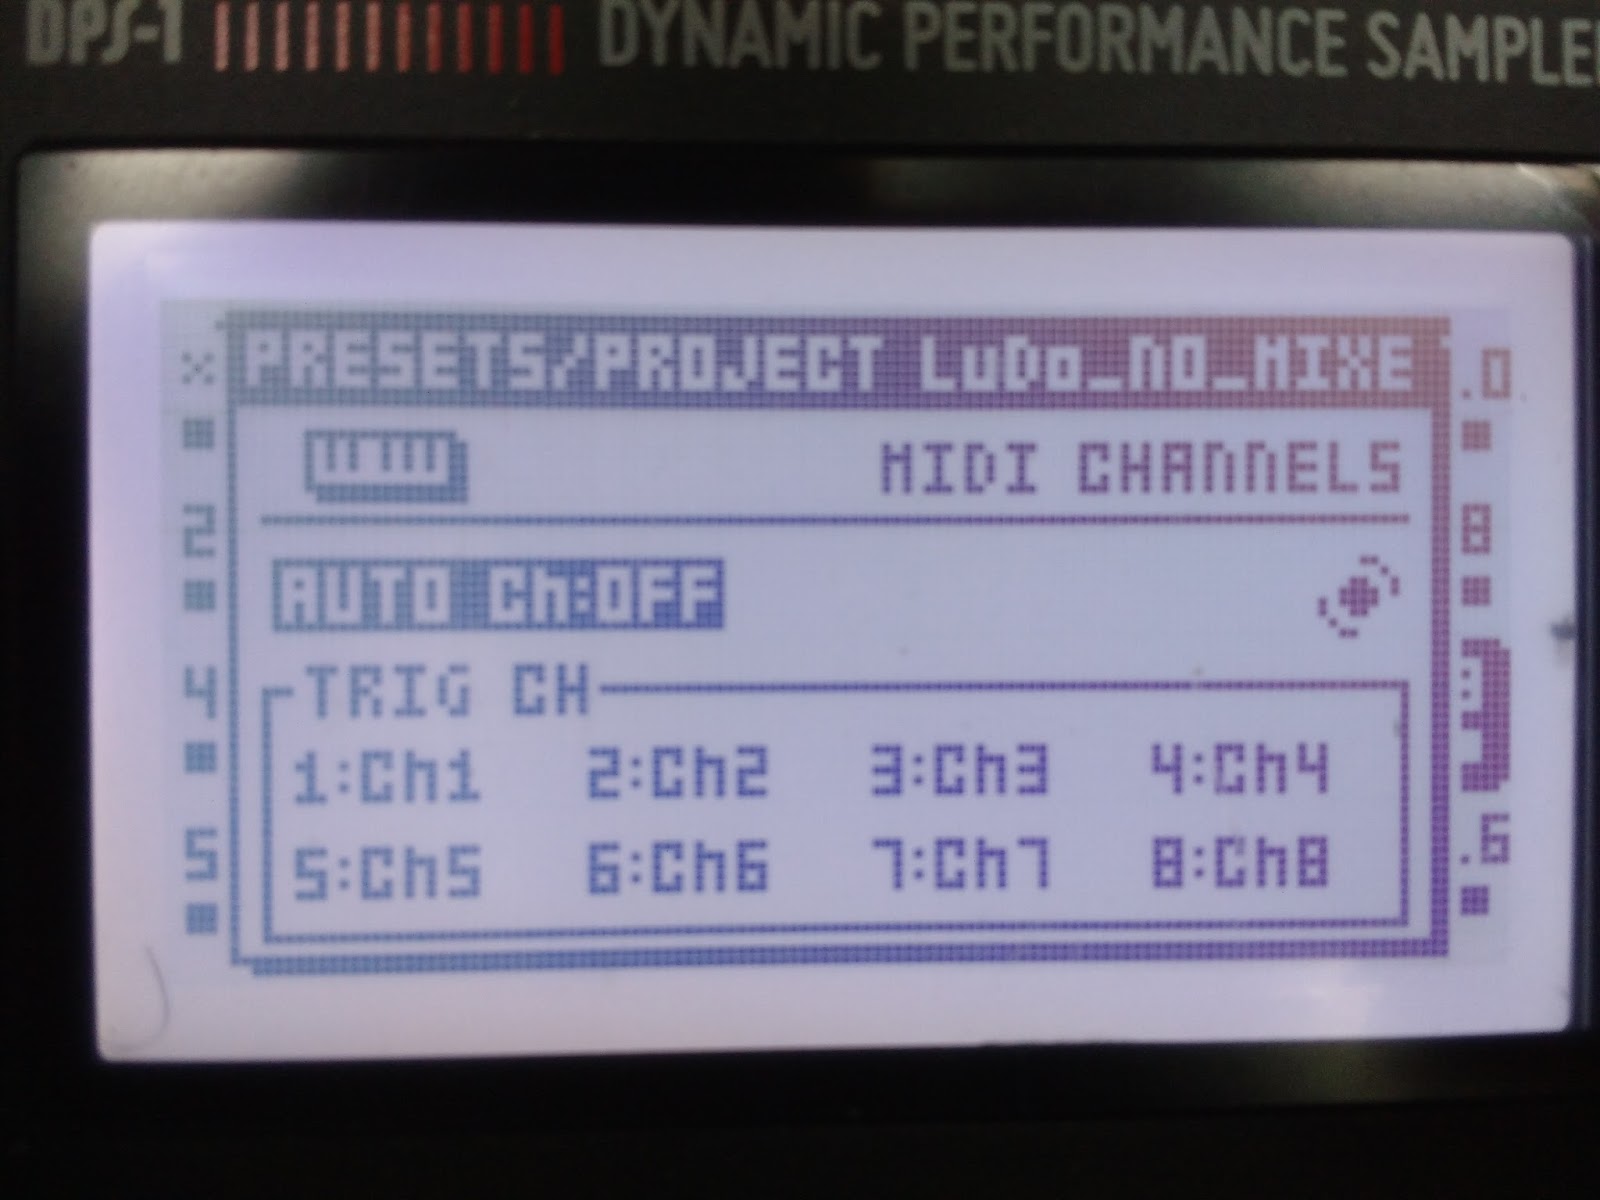
Be sure that you have 1 to 8 MIDI channels assigned to tracks ond the MIDI menu:
9) It should be working by now! Hope you had luck! If you want to use your own template, remember to follow the MIDI implementation chart in the Octratrack Manual.
If it doesn't work, comment on the post about nanoKontrol and Octatrack and i'll try to help you out.
Jorge
http://www.jcrowe.xyz/