Creating A Bootable USB Device On Linux Mint 11
Version 1.0
Author: Christian Schmalfeld <c [dot] schmalfeld [at] projektfarm[dot] de>
This tutorial will show you how to make your USB hard disk device a bootable Linux system.
1 Preliminary Note
Linux Mint 11 needs about 4.7 gigabyte of free space on your hard drive, so make sure your device has at least that much space available. I am using an 8 gigabyte stick which is enough to install Mint on it and additionally have some space left to save data. In my case, I will install Linux Mint 11 on my USB device, but it should work similarly with other systems. To create a bootable disk, you need either an iso-image of the desired Linux system or a real Linux DVD.
2 Formatting And Installing
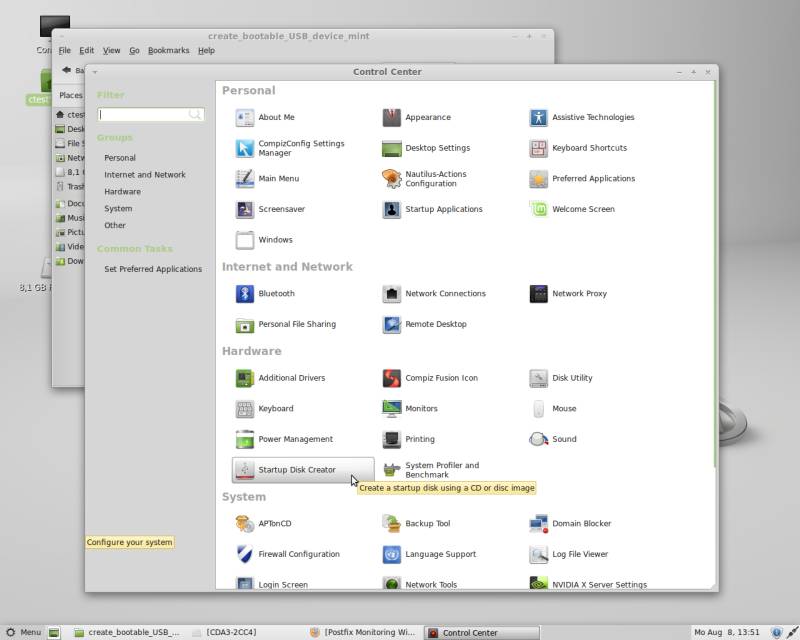
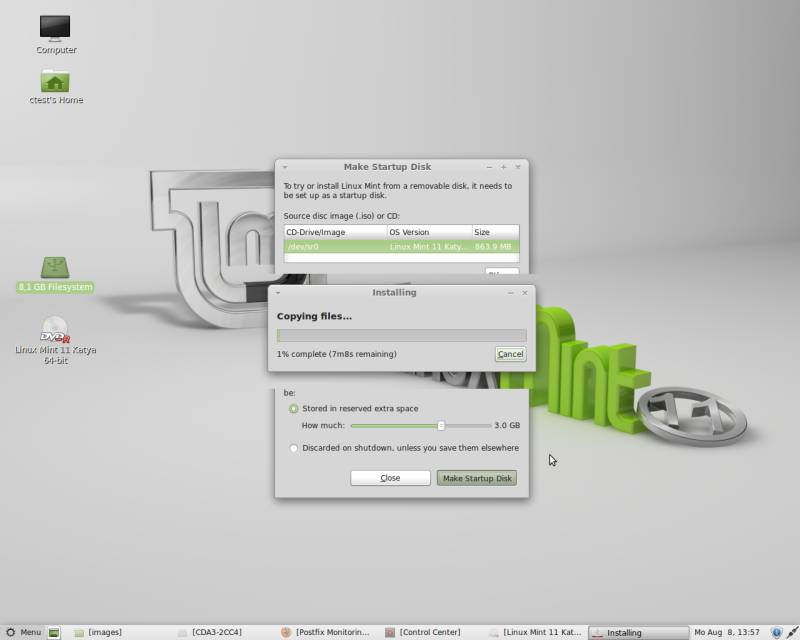
The first thing to do is to open the Control Center in the main menu. On the Hardware group, you will find an application called Startup Disk Creator, which you need to open. Once klicked, a new window will come up.
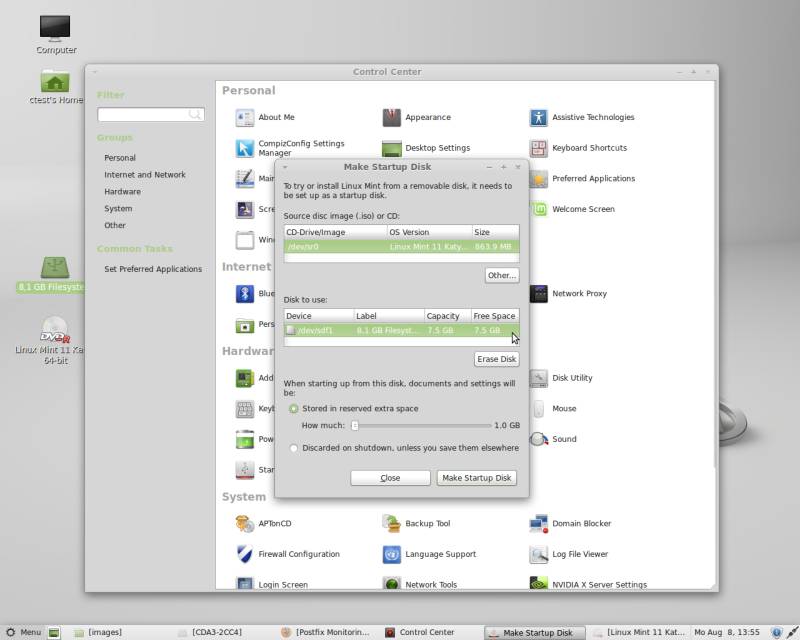
You are now asked to insert the boot disk which shall be written on your USB device. You can now either enter a disk in your disk drive oder browse through your system to find an iso image of a Linux Mint boot DVD. The second step is to select the device which the image will then be written on. Enter a USB device with a recommended minimum capacity of 8 gigabyte and select it as Disc to use if not autoselected.
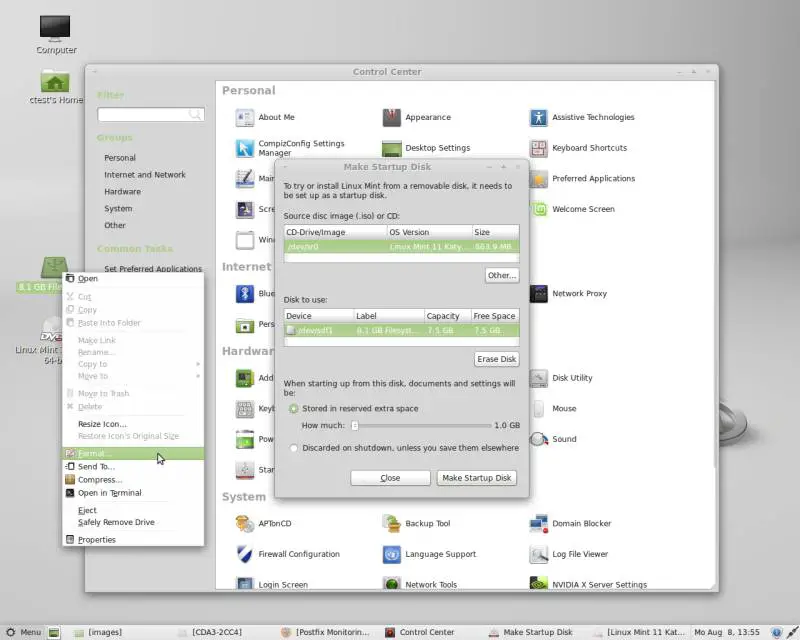
The device you will be using as boot device should be erased before writing the image onto it if there is not enough space left. Therefore, either right-click it on your desktop, select Format... and confirm by clicking Format again, or stay in the Startup Disk Creator window and klick on Erase Disk.
Select the amount of space used on the system to be installed to store own documents and settings then.
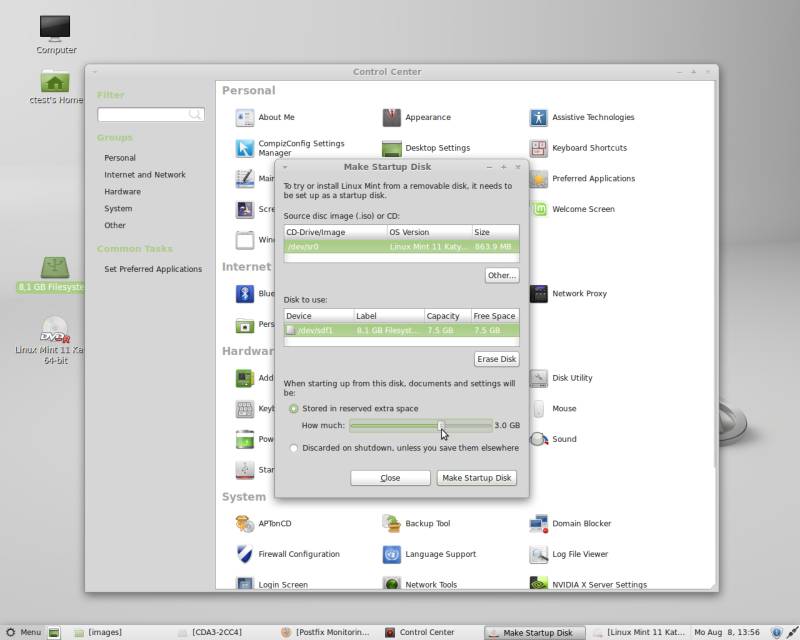
Confirm by clicking on Make Startup Disk and the installation should begin. If an error occurs, try to reboot your computer, reinsert and format your USB device again.
After the installation is done you first need to change the syslinux.cfg file of the newly installed system. Therefore, browse the USB device and find the syslinux folder. Open the contained syslinux.cfg with a texteditor of your choice.
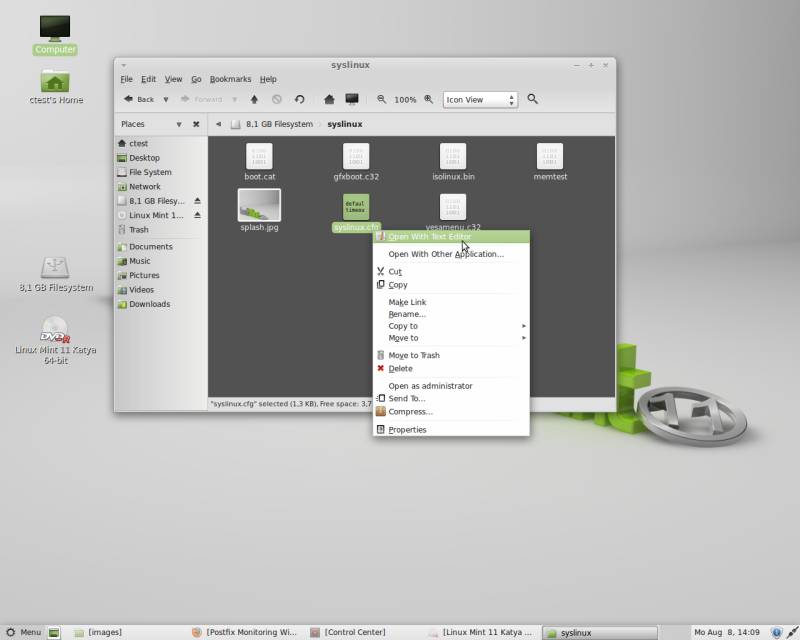
The first line of the document should say:
default vesamenu.c32
[...]
Before you boot from the USB device, it is recommendable to change this first line into
default live
[...]
In case you forget to do this, on startup you will be shown this error message:
vesamenu.c32: not a COM32R image
boot:
If this error occurs (you need to edit other settings however before you can actually boot from the USB device), you can do manually what the computer would have done automatically after editing the syslinux.cfg file. Just hit the TAB key and enter live. The system should then reboot normally.
3 Booting Your USB Device
To make your computer actually boot from your USB device, you first need to enter BIOS and change the boot device settings. For this, reboot your computer and hit the Del key when told so to enter the settings. On most systems you can just continuously hit the key during the boot process, some do not even show the message to do so.
Once you entered BIOS you need no look for the boot options, which are in the Advanced Setupsection for me. In there, you first need to change the primary hard disk drive to boot from (not the primary boot drive yet). Your current hard drive should be set as primary hard disk drive for the moment. Select that by using your BIOS' key input instructions and change it to the bootable USB device which must be plugged into the computer to be listed here.
Now that you have done that, the entry that contains your hard disk to boot from under boot settings should automatically have changed into your USB device's name. If not, select it manually.
Notice that if your hard disk drive is not selected as primary boot device you have to eject all disks that would be booted before your USB device, such as the Linux Mint installation disk which you used to create your booting device. Having finished this step, press the key to save your BIOS settings (F10 for me) and leave the BIOS by confirming the upcoming dialogue.
Your system should now boot from your stick instead with your computers hard drive. You can now create and save files on your USB device just as on a normal computer's hard drive since you have reserved space during the process of configuration.
4 Undo Changes
If you do not want to have the operating system on your USB device any longer, you can just format or erase it as you have done before the installation.
To boot normally from your computer's hard drive again, enter BIOS again just like you have done before and select your computer's hard drive as your primary hard drive. If your boot settings do not apply automatically, select your computer's hard drive as primary, secondary or tertiary boot device, depending on which devices should be checked first before booting from your hard drive (e.g. operating systems which are installed from DVDs. Your computer only boots from disks if they are configured as bootable disks. It will not boot from game disks etc.).
It is recommended to have your CD/DVD drive as primary boot device, followed by your hard drive as secondary boot device. Save your settings and confirm to leave BIOS. Your computer should reboot from its hard drive as before now.

