- make handmade, crochet, craft
- make handmade, crochet, craft
- Contact usRSS
tutorial
Tags Cloud
- crochet
- craft
- handmade
- make handmade
- craft handmade
- tutorial
- crochet pattern
- sewing
- embroidery
- Katie Holmes
- Cindy Anthony
- The Bachelorette
- knitting
- Steven Tyler
- gift
- Casey Anthony trial
- Victoria Beckham
- knitting pattern
- Bead
- Natalie Portman
Friend
Featured Post
 Crochet so cute baby dress for summer
 Embroidery sewing: 5, 4, 3, 2, 1 with Diane Gilleland
 Beautiful bolero for women, free crochet pattern
 Knitting pretty vest for ladies
 Crochet beauty lace sun dress for baby
  Crochet beauty ruffled jacket and cardigan
 Cute summer top for ladies, crochet pattern
 Crochet fashion for girls with triangles
New Post
- Knitting a beautiful pullover
- Pullover with embossed pattern
- Pullover with a beautiful pattern
- Diagonal Pullover
- Cute cabble Pullover
- Knitted Skirt with pockets
- Knitting cute long pullover
- Pullover poncho knitting
Popular Post

Style HaNi design: dress for beach
Figure knitting braids

Crafts for Spring : colorful hat, crochet pattern
If you want to have any crochet products and translate patterns to English , please order, you can see more products in my shop. Thanks. Crochet

Ornament craft: cute motif crochet
Ornament craft: cute motif crochet Crochet rabbit patterns Crochet fish patterns Crochet butterfly patterns Crochet snail patterns Crochet duckling patterns Crochet ladybug patterns Crochet flowers patterns Crochet apple patterns Crochet cupcakes patterns Crochet owl hair

Animal Scarf Crochet Patterns, OOAK Animal Scarves
Animal Scarf Crochet Patterns, OOAK Animal Scarves Cat Cuddler Scarf - Animal Pet Warm DIY Fashion Tutorial Winter Fall Autumn The Cat Cuddler Scarf Pattern. This pattern is

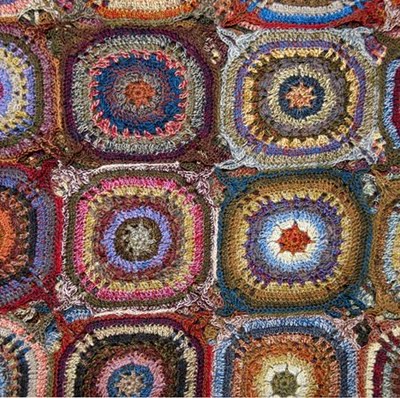
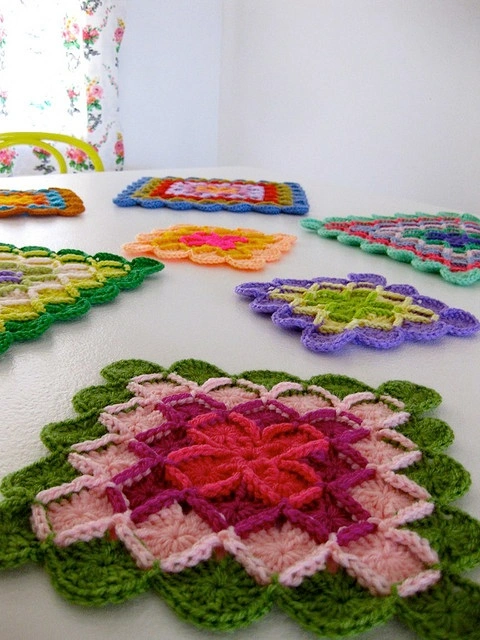
African Flower / Paperweight Granny: free crochet patterns
This is the first time I come across African Flower… well, accurately speaking, this is the first time I know that this crochet block
Art crochet

Beautiful lace bolero, free crochet patterns
Beautiful lace bolero, free crochet patterns In its pages, you'll find fabulous crochet patterns and helpful articles that support its. Lace Bolero is beautiful, and the

Recycling ideas: basket out of nilon bag
Recycling ideas: basket out of nilon bag Material - Plastic bags- Scissors, needles, Instruction: Step 1: - Cut off the bottom of the handle of bags. Step 2: - Cut cross from

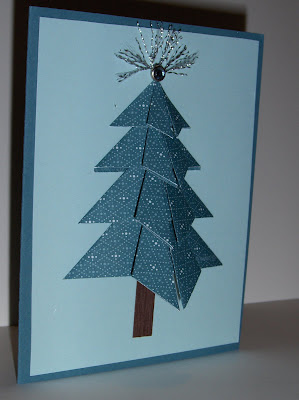
Christmas craft ideas: paper Christmas tree tutorial
Herringbone in the tree Christmas craft ideas: paper Christmas tree tutorial 1. This Christmas tree came up with a simplified three-dimensional. It can be used independently as a souvenir,

Amirugumi crochet
Author's Toy Natalia Olshinoy not survive if get lost What talent, what realistic fur, how lovely, just no words! We will need: Yarns of beige and black colors;
Baby blanket, Wool-Eater Instructions (free crochet patterns)
Baby Afghans Find the perfect free simple crochet baby afghan in this ... Watch these great crochet video tutorials for amazing step by step instructions. .... Crocheted Wool Eater Blanket By connecting crocheted flowery patches,

Christmas paper snowflake tutorial
Snowflake flower tutorial This snowflake is easy to do with the children. Will need: Paper, A4 or A5, scissors, glue and a New Year mood. 1. A4 sheet

Fashion gifts for women: Lace purple top, free crochet patterns
Fashion gifts for women: Lace purple top, free crochet patterns Free, online women's shirts and tops crochet patterns. Make your own warm-weather clothing with this collection

Valentine photo cards
valentine photo cards: Handmade Valentine card, quilled quilling, personalized message Quilled Valentine's card, sheep, handmade, quilling, I love ewe Paper quilling card, quilled flowers, handmade Handmade 18th birthday card,
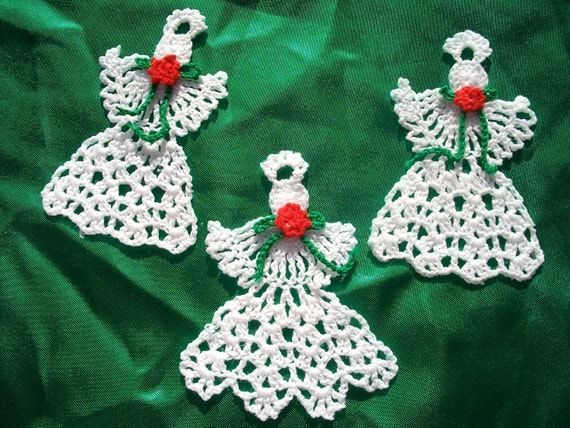
Personalized photo christmas ornaments
Santa Face Ornaments Beaded Crochet Icicles (purple) Crocheted Red Flower Crosses Trio of Beautiful Christmas Angels Crocheted Red Poinsettia Baskets Victorian Ornament Collection (Perfume Bottles) Beautiful Lacy Stocking Ornaments Beautiful Sapphire Bead
Christmas candlestick: Crochet Votive Tutorial
Candles, Crochet, tutorial | October 3rd 2011 |
Christmas candlestick: Crochet Votive Tutorial
Abbreviations I use:
CH: chain
DC: double crochet
SS: slip stitch
SP: space
SC: single crochet

CH in multiples of 4 that fits snugly around your jar. Snug is better than loose so that it fits well and isn’t sloppy looking.

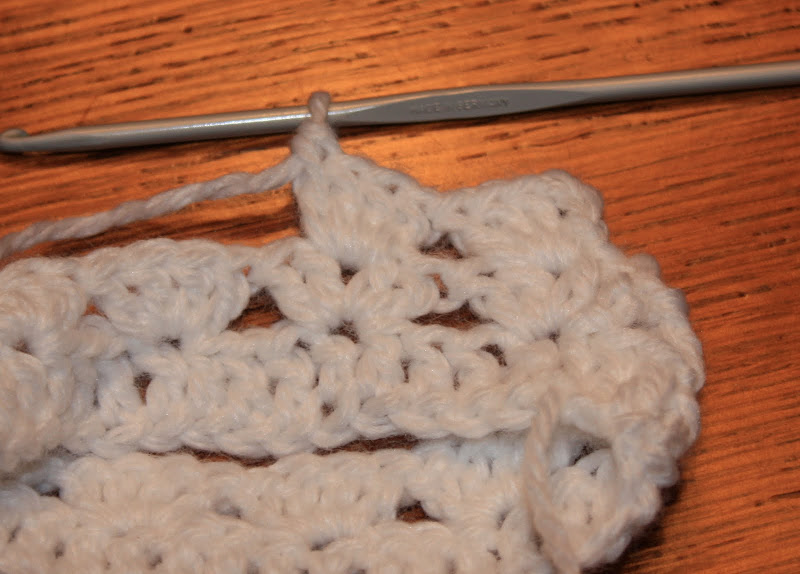
Join to create a loop, trying not to twist it. I have twisted many and frankly you will never notice, so don’t sweat it. Now CH 3. This is your first DC. DC in every stitch of your chain. (see photo above) When you reach the first CH 3, join with a SS. This is your foundation round.

CH3. This is your first DC of a 4 DC cluster. 3 DC in the same stitch next to the CH3. This completes one cluster. Skip 3 SP.
The above photo shows the cluster of:
*4 DC… 3 skipped stitches….4DC…3 skipped stitches* repeat to end of round.
Join with a SS to the top of the first DC (which was really a CH3) when you complete the round.
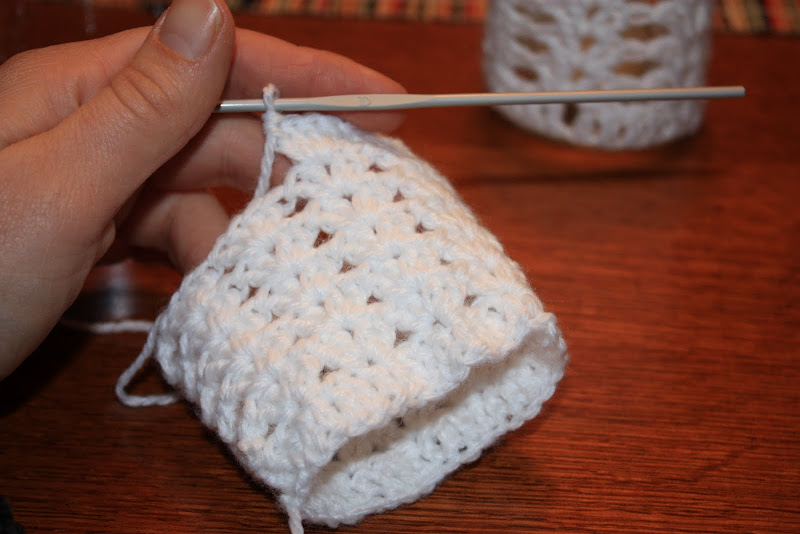
SS across the next stitch. Now SC in the middle of the 4DC. CH2 (this is your first DC of the next 4 DC cluster). DC3 more in the same stitch. Skip to the next cluster …4 DC in the middle of every cluster… all the way around. SS to the top of the first DC. Continue in this manner, around and around.
Occasionally, check how it is fitting by slipping it over your jar.


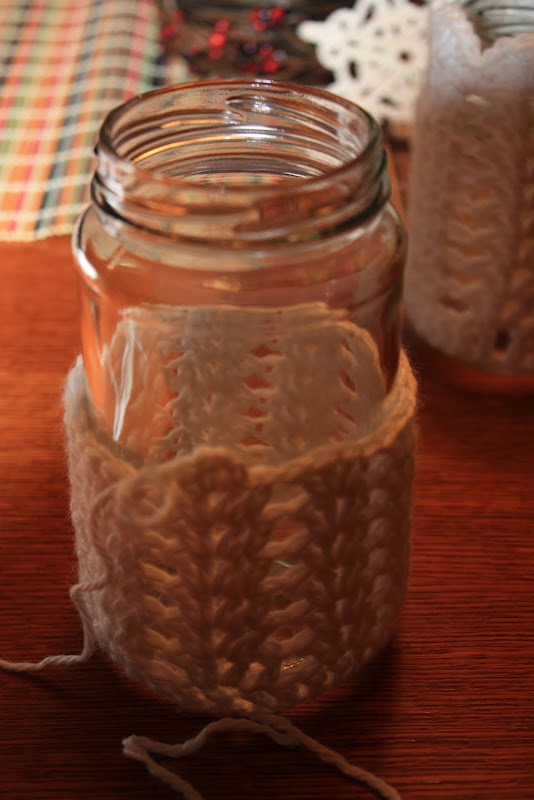
Once you reach the top of the jar, continue to slip it over the jar to check the size. Make sure the bottom is touching the table and not pulled up too high.
Once you feel it close to the right size, factor in a finishing row. I like to create a scalloped top.

Instead of 4DC in every cluster, do 6 DC and 1SC in the space between. The 1SC pulled the sides down to create a scallop. (see above) Continue around. Join with a slip stitch to the first scallop.
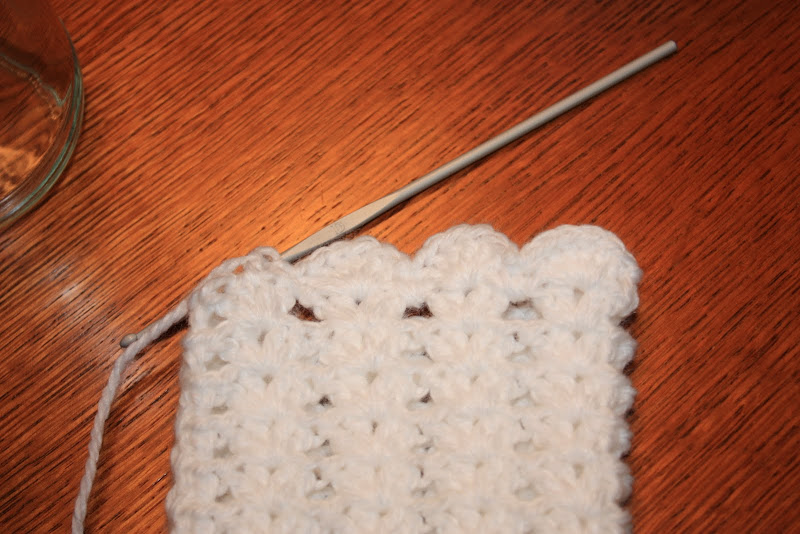

Once you reach the end of the scallop top round, finish off and weave in the yarn from the beginning and the end.
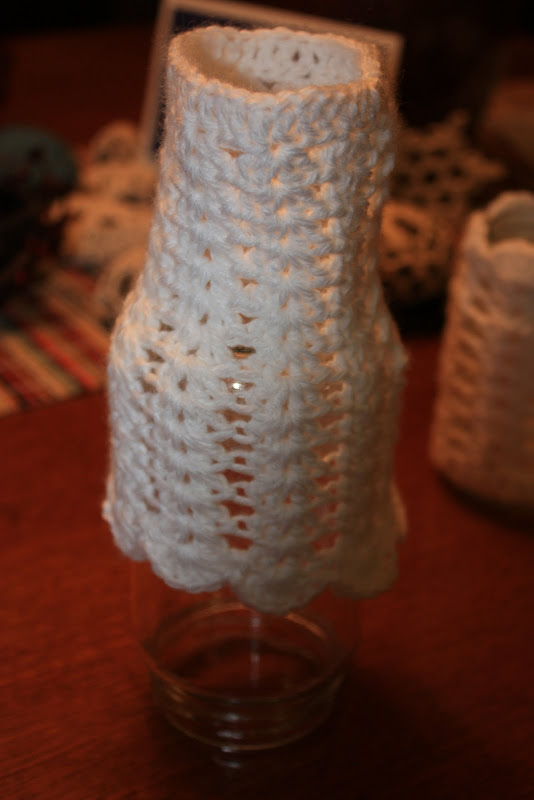
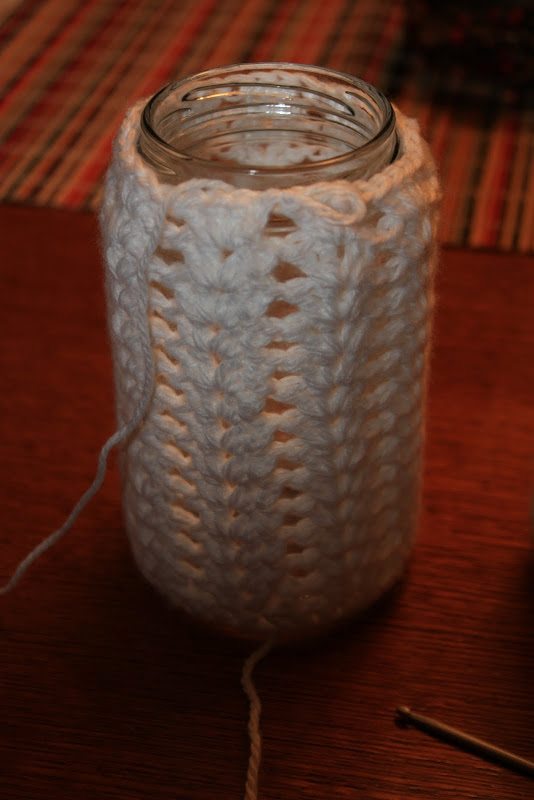
Pull it over your jar…as you can see, it fits snugly.

I use tealights in mine, which produce very little heat and burn out in an evening.
Light it up and enjoy the glow….look what you made!!!
http://www.naturenutnotes.com/2011/01/crochet-votive-tutorial.html
source: lh5.ggpht.com
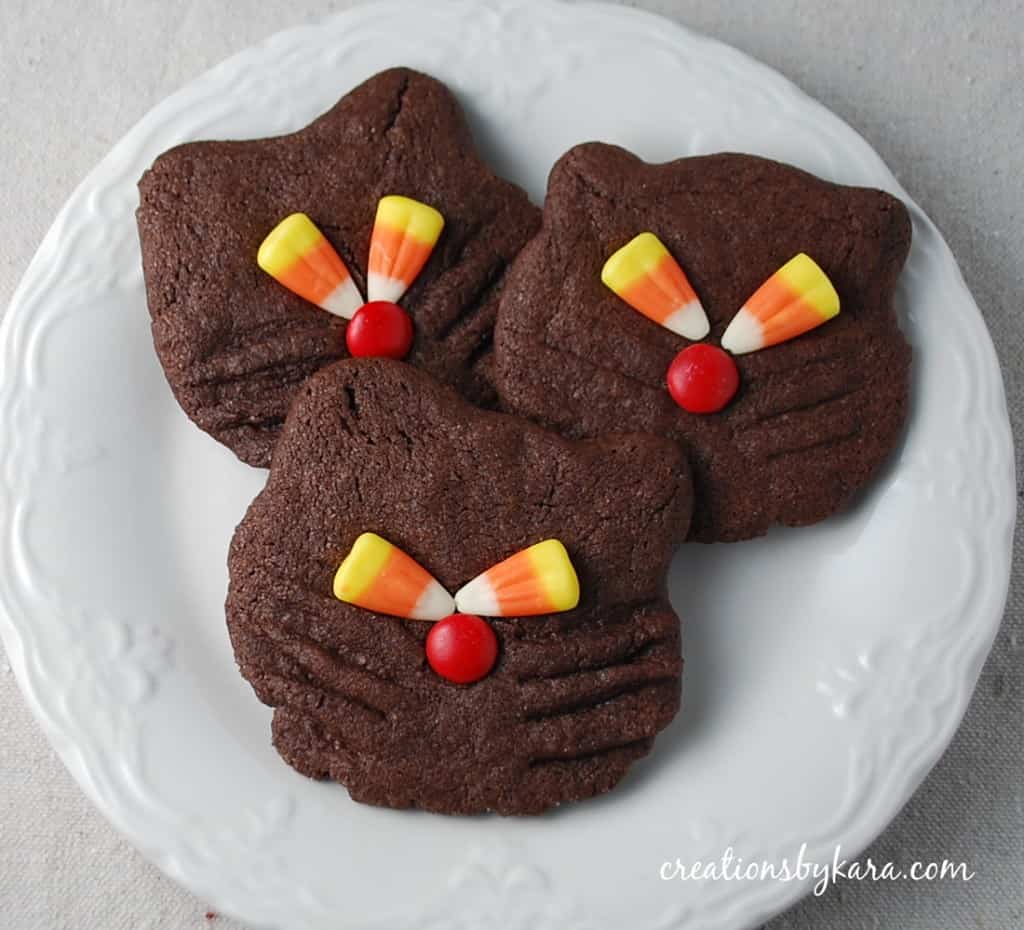
Food gifts: Halloween Recipe-Black Cat Cookies
Food gifts: Halloween Recipe-Black Cat
ChristmasTree origami and scrapbooking
Origami Tree Tutorial Above is a few examples of this fabulous little tree! Now let me show you how to make it, once yo

More Ways to Preserve Autumn Leaves
Preserving autumn leaves allows you to use their beautiful colors in crafts all year long. Even if you already have a g

Christmas craft ideas: Christmas Ornament, video tutorial
Christmas craft ideas: Christmas Ornament, video tutorial Quilted Christmas Ornament Quilted Christmas Ornament Photo: h

Crafty hair accessories: Glitter Bow Headband Tutorial
I've been going into the hair accessory section of the store lately looking for something new and fun and I fell in lov