You may find this blog that explain how to create new separate project in asp.net mvc online. In this guide, asp.net development company professionals will make you understand about creating new AREAS as separate project in asp.net MVC. You can read this article completely and learn the process by following the discussed steps.
In Asp.Net MVC UI and Business layer will be separated by creating the physical folders Model, Controllers and Views.
In Most of the Business process, Application will have huge number of Controllers and Views based on the requirements. In this case it is very difficult to manage the files. There is a Feature called AREAS. In which we can separate the large applications into smaller functional Units.
We can create same structure like Model, View and Controller in AREA itself.
In this post I am going to explain how we can create the AREA in Asp.Net MVC application and how we can split the application into smaller functional groups.
For example, a web site can contain two modules as Blogs and Forum apart from the main site. Here, the blog and Forum can be created as two separate Areas within the same application. Thus enabling separation and grouping of functionalities within the Area.
The complexity doesn’t stop here. At times we would require such separation in assembly level by having separate DLL for each Area, so that any changes can be done separately and deployed without the need for full site publish. Or we might want to add a new module to existing MVC site which was deployed a year ago and we do not want to disturb the existing build.
In such cases we could create a separate project for an Area and deploy it. Thus using the existing authentication, authorization and resources of the main site.
Steps for creating a separate project for an AREA in ASP.Net MVC
- Right click on the project solution and add a new web application.
- Select “Empty” template for the new project and select “MVC” for core reference
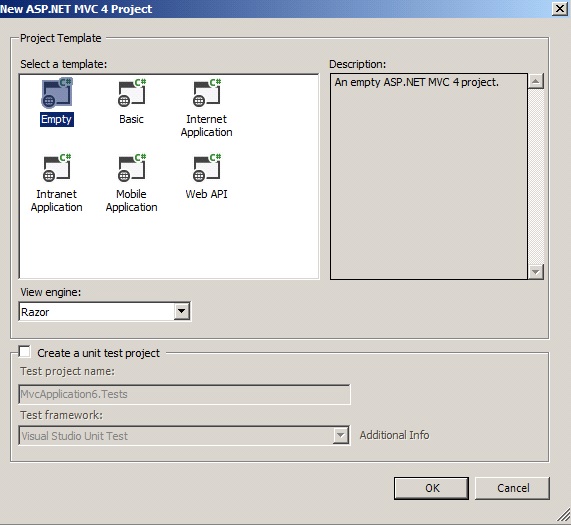
- Click OK to add the project into the solution
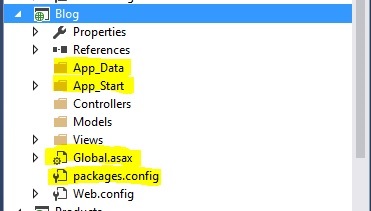
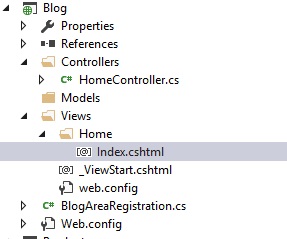
- Remove the folders and files which are marked in yellow from the project.
- Comment / remove all the elements inside the “Configuration” element in web.config
- Add a new class file to the project and name it as “BlogAreaRegistration”
- Rename the namespace of the file to Main site namespace.
- Inherit the “AreaRegistration” base class from “System.Web.MVC” and implement the methods.

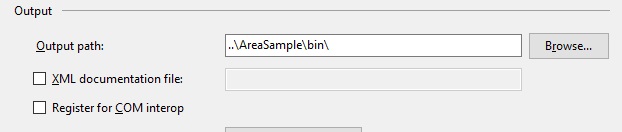
- Right click and Edit the project properties, and navigate to “Build” Tab. Below two steps are optional and can be done manually.
- In the “Output” section, map the output path to the main site bin folder. This will place the DLL in the bin folder.
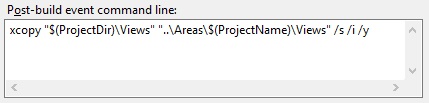
- Navigate to “Build Events” Tab, and paste the following script in “Post-build event command line”. This would copy the required “Views” and place it under Main site Area folder.
- Add a new controller into Controller Folder and name it as “Home”.
- Add a “View” to the default Index action.
- All set, now rebuild the project. On completion, you will be able to find the “Blog.dll” in the main project bin folder, and “Views” inside the main project Area folder.
- Run the main application and type in “blog” to navigate to blog module
 Yes, we have created a separate Area for “Blog” and plugged it in to the main site. You could also notice that Master Page / Layout page and other resources of the main website are been reused without duplicating, thus maintaining the look and feel of the site.
The article is intended by asp.net development company experts in order to guide you and make you understand about the development process. In this guide, they have shared important steps to make you learn how to create a separate project for an AREA in asp.net mvc.
Conclusion
In this article I have explained how we can split the huge Asp.Net application using AREA. Hope this will help full for your business need. Thanks for reading this article.