

This popular article was fully updated in 2017. Changes include information on public keys, troubleshooting tips, and updates for Windows 10 and other relevant software.
Vagrant has quickly become the ubiquitous go-to tool for local development across Mac, Windows, and Linux operating systems.
Vagrant helps you create virtual machines on-the-fly via a set of reusable configuration files. Developers can share their configurations and scripts via GitHub and elsewhere, so that other devs can spin up an identical environment and tooling.
It’s a great tool if you want to spring up servers for testing programs, learn how to use Linux tools, or work in a test environment before applying changes on a production system. Do you want to learn to install the PHP/Apache/MySQL stack from scratch on Ubuntu? Or play with setting up a cache server like Varnish in front of Apache? Try your hand at Nginx? Learn PHP 7? Vagrant makes things quite a bit simpler than using VirtualBox alone.

Let’s take a look at how to get Vagrant set up in a Windows environment.
Installing the Megabits and Pieces
To get started, go ahead and install these core tools:
- VirtualBox (the software that creates virtual machines)
- Vagrant (our hero, the software that deploys virtual machines and runs provisioning scripts)
- PuTTY and PuTTYGen (SSH client and a generator for security keys)
VirtualBox and Vagrant install like any other Windows program. Vagrant will install itself to your global path so you can run it from anywhere.
Create Your Projects
Now that you have it all set up, you can start your first Vagrant project by creating a project folder which will house the various configurations for each of your VMs. You’ll use the command line to run Vagrant commands from within these folders.
Create a project folder, I used E:\Vagrant\sitepoint.
Tip: As a Windows user, you can quickly open a command prompt from Explorer by holding down shift and right-clicking the folder or white-space within the folder, then choosing “Open Command Window Here”.
Using Vagrant
The primary commands to get started are vagrant init and vagrant up.
Open a command line and change directories to your test project folder. Run vagrant init and a new vagrant file will be created in the current directory called “Vagrantfile” (no extension) which holds a basic starter configuration.
Open Vagrantfile in a text editor like Notepad++ or Sublime and take a look, study the comments before each configuration value. You can set shared folders between guest and host, turn on port forwarding, set the hostname, and more. Notice that all but maybe one line is commented out: Vagrant has a default configuration it will use even without any settings changed in here.
This Vagrantfile doesn’t point to any sort of virtual machine yet, so go ahead and delete the Vagrantfile you just created and let’s find a “base box” to use.
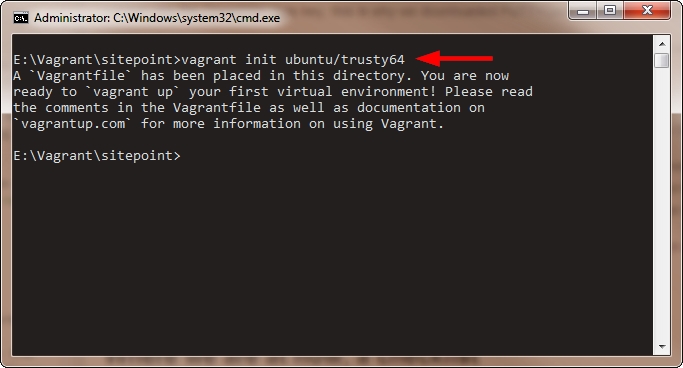
Browse the Vagrant Cloud for base boxes you might like to use. For this example, we’ll use “ubuntu/trusty64” which is the “official” base box for Ubuntu Server 14.04 LTS (Trusty Tahr). To have Vagrant automatically use this base box, type this:
vagrant init ubuntu/trusty64
This time, if you open Vagrantfile, you’ll notice it lists the base box in there for “config.vm.box”. Other settings are still commented out.
Now that you have a Vagrantfile with a base box configured, you can spin up the VM with this amazing command:
vagrant up

To explain what’s happening here, Vagrant first imports the base box if you don’t already have it (I already had it, otherwise it would download first). It then checks if your box is up to date.
Note: These base boxes live in your
%userprofile%/.vagrant.d/boxesfolder. You can list all installed boxes by typingvagrant box list. You can delete boxes withvagrant box remove box/name.
You can see it sets up the SSH forwarding port as “2222”: you’ll need this to use an SSH client like PuTTY.
Notice the username is “vagrant”, which it always will be. You’ll also notice that it generates a new set of keys, something Vagrant didn’t do in previous versions. The public key is automatically copied into the VM and replaces the default key in there. It also places the private key in a new folder called “.vagrant” in your project folder. If you drill down in that folder you’ll find “private_key”, which will be useful to use in PuTTY later.
Next notice it checks for guest additions and mounts the shared folder between host and guest. This can be changed as you wish, or additional shared folders can be added. The first folder “/vagrant” is on the VM; it will share to my local project folder. Files will be kept in sync between the folders as you work.
Now I Can Access my Server, Right?
Yes! Kind of!
You see, Vagrant has to be able to log in to the new server and perform additional provision, such as setting the configured IP, port forwarding, folder shares, VirtualBox Guest Additions, etc. In order to do this, all base boxes are required to have the Vagrant public key already installed, along with a user named “vagrant”, with password-less sudo privileges.
Once the VM is created, Vagrant will provide some output which you can scan for errors. See the previous screenshot. Most base box installs won’t have problems, but advanced scripted provisions can sometimes run into trouble and will have hundreds of lines of text output during the provisioning process.
The problem we face now is that Windows doesn’t come with an SSH command line client. This means the built-in SSH functions of Vagrant won’t necessarily work for us Windows users. But that’s why we have PuTTY. Type this to get your SSH info whenever you need it:
vagrant ssh-config
It will tell you the IP and SSH port to use and a few other bits of info in case you forget.
Even though many base boxes are barebones OSs, they do require an SSH server to be installed as one of the requirements of being usable by Vagrant. Many base boxes will have nothing but OpenSSH installed.
Open PuTTY, enter the IP and port, give the connection a name, and save it. You can now connect to the new server over SSH with PuTTY. The username is “vagrant” and the password should be “vagrant” as well, but this can be individualized to the base box in special cases.

Vagrant will automatically choose another port if the default 2222 is taken. All your VMs will get a new port, so be sure to note which VM is which!
Side note: You can install a Windows SSH client, such as Cygwin or MinGW. Even Git comes with an SSH client. Type
vagrant sshand see what happens! Linux and Mac users should already have SSH clients. If you don’t have a client, Vagrant will show you some options.
Using Public and Private Keys
You can use the new private key Vagrant created, as the private key was stored on your local machine. However, PuTTY cannot use the OpenSSH style key. This is why we downloaded PuTTYGen, so open that now.
Click “Load” and browse to your project folder all the way to **\\.vagrant\machines\default\virtualbox**. Switch to see “all files”, select “private_key” and click Open.
You can immediately click the “Save private key” button, select “Yes” to save without a passphrase. Name it something similar like “private_key_putty” in the same folder. This will create a file with a .PPK extension. Close PuTTYGen and go back to PuTTY now.

In PuTTY, load your connection to the new server or type it in again if you didn’t save it. Then go to Connection->SSH->Auth in the sidebar and click “Browse” to find the private key. You will see the PPK version but not the other one, since PuTTY doesn’t use that type. Now be sure to save your configuration so you can keep using it later.

With that done, the next time you open this connection and type “vagrant” as the user, it will automatically authenticate with the key and you’ll be logged in without having to type the password.
You can take this a step further and have PuTTY auto-type the username as well. Go in your PuTTY config to Connection>Data and type “vagrant” into the “Auto-login username” field. Now when you open the saved connection, PuTTY will automatically type the username and log in with the private key for you!
Additional Notes
The Vagrantfile is where all configuration starts. This file is meant to be managed by a version control system and is how you would share your development setup with a team. If everybody uses the same vagrant file, they’ll get the same VM setup with the same boxes and provisions. Note that scripts can be called external to this file, meaning some complex vagrant projects could have many files and folders included.
You can use VirtualBox to see any VMs you’ve created, but you don’t actually have to open or use VirtualBox at all to use Vagrant. If you make certain changes to the VM from VirtualBox, there’s a chance Vagrant could lose the association to the VM.
Vagrant creates a shared folder between your project folder and a folder in your VM which is /vagrant by default. Often boxes are used as development machines, so a common folder to also share is your Apache or Nginx www or public_html folder.
NOTE: Vagrant forwards port 22 automatically so you can get in, but it doesn’t automatically forward a web port such as 80 in case you’re doing web dev work. You’ll have to open your Vagrantfile and uncomment the line which forwards port 80 to enable it. Just read the notes in the file for how. After editing, you’ll want to do a
vagrant reload.
You can turn the VM off by using vagrant halt, or suspend it with vagrant suspend. Then turn it on again any time with vagrant up. Type vagrant status to see the current state of the VM.
All commands can be found here.
TIP: Check out Vagrant Manager for a visual System Tray tool to manage your local VMs. Also available for Mac users.
Additional Security
Because anybody can create base boxes, the Vagrant rules state that they should create a user and password vagrant/vagrant. It also states that it doesn’t expect the root user to have any password — that is, it doesn’t use root or expect a password for it. It would be good practice, if you feel the need, to know what the default users and password are on the box you choose to install.
The rules also state that Vagrant needs password-less sudo on the vagrant user so that it can perform the setup, so you should be aware of this if you’re trying to increase security.
Vagrant sets SSH ports to bind to localhost, so it won’t accept connections from the “outside”. This can be changed if you wanted access to your VM from some other host somewhere else. You would need additional configuration to do this.
Potential Problems
Based on feedback, there have been some issues using Vagrant. To be brief, here are a few points to consider if you have issues:
- Make sure Vagrant can communicate with secure websites over https. The only thing that might get in the way here are firewalls or limited user accounts.
- Your PC’s BIOS may have settings for enabling virtualization that must be on. You’ll have to find your motherboard manual to see where these settings would be. Most modern computers for many years now will have defaults set up to enable virtualization.
- I personally had an issue recently where the latest version of VirtualBox didn’t work with the latest Vagrant. I had to install the prior version of VirtualBox. You could try a previous version in a pinch if nothing else is working.
- If Vagrant has trouble communicating with Atlas for base boxes, you may need the Microsoft Visual C++ 2010 Redistributable Package. This issue is older and may have been fixed now but you can read about it on GitHub here.
- Advanced Linux file system attributes may not work well, such as symlinks and certain permissions. There was a problem with shared folders and long file paths (such as what NPM creates), but this was fixed in later versions of Vagrant. Read about it here.
Next Steps?
Now that you’ve learned how Vagrant works, you’ll want to go further. You can find additional boxes apart from Vagrant Cloud, such as vagrantbox.es. Using a box from another source is as simple as typing vagrant init box/name url where the ‘box/name’ and ‘URL’ will be provided for you.
George Fekete covered how to create your own base box.
You can even use DigitalOcean as a provider and deploy droplets using Vagrant.
Automation tools like PuPHPeT and Protobox help you create the provisioning scripts for deploying more full-featured development VMs.
You may have heard of the popular Vagrant box Laravel Homestead which can be used to deploy a development server for Laravel projects. SitePoint’s Bruno Skvorc has built off of Homestead to create what he calls Homestead Improved with some alternate configuration for web development. This box is often used in tutorials on SitePoint.
Read Bruno’s Re-introducing Vagrant article for deeper information regarding web development tooling and the LAMP stack using Vagrant.
There’s a box called VVV which not only creates a development box for WordPress devs, but actually sets it up so you can host multiple WordPress sites on one VM. Homestead does the same thing, so that you aren’t using one entire VM for each project you work on. Aleksander Koko wrote about VVV as well.
The sky’s the limit, so jump in and look around for cool boxes, provisioning scripts, or create your own!
I hope that helps get you started! Let us know in the comments if you finally took the plunge, and if it’s working for you.
Frequently Asked Questions (FAQs) about Getting Started with Vagrant on Windows
What are the prerequisites for installing Vagrant on Windows?
Before installing Vagrant on Windows, you need to have VirtualBox or any other provider installed on your system. Vagrant is a tool for building and managing virtual machine environments, and it requires a provider like VirtualBox to create these environments. You also need to have enough storage space on your system to accommodate the virtual machines that Vagrant will create.
How do I install Vagrant on Windows?
To install Vagrant on Windows, first, download the appropriate installer from the Vagrant downloads page. Once the download is complete, double-click the installer to start the installation process. Follow the prompts in the installation wizard, accepting the default settings unless you have a specific reason to change them. Once the installation is complete, you can verify it by opening a command prompt and typing ‘vagrant –version’. If Vagrant is installed correctly, this command will display the version of Vagrant that you installed.
How do I create a new Vagrant project?
To create a new Vagrant project, first, create a new directory for your project. Then, navigate to this directory in a command prompt and run the command ‘vagrant init’. This command will create a new Vagrantfile in your project directory, which you can then customize to specify the settings for your virtual machine.
How do I start a Vagrant virtual machine?
To start a Vagrant virtual machine, navigate to your project directory in a command prompt and run the command ‘vagrant up’. This command will start the virtual machine specified in your Vagrantfile. If this is the first time you’re starting this virtual machine, Vagrant will first download the necessary box file, which can take some time depending on your internet connection.
How do I connect to a Vagrant virtual machine?
To connect to a Vagrant virtual machine, use the command ‘vagrant ssh’. This command will start a SSH session with your virtual machine, allowing you to run commands on the virtual machine as if you were sitting in front of it.
How do I stop a Vagrant virtual machine?
To stop a Vagrant virtual machine, use the command ‘vagrant halt’. This command will gracefully shut down the virtual machine, preserving its state for the next time you start it.
How do I delete a Vagrant virtual machine?
To delete a Vagrant virtual machine, use the command ‘vagrant destroy’. This command will completely remove the virtual machine and all its associated resources. Be careful when using this command, as it cannot be undone.
How do I update Vagrant?
To update Vagrant, you need to download and install the latest version of Vagrant from the Vagrant downloads page. This will overwrite your existing installation with the latest version. Note that updating Vagrant will not affect your existing Vagrant projects or virtual machines.
How do I troubleshoot Vagrant errors?
If you encounter errors while using Vagrant, the first step is to check the output of the command that caused the error. Vagrant will often provide error messages that can help you diagnose the problem. If the error message is not clear, you can try running the command with the ‘–debug’ flag to get more detailed output. You can also check the Vagrant documentation or online forums for solutions to common problems.
How do I use Vagrant with other providers?
While Vagrant works best with VirtualBox, it can also be used with other providers like VMware or AWS. To use Vagrant with these providers, you need to install the appropriate provider plugin for Vagrant. Once the plugin is installed, you can specify the provider in your Vagrantfile using the ‘config.vm.provider’ setting.
 Zack Wallace
Zack Wallace is a hobbyist programmer and private web developer in Northern Arizona and has been in the IT field for over 12 years.