Interactive Triangle Centers
Setting Up the Workspace
1. Open the GeoGebra program by double-clicking on the GeoGebra icon.
2. Resize the GeoGebra window so the program fills the entire screen.
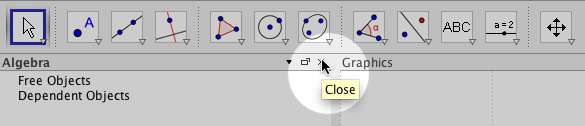
3. If the Algebra window is open, close it.
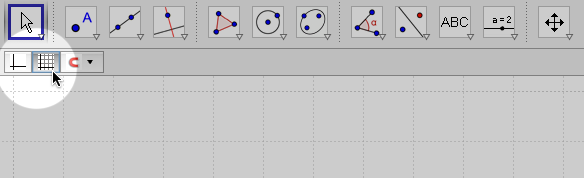
4. Turn off the axes and turn on the grid. Use the toggle buttons as shown below.
5. Right-click anywhere on the white grid and select “Standard View.”

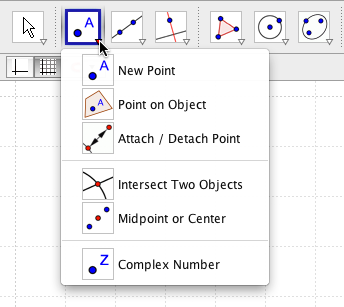
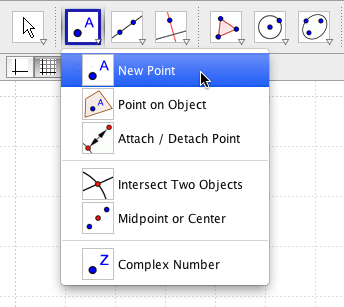
6. Locate the Toolbar. To see all the tools, click on one of the tiny arrows and a list of more tools will drop down. Try selecting the “New Point” tool.
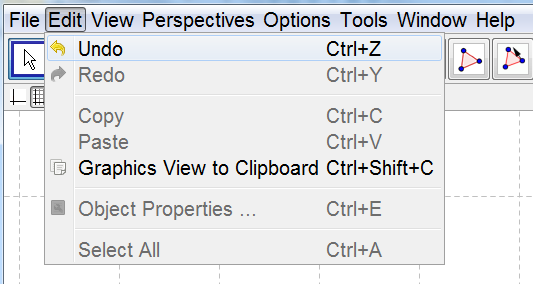
7. Click on Edit in the Menubar to locate the Undo and Redo buttons.
If you ever make a mistake, you can either click Edit > Undo, OR you can use the keyboard shortcut and press Ctrl and Z at the same time.
NOTE: When you Undo an action, your tool selection might change back to the previous tool selected. Make sure the correct tool is re-selected before moving on.
Construct Triangle ABC
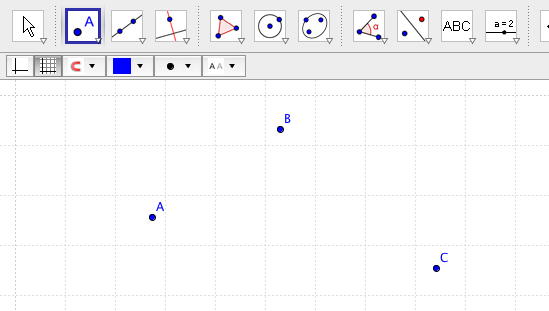
STEP 1: Create Three New Points. Using the New Point tool, click anywhere on the grid to plot three new points. The points will automatically be labeled A, B, and C.
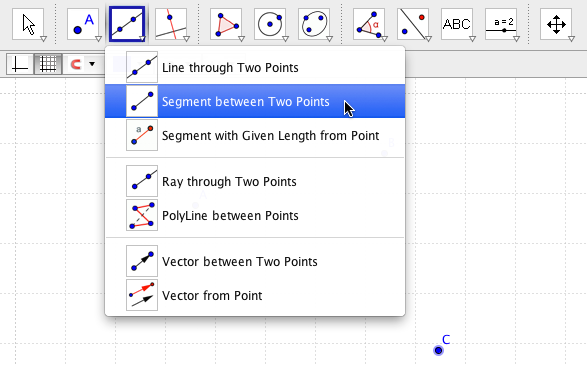
STEP 2: Connect the Points to Form a Triangle. Select the Line Segment tool from the dropdown menu. Click on point A and point B to connect them. Then click on points B and C. And lastly, points C and A.
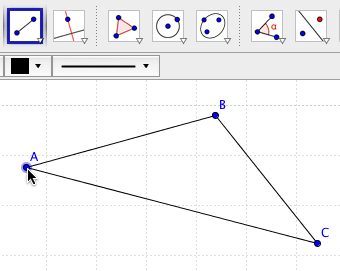
After drawing the three line segments, you should have triangle ABC.
Construct the Centroid
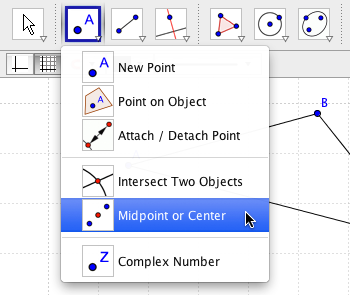
STEP 1: Find the Midpoints. Select the Midpoint tool, and click on point A and point B to construct the midpoint D. Then click on points B and C to construct midpoint E. Finally, click on points C and A to construct midpoint F.
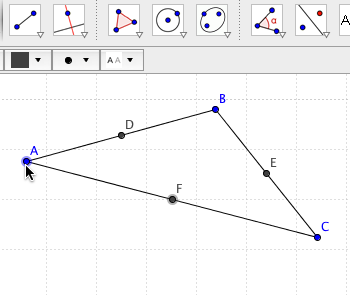
Your triangle should look like the picture on the right. Remember, if you make a mistake, just use the Undo button (or press Ctrl+Z on your keyboard).
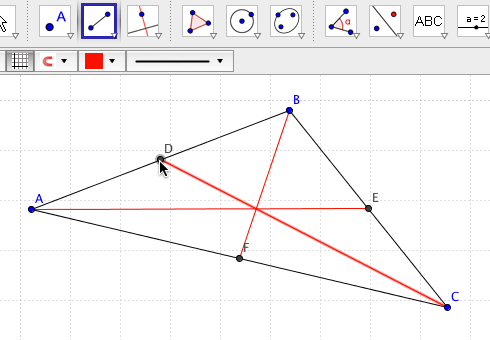
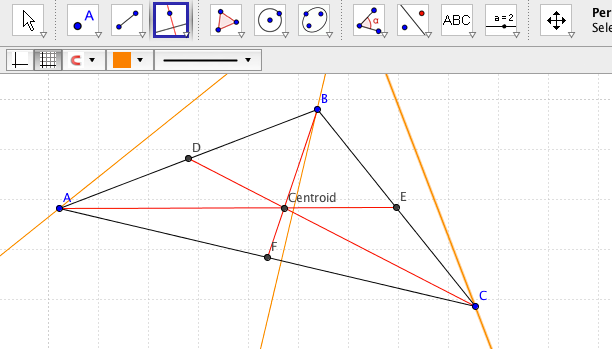
STEP 2: Construct the Medians. Select the Line Segment tool again, and this time, change the color to RED.
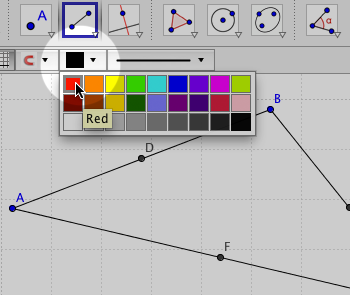
Now click on point A and then midpoint E to connect them and form a red median. Next, click on point B and midpoint F. Finally, click on point C and midpoint D. Your diagram should look like the graphic below.
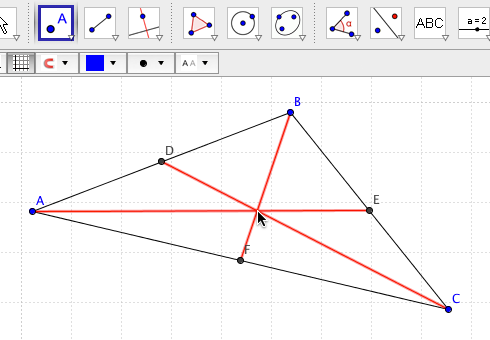
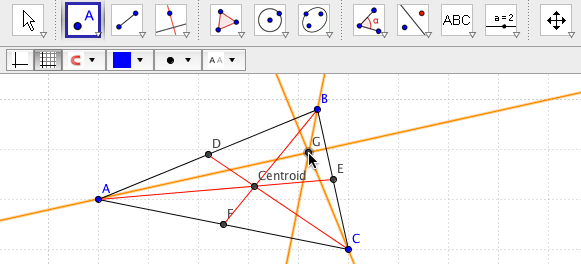
STEP 3: Construct the Point of Concurrence. Select the New Point tool and hover over the intersection of the medians. When all three medians become bold, click to create point G.
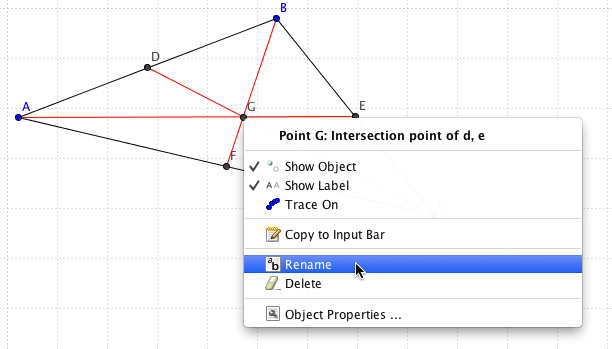
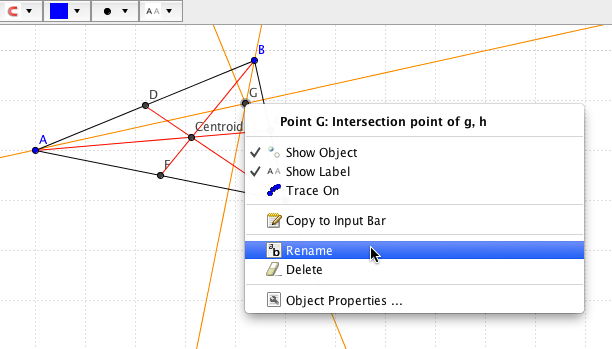
STEP 4: Label the Centroid. Right-click on point G and select the option to Rename. In the popup box, type in “Centroid” and then click OK.
Awesome! You just constructed and labeled the Centroid! Let’s keep going!
Construct the Orthocenter
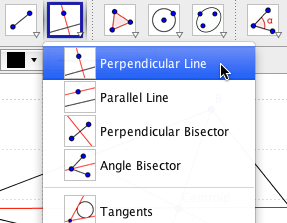
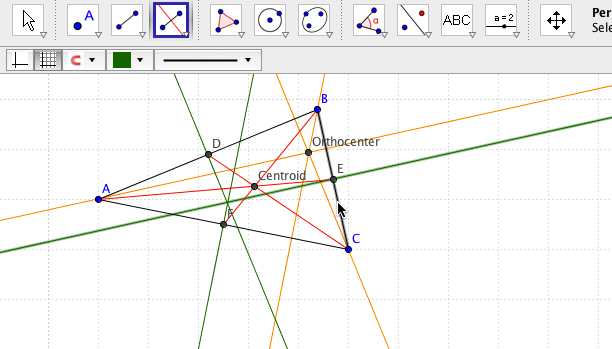
STEP 1: Construct the Altitudes. Select the Perpendicular Line tool and change the color to ORANGE. Click point A and segment BC. Next, point B and segment AC. Then C and AB.
STEP 2: Construct the Point of Concurrence. If your three orange altitudes are intersecting out of view, use the Move tool (it’s the one on the far left that looks like a mouse pointer) and drag the vertices of triangle ABC. When you can see the orange lines intersecting, select the New Point tool, make sure you are lined up over all three orange altitudes, and then click.
STEP 3: Label the Orthocenter. Right-click on the point you just created and select the option to Rename. In the popup box, type “Orthocenter” and click OK.
You just constructed and labeled the Orthocenter! Give your neighbor a high five!
Construct the Circumcenter
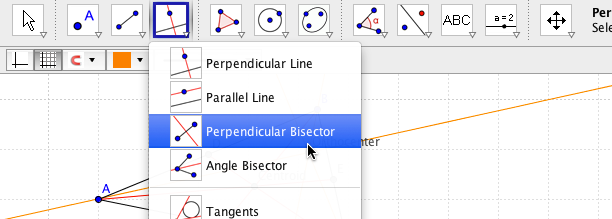
STEP 1: Construct the Perpendicular Bisectors. Select the Perpendicular Bisector Tool and change the color to GREEN.
Next, click on each side of the triangle. Click segment AB, segment BC, and segment CA.
STEP 2: Construct the Point of Concurrence. Select the New Point tool and create a point where the three green lines intersect.
STEP 3: Label the Circumcenter. Right-click on the point you just created and Rename it to Circumcenter.
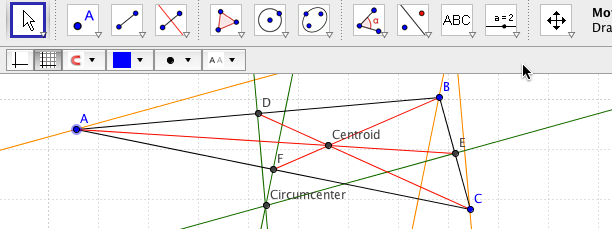
You just constructed and labeled the Circumcenter! Can I have your autograph?!
Construct the Incenter
STEP 1: Construct the Angle Bisectors. Select the Angle Bisector tool and change the color to BLUE.

Next, click on point A, point B, and then point C, in that order. Now click points B, C, and A, in that order. And finally, click points C, A, and B, in that order. You should have 3 blue lines.
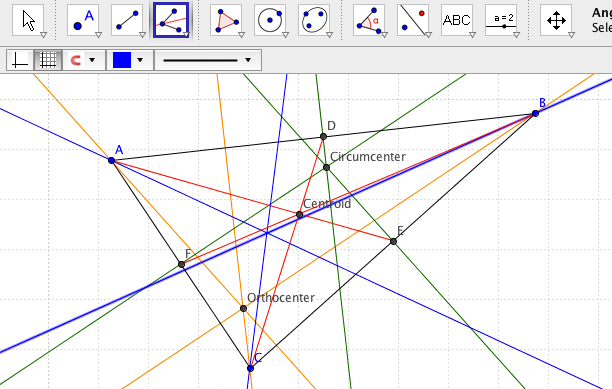
STEP 2: Construct the Point of Concurrence. Select the New Point tool and create a point where the three blue lines meet.
STEP 3: Label the Incenter. Right-click on the point you just created and Rename it to Incenter.
You are remarkable! Superb! You just did all four triangle centers! Congrats!
Save Your Work and Email It!
Click on File and Save As. Name your work “TriangleCentersLastName.” For example, I would save my work as “TriangleCentersEggleston”
Attach the file in an email, set the email subject to “Triangle Centers GeoGebra File,” and send to Victoria.Chaney@visd.net