Pressed Flowers and Apple Rings

Just recently we celebrated our parents 50th wedding anniversary and I made bookmarks for everyone in the family and everyone at the party.  On the front I had the dates, Happy 50th Anniversary and a picture of Mom & Dad.  On the reverse side I had all the kid’s names and listed out all the members in each of their familes … laminated the bookmarks and was thrilled at how they turned out.  I went a step further and used pressed flowers (real flowers I had flattened and dried in a phone book) and made these nifty bookmarks …
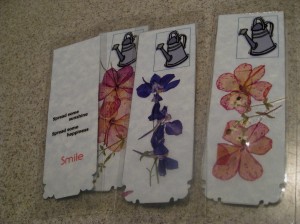
4 bookmarks

I typed up a saying for the back on these.  Any type of personalization can be added; names, dates, birthday wishes, etc.  Use them as favors at a party or wedding or send individually to your favorite people in a card.
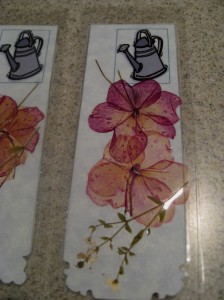
PF Bookmark Laminated pressed flower bookmark

I used a Fiskars paper punch on the corners to give the bookmarks a classy look.
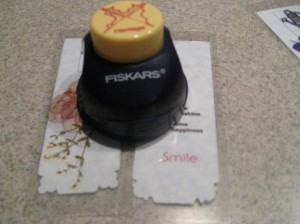
fiskar paper punch

In a previous post I mentioned an apple pie filling I made and since it still is apple harvest time, I did purchase lots more apples.  This time I decided to make Spiced Apple Rings and once again I used Ball’s Blue Book for the recipe.  My only dilemma was I used the wrong type of apples – they were somewhat mushy.  I need to study up on the correct apples to use for preserving and baking purposes.  The Jonathan I used for the apple pie filling was right on – the apples remained firm and the taste was excellent.  For the rings I used Cortland and although they have a great tart taste, the firmness wasn’t there (had I known, I would have used a different apple).  If anyone has a recommendation on which apples to use, I would greatly appreciate it.  I will show you the steps for the Apple Rings – first I cored all the apples with this apple corer (great product, worked very easily).
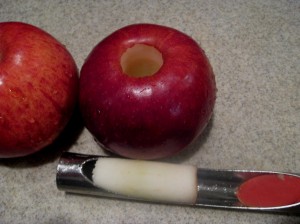
cored apple Cored apple which I then cut into thin slices ..
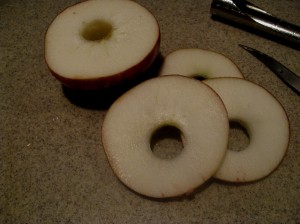
cut up cored apple

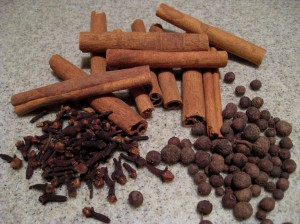
I placed all the cut up slices in a mixture of water and lemon juice so the apples wouldn’t turn dark as I was cutting the remainder.  I made up a bag of spices to use for the syrup – 4 cups water & 4 cups sugar and I added a few drops of red food coloring.
spices

Cinnamon sticks, cloves and allspice tied in cheesecloth and removed before canning the apple rings.
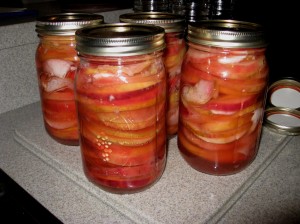
canned apple rings

They tasted Great – and these rings did hold up fairly well.  I have a bowlful that is more like chunky applesauce that I will refrigerate and add to oatmeal and/or ice cream in the next few days.  I will be on the lookout for the firmer apple …. the book did suggest using several different varieties at one time.

One last note – I have all my garlic planted …. yeahhhh and started another blog GarlicnHerbs to keep track of the progress and to share recipes and garden tips!
Crafts from the Garden

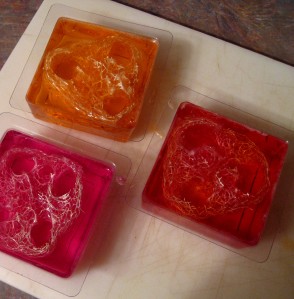
I have been busy crafting – luffa soap, a broom and mini gourd flowers in a vase!  All these items come from my growing efforts in the garden.  Luffa grows on a vine and can take over an area so next year I will be using the trellis idea and try to contain all the vines .. vines from the luffa, vines from the gourds and also my edibles such as watermelon and cucumber and whatever else happens to be planted in the gardens.  Luffa grows like a cucumber and the outer skin needs to dry out and turn brown before it can be peeled and the luffa inside revealed.  The seeds are then removed and the luffa can be used as is or cut into sections.  I used pieces and inserted them in soap molds along with melted glycerin soap, fragrance and color.

Luffa soap in molds Luffa soap in molds
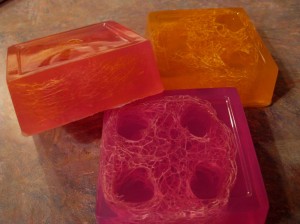
Luffa soap Finished soaps

The soaps make a great gift and are really effective on dry skin or used on gardening hands!  They are too rough for small children or those with sensitive skin – I use them strictly on my hands and feet.  Luffa on its own is quite soft once wet and can be used much like a sponge.  I love my Luffa!! 

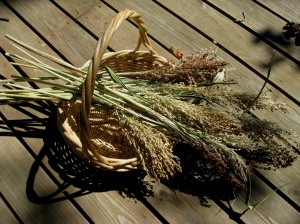
Next I experimented with the Broomcorn I grew and attempted to make a broom.  I did read that a nice sturdy broom will need about 60 stalks to complete, but since I only grew about 20 stalks my broom is a bit sparse.  I figure I will use it for cobwebs in the barn.

Broomcorn in basket Harvested broomcorn

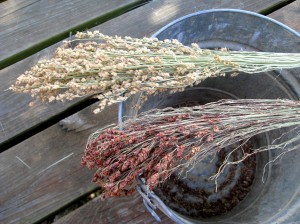
I let the broomcorn dry for a couple weeks and then deseeded the upper portion of the stalks where the seeds grew.

Deseeding broomcorn

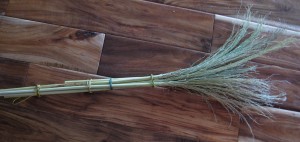
Finished broom Finished broom
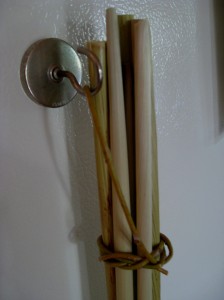
There’s a shorter stalk in there as you can see but it was secured quite well along with the others.  I actually used willow branches to tie the stalks together.  At first I used twine but it wasn’t as natural looking as the willow branches (the green tie is the twine).  Willow branches need to be worked with while they are still fresh so you can bend them easily.  I added a loop for hanging …

Hook on broom

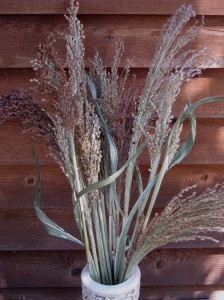
Broomcorn is also very attractive in dried flower arrangements and wreaths – I will be growing much more next year!

Broomcorn in vase Broomcorn in vase
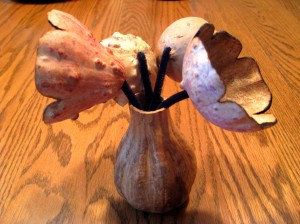
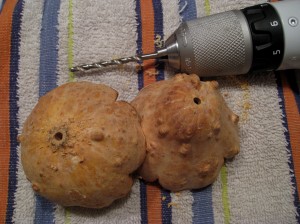
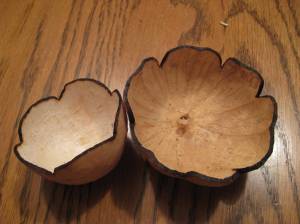
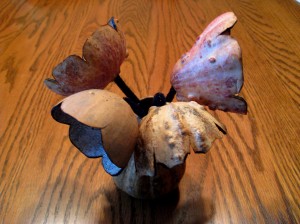
Lastly, I had some more fun with my mini gourds.  I cut them in half and shaped some petals for flowers.  After drilling a hole and cleaning the inside, I added some color and also woodburned the tips of the petals.

Drilled gourd flowers

IMG_7561

I used pipe cleaners for the stem and another mini gourd for the vase.  They came out pretty cool; don’t ya think?

Mini flowers in vase 2

Mini flowers in vase 3

Garden Ramblings

I am very hopeful I will have a great harvest of baby gourds since they seem to be growing right along despite the dry, clay soil down south.  I have resigned myself to the fact that many of the other plantings out in the field will not make it…am I disappointed?  sure, but that’s what experimenting is all about and how would I know if I didn’t try.  You are probably wondering what I am rambling on about – well, we purchased land down south and the climate, soil and whole weather scene down there is different from what I am used to (5 hrs. in distance makes a dramatic difference!)  So the beans, corn, grains and squash need a different location next year and I think in the meantime I will do some seroius work on that soil; plant buckwheat as a cover crop  for one.  Look at the cute little gourds that don’t mind the tough conditions …

Baby ornamental gourd  Baby ornamental gourd 3

I learned some major differences about the various gourds and even hand pollinated a few of the night flowering apple gourds – night blooming types have white flowers while the day blooming have the yellow flowers … it’s all very interesting! 

I have the tomatoes planted closer to the house and I used black plastic under the plants when I first put them in the ground.  I should have removed this after the plants were thriving since I didn’t realize it would fry the poor leaves.  The black plastic gets extremely hot and does a good job killing the grass and weeds underneath but unless it is covered on top, it will cook what is growing above as well.  Removed the plastic and collected some great tomatoes with hopes of more to come…

Ital heirloom    fox cherry Italian Heirloom (which are huge!) and Fox Cherry Tomato (which are a big for a cherry tomato).  Both taste very good and the Trophy tomato was also ready, but the best tomato, much to my surprise since it doesn’t look like much, is the Cherokee Purple ……. the flavor is outstanding!

Cherokee Purple Cherokee Purple

The Anise Hyssop is thriving (remember the cookies I made recently) and the Blackhart Barley is looking good – brought some in to dry and instead of hanging to dry I set them in a vase and will let them dry up that way (no water).  I can look at the pretty arrangement as they dry.

Anise hyssop and barley Anise hyssop and barley

Check out this guy …. Frankie, the hound dog – passed out after a long day running, swimming and making sure the big horse flies were put in their place!

Frankie passed out

Chive blossom vinegar and a Spectacular Gift!

All day long I was anxiously awaiting the arrival of my gift from UPS – an early birthday present and it arrived … finally at 5:30 pm.  The first package arrived at 11:30 am and I shuffled around all day “hoping” the second part would arrive soon!

sewing machine and software Of course the software arrived earlier and the main machine at the later time … all seems in perfect shape and I have already viewed the instructional CD that came with it and need a breather … this baby can do alot!  I am totally excited to start working with my new gift, but I am kinda tired from the day and I know if I start playing around and something goes wrong, I will get frustrated – so best to wait until morning when I am alert and fresh!

I planted some great seeds today – pickling cucumbers and this will be a first time endeavor – the pickling part.  My mom used to pickle cucumbers when I was young, but I have never attempted it yet.  My hubby mentioned this was something he always wanted to do … soooo pickled cucs on the way!  This past winter we discovered Delicata squash and they are SO good,  I planted them also along with Golden Wax Bean and Red Swan Bean.  The chives were blooming like crazy and I thought I would try drying some and see how they come out …

chives hanging Chive blossoms hanging upside down to dry and since I have quite a number in bloom, I am making Chive Blossom Vinegar ::: 

Here’s the method for making pink chive blossom vinegar:

  • 2 cups white vinegar
  • 2 cups washed, dried chive blossoms, packed into a clean sterilized jar.
  1. Bring vinegar just to boil, but do not boil.
  2. Use a funnel to pour vinegar over chive blossoms.
  3. Use a cork or plastic wrapped sealed with a rubber band to close the jar. Metal lids will react with the vinegar.
  4. Let stand in jar in a cool dark place for a week.
  5. Strain vinegar, discard blossoms.
  • Transfer to a decorative bottle and seal with a cork.

chive blossoms & vinegar

jar chive blossom vinegar Pink chivey vinegar … sounds cool!

Progress on Fireplace Decorating

Little by little I have been adding decoration to the fireplace and it sure looks alot nicer than it did a week ago!  First I will show a total picture of my additions and then I will zoom in on some details. 

Now the Welcome sign to the left there I had stenciled and painted the lettering previous, since then I woodburned around the letters and added a bunch of the dry flowers to the top.


I really like the woodburner tool and I will need to practice more with it so I can use it when I finally decorate my gourds.  I have the basic version and I may decide to upgrade if I find it works well on gourds and signs.  The effect is what I like about it.  Two more dried flower arrangements are next – all the flowers I grew this summer.


Notice the pinecones I have on the mantel also.  We had a very huge windstorm this past weekend and it shook tons of pinecones down off the trees!  I have ALOT and the major problem I find is the sticky tar on the pinecones.  I did a little research online trying to find what I can use to clean them so I can craft without the stickiness and all I came up with so far is – ways to remove the tar from dogs or pets using butter, oil or even peanut butter.  I need a better solution so Please if anyone has the answer, let me know.  I saw a really cool shackled roof using the pinecone pieces on a gourd birdhouse design that I want to try.  Here’s a closeup of the mantel and there is another design there – I took a branch from the yard and peeled the outer bark, then glued several bundles of dried flowers to it and laid it across the mantel along with some of those pinecones.

I am sure I will be tweaking the designs and as each holiday comes along add festive details.

Huge ideas to small results

I started out ready to make some huge flower arrangements to add to the fireplace (for my makeover plan), but my creative juices kept thinking “small”.  For some reason I had the urge to decorate my tiny birdhouses with the dried flowers, so I did. 


Maybe I felt overwhelmed with this huge task in front of me so I went in the opposite direction and decorated small.  Ok….enough analyzing why I did what I did …….ain’t these cool ?!?!   The white house has dried pressed leaves from the yard on the side and I used the glue gun to atttach statice flowers on the base.  The maroon house has tansy, globe amaranth and some birdseed stalk glued on.  I let the birdseed that fell from the feeder grow this year and have some spectacular dried seed stalks to design with.

Published in: on October 24, 2008 at 1:41 am  Leave a Comment  
Tags: , , , , ,

Dried flower bundles and My New Tools!!

A couple of months ago I purchased a Dremel tool and just recently received a free DVD I sent for from their website – 70 projects and 500+ tips.  I haven’t had a chance to check it out yet, but I am excited (especially since it was free).  If you have a Dremel or are thinking about getting one, send for the DVD!  Today though I got more tools … COOL Tools for my projects! 

 I have very few tools and not real knowledgeable about them, but since hubby endorsed them and they are Black & Decker, I am betting they are Great!  It was a neat deal too, buy the kit of saw, screwdriver, flashlight … with the battery and get a free tool, so I got the drill and an extra battery so when I am working feverishly on a project I won’t have to wait for recharge.

I did gather some dried flowers and made bundles with them … soooo easy!  All the flowers were grown in my gardens and they air dried well.  I am sure I will use at least one or two in my fireplace makeover.

 Dried flower bundles

I do have my miniature blue corn situated next to the fireplace hanging from a branch I found in the yard.  This blue corn is really neat and grew just like regular corn, but I did have a problem with the squirrels eating half the crop.

   Blue corn

One other thing I did do today was label these new paintbrushes and took a picture so I can identify them.  I am new to detail painting and each brush has a purpose.  All the brushes I purchased previous were generic and I decided I wanted “good” ones since I am tired of losing bristles in my painting projects and I will be learning the proper techniques.  So anyways, I have this picture now so I know what brush to use when the instructions say use the shader or whichever brush.  I know there are a whole bunch more I can get, but this is good for starters.

Fireplace decorating

It’s time to spruce up the fireplace and Fall is the perfect time to decorate!  I have plenty of dried flowers from the summer gardens and it’s time to use them to bring nature indoors since any day now frost will be upon us.  I definitely have some favorites that dried well and kept their color – statice, strawflower and globe amaranth work great!


                         Flowers drying

 I found myself using the fireplace as a book rack … several piles of books lined the brick bottom, so I relocated these and dusted off the mantel.  The decorating will take some time and I plan to post my progress as I move forward with it.

 The view of the fireplace is actually what you see as you enter the front door of our home and it should have a major impact to Wow all my visitors (like I have so many visitors, not really!)  One day soon the house will be ready to sell so we can move on down to our dream home permanently, so the first impression needs to be Awesome and from the looks of it …. it needs work!  The gardening work that I have faithfully blogged about all summer is ending soon and I will have more time to craft and this blog will encourage me.  I will have more time to spend on the website as well.